AWS EC2 create instance with docker and docker-compose (and touch of automation)
Often you need to test few things not only on development local machine but rather to do testing on AWS as well. In case that you didn't fell a sleep, in last years, specially once Docker enter the stage, target machines only need Docker runtime environment and to provide Docker images and you are ready to go. This post will explain steps you need in order to spin-up one EC2 instance: how to do it manually using AWS console and afterwards, as I'm very big fan of automating stuff, same thing with AWS CloudFormation script. So here we go ...
EC2 Instance with Docker Container Runtime Environment (CRE)
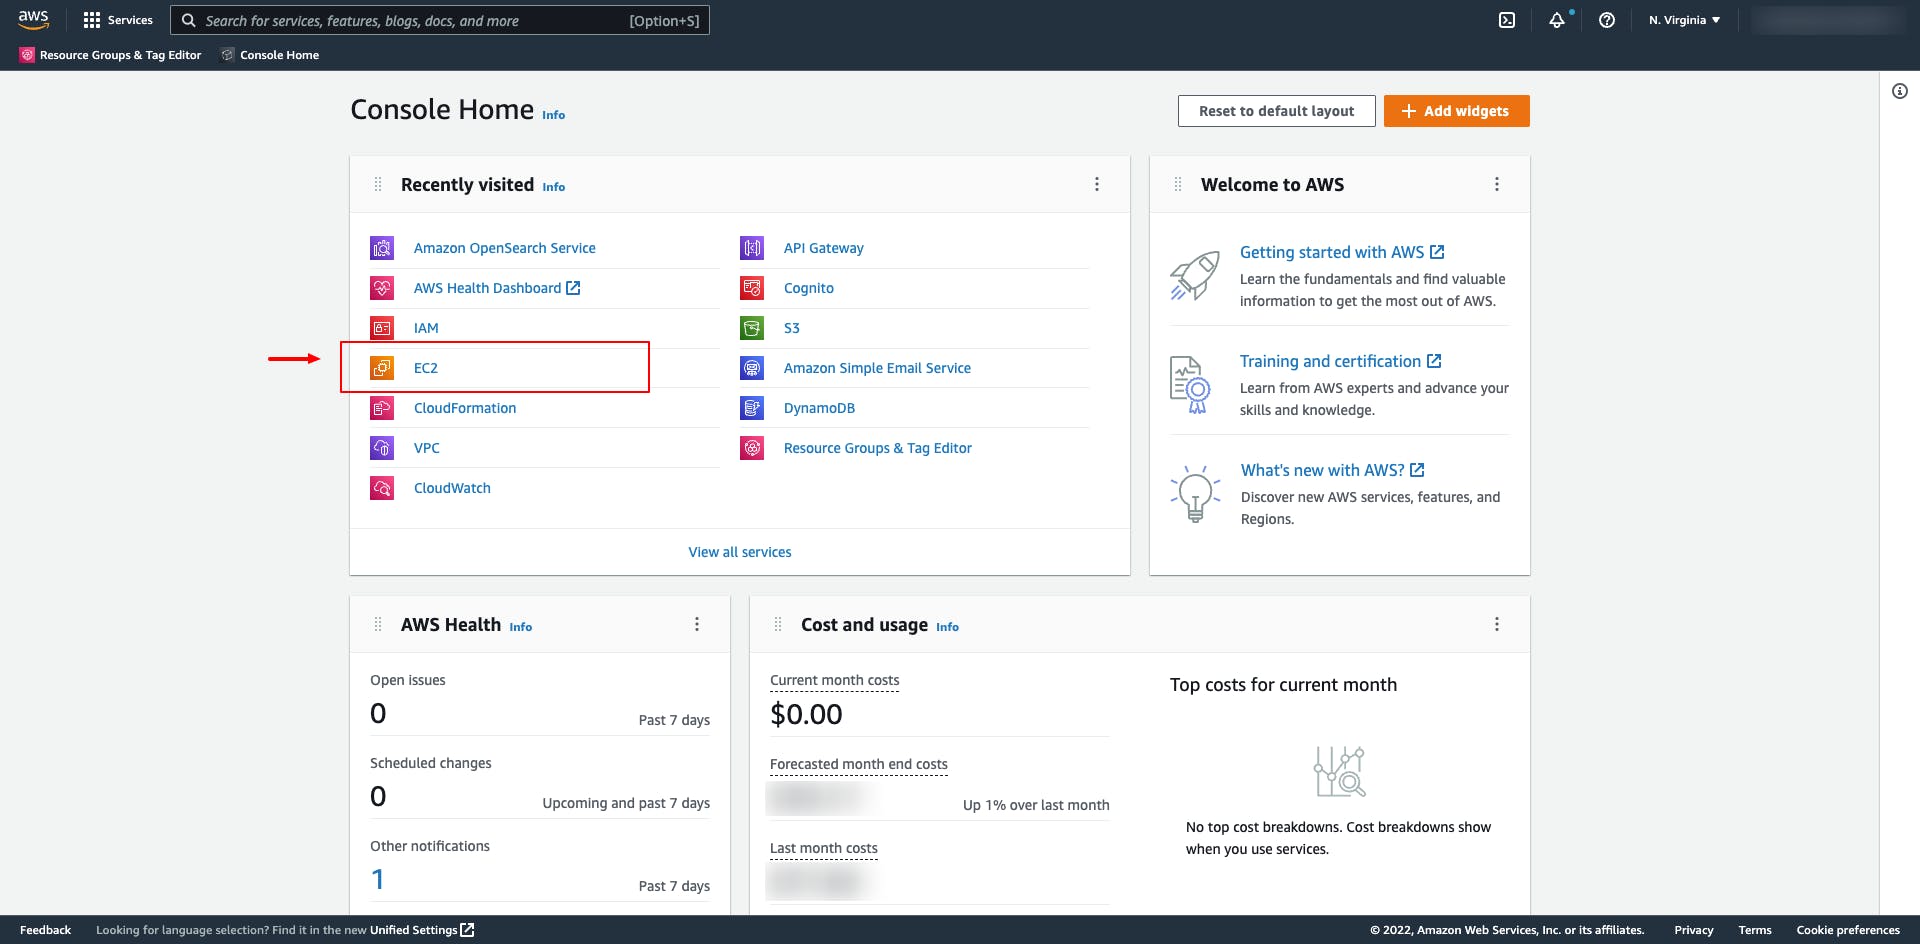
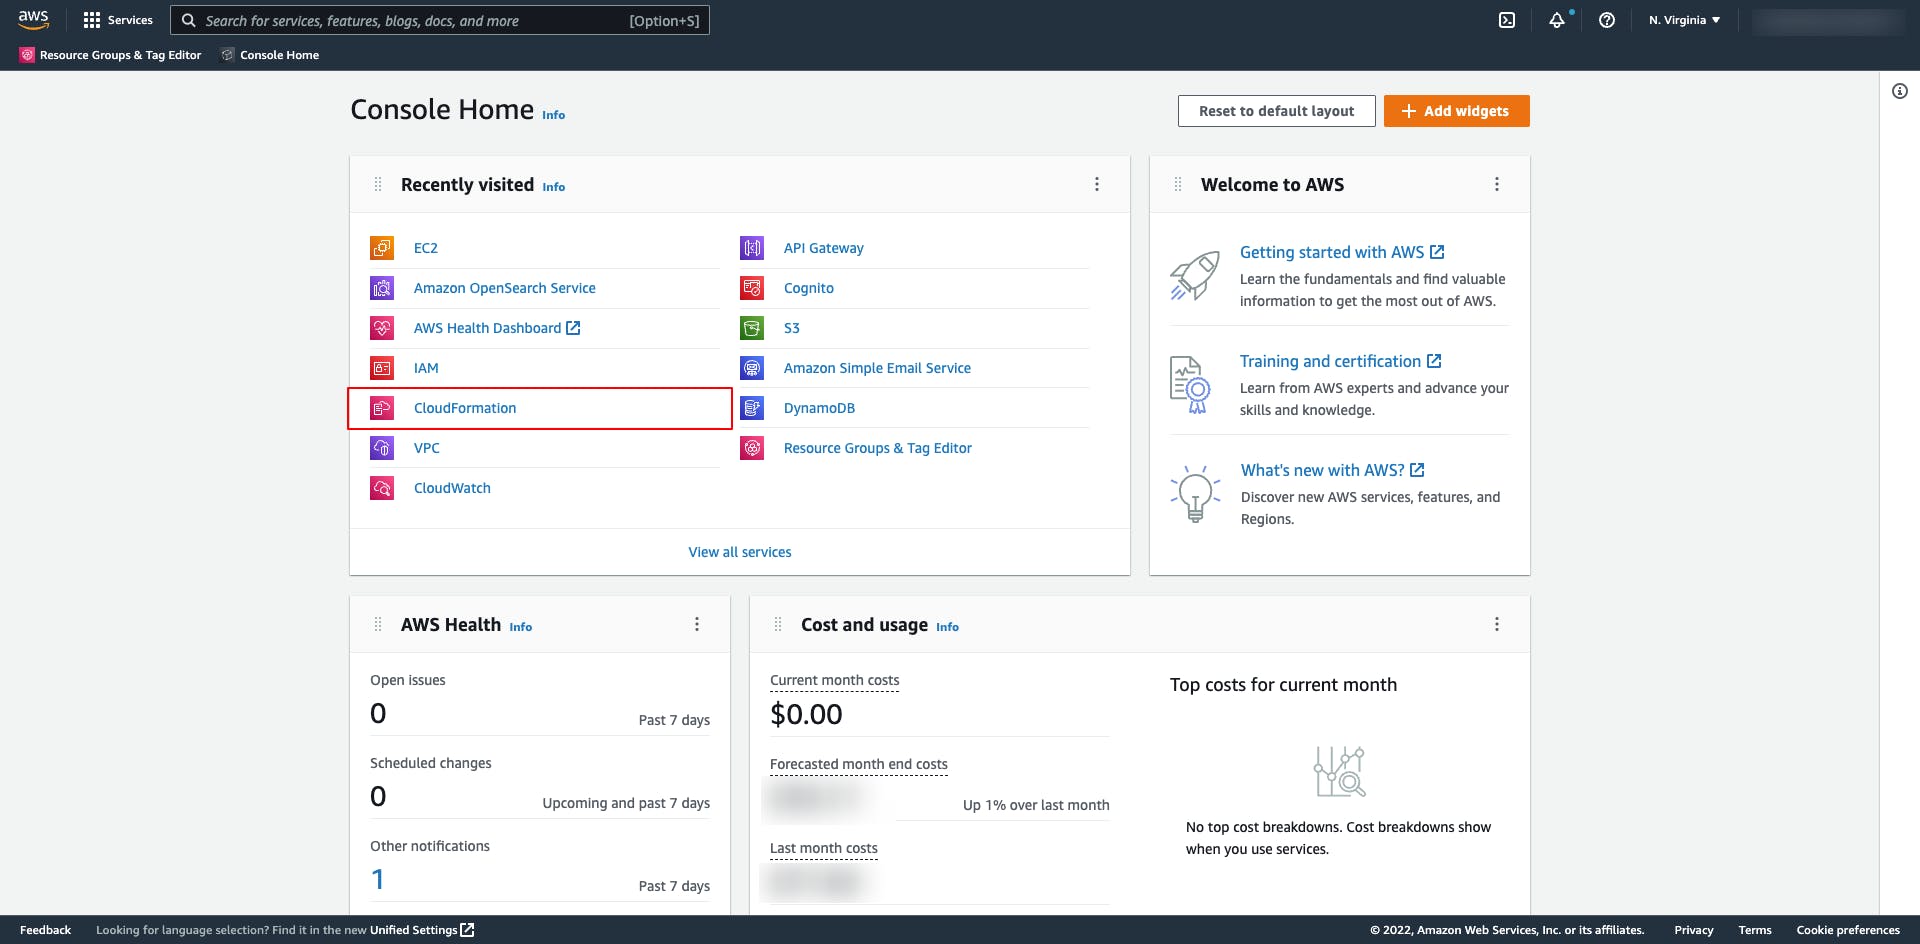
EC2 is one of Compute services of AWS. Therefore in order to access this AWS service, using AWS main console, click on EC2 (see the following image).
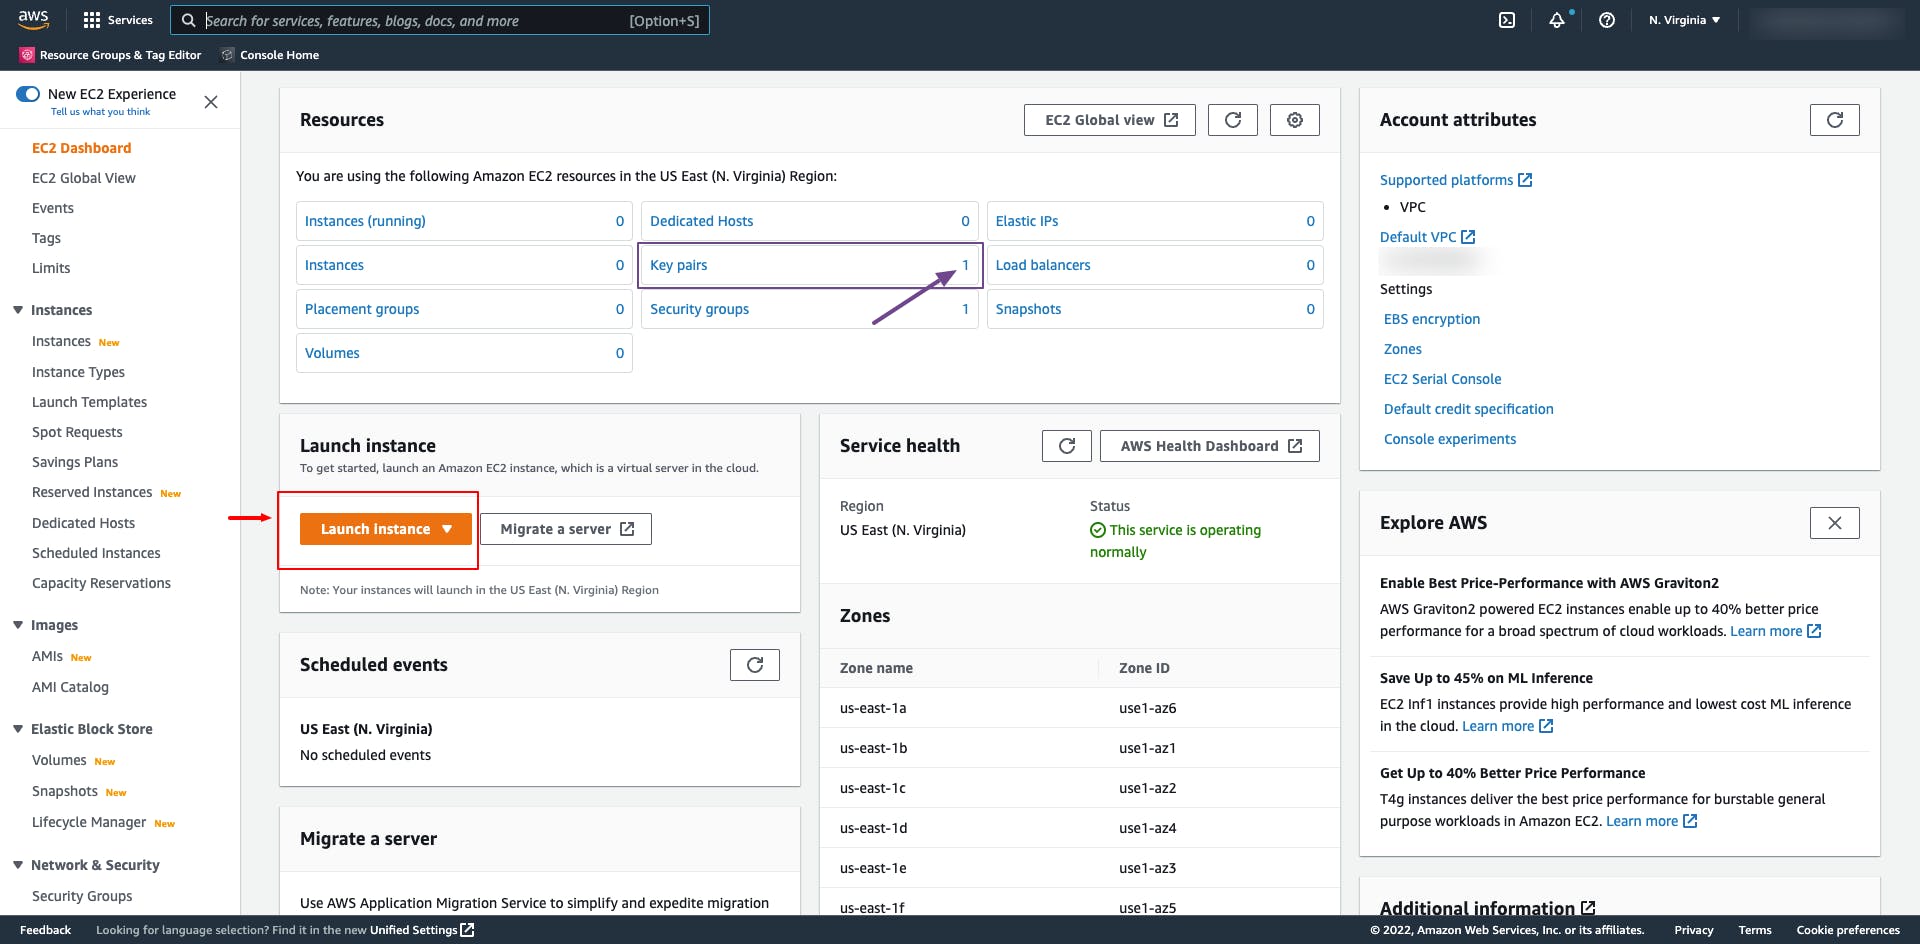
You'll end-up on EC2 management dashboard console from where EC2 instance can be launched. Please note that here, the key-pair has been already created (see purple annotation). This one you'll need later on in order to SSH connect to created EC2 instance.
Let's click on "Launch instance".
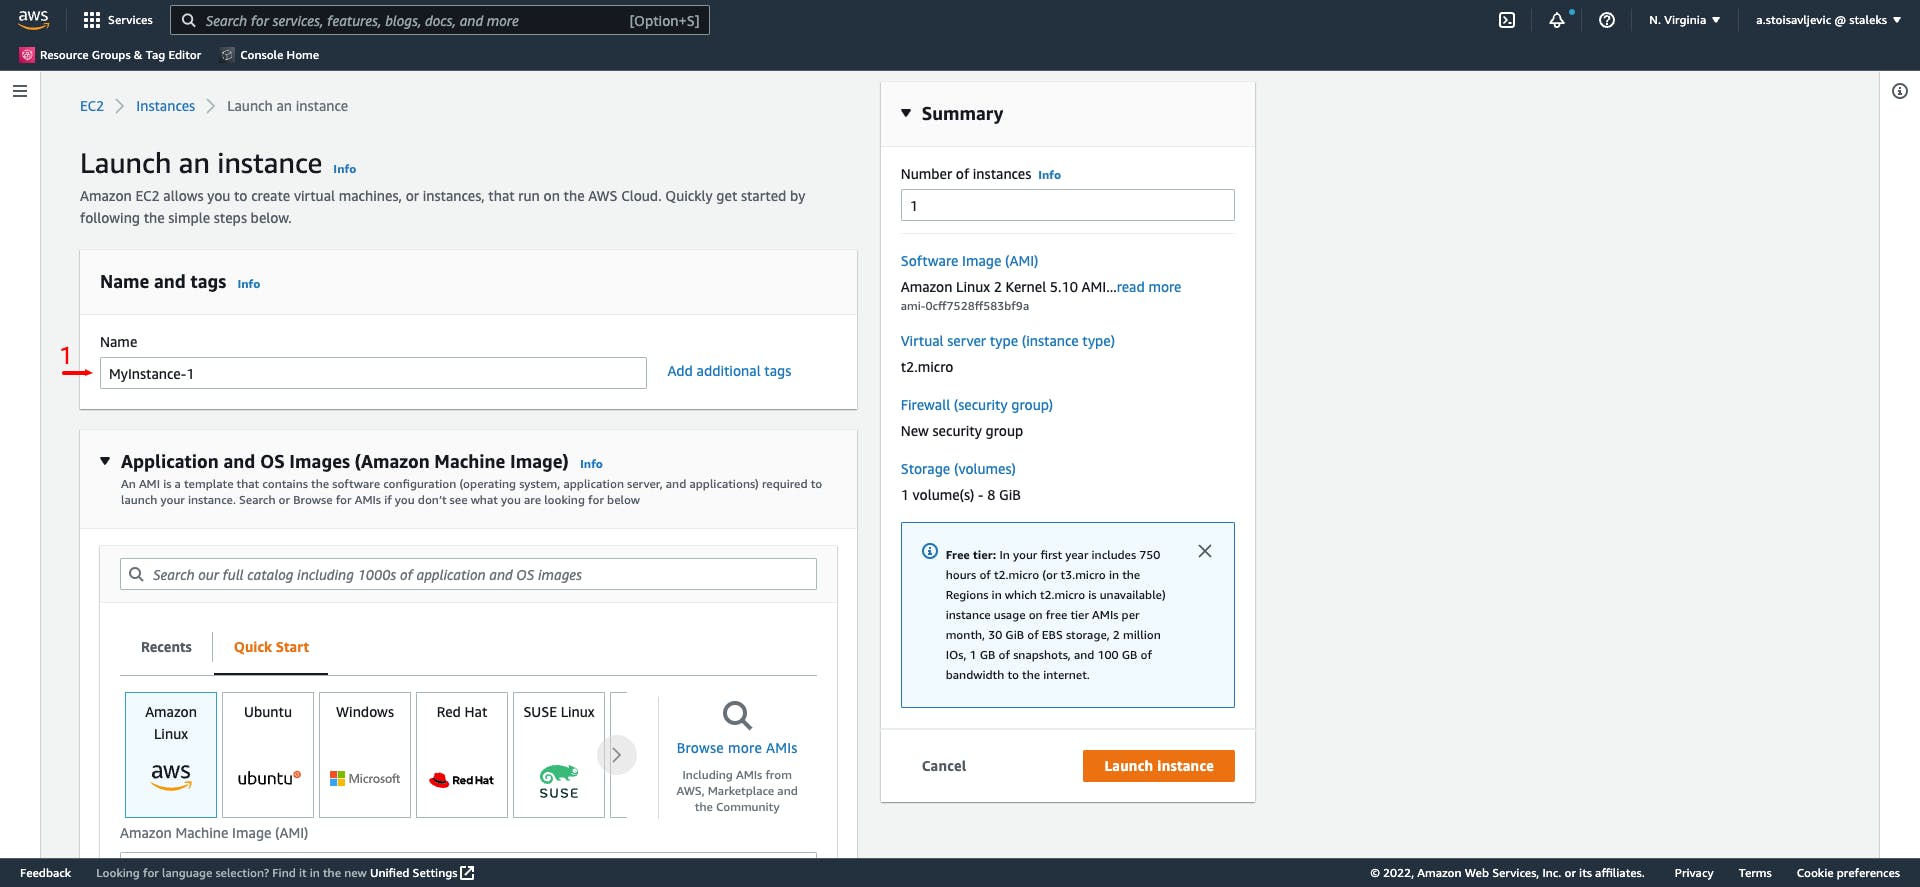
Previous click brings us on next form where you'll be defining some configuration about EC2 instance that you want to create like: Instance Type, Amazon Machine Image (AMI) Id, Network & Security settings, ...
Let's first start with naming our EC2 Instance. As I'm not particularly inspired I'll name this instance - "MyInstance-1". (fill-out input field "Name")
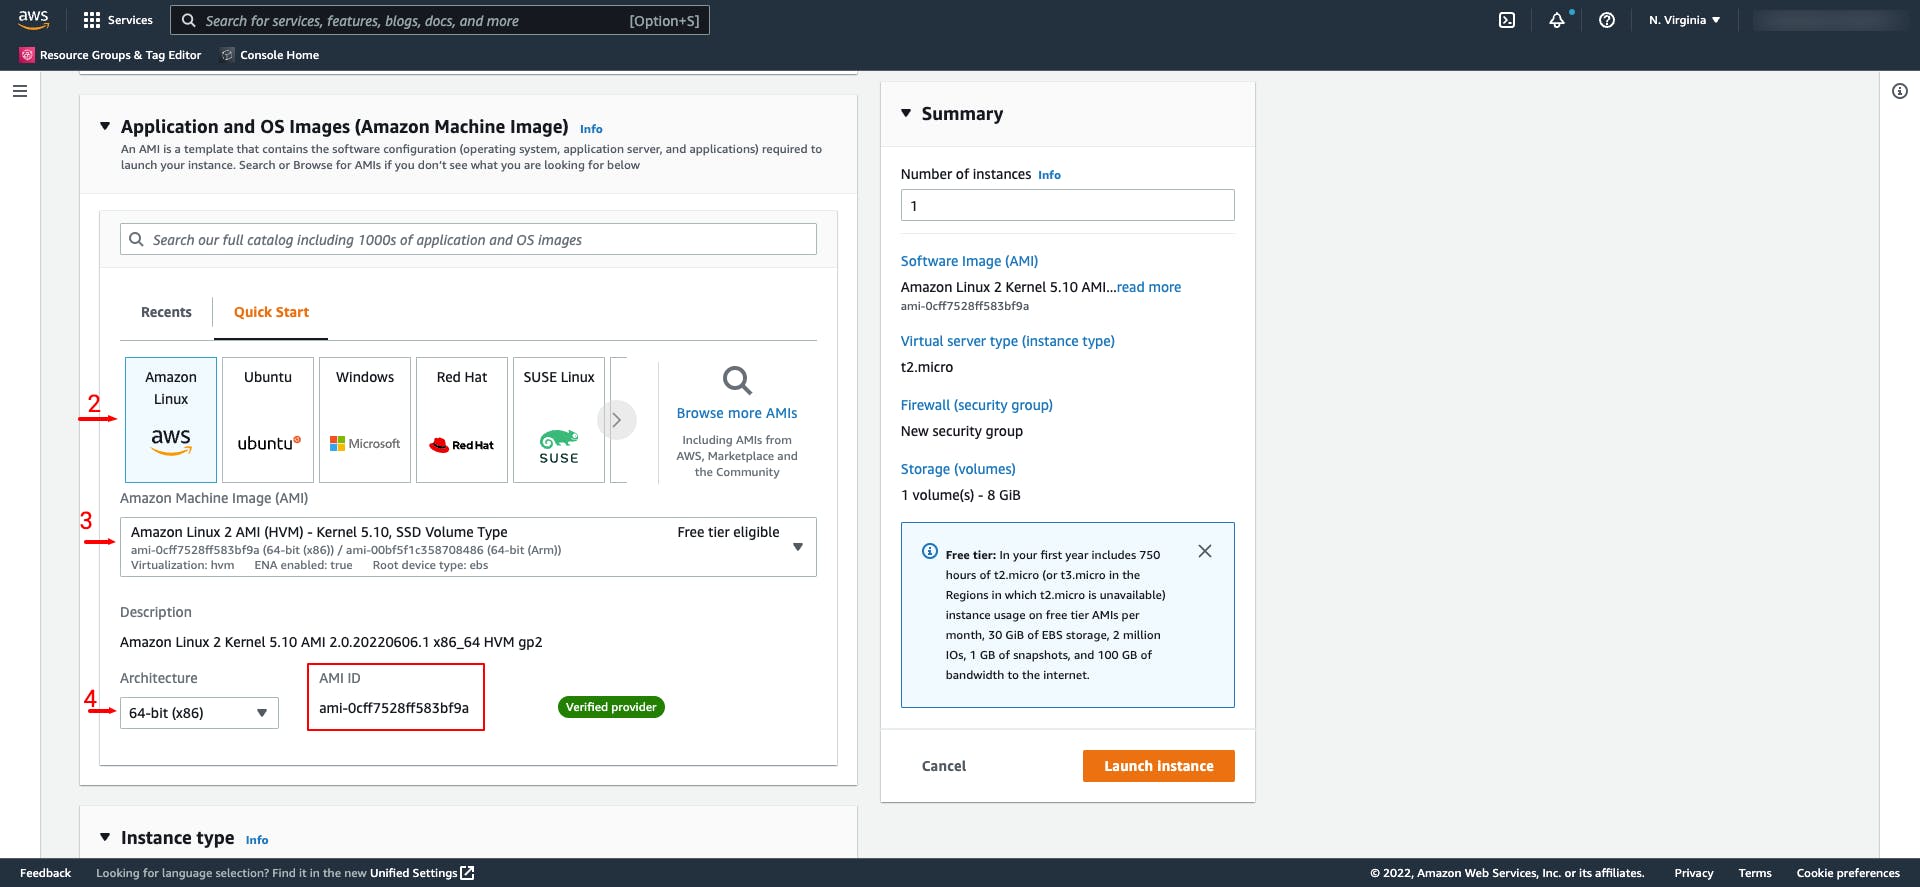
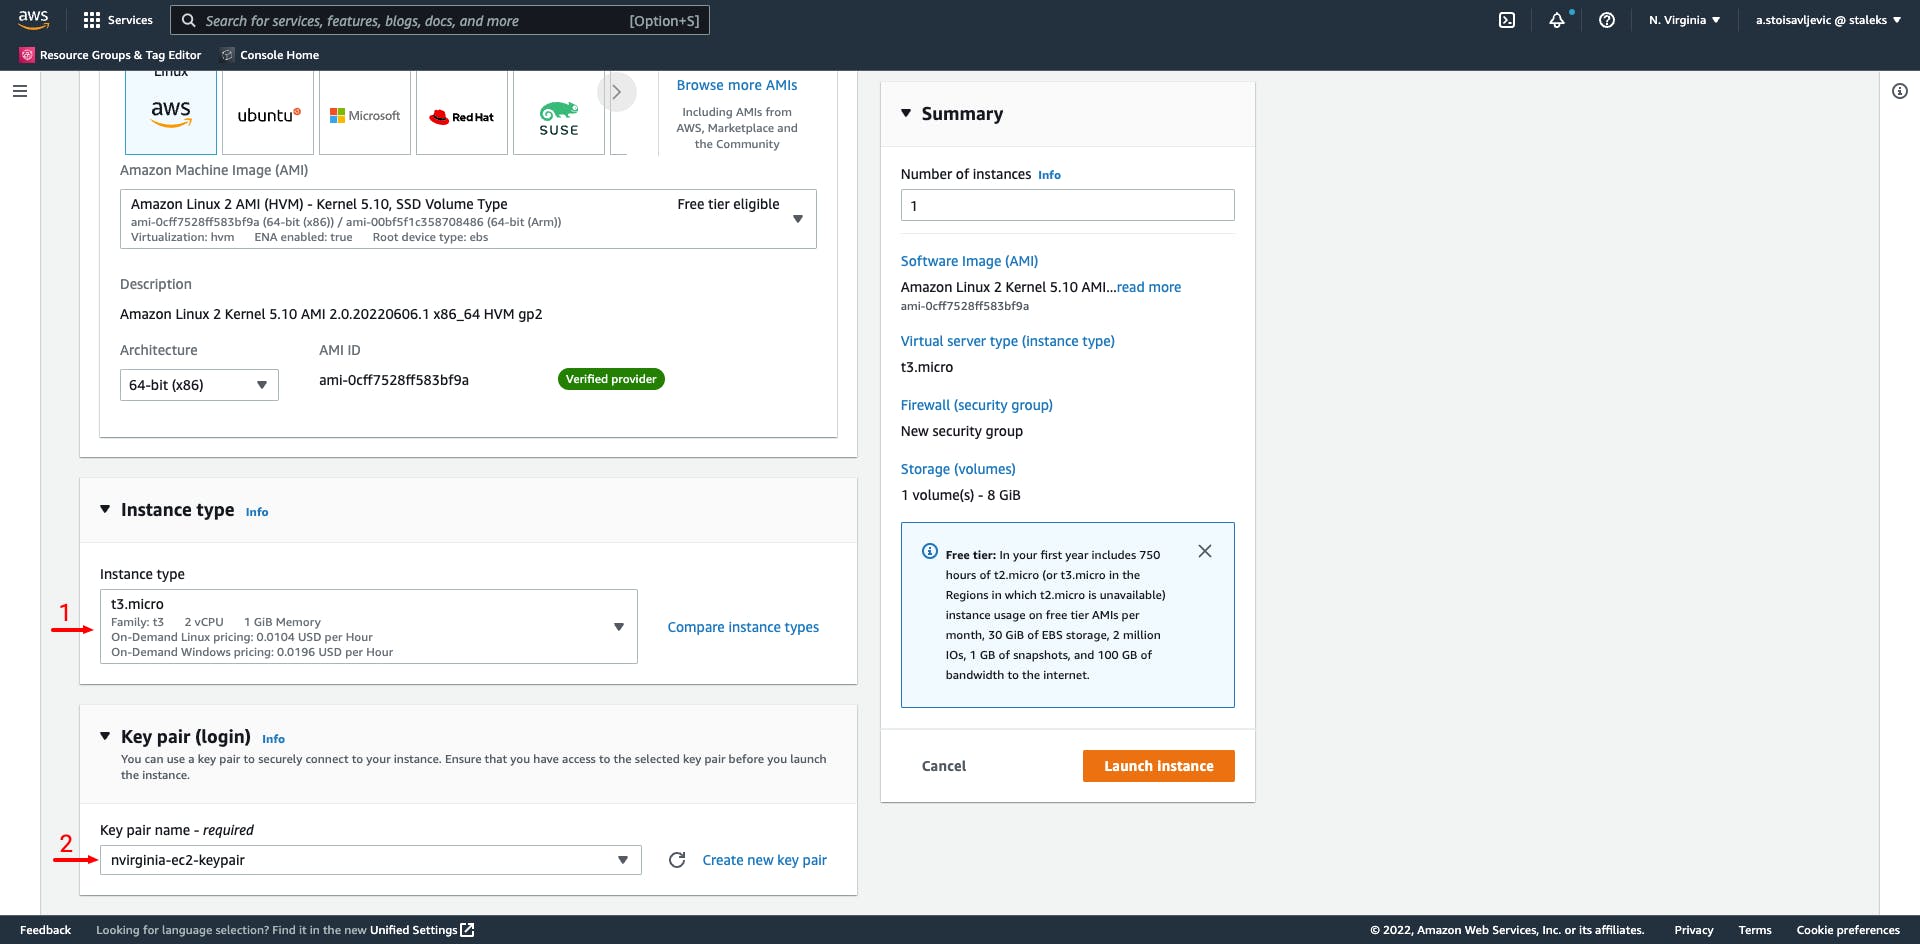
Next section deals with Amazon Machine Image (AMI) setup. Here you can configure what will be used as OS (Amazon Linux OS, Ubuntu, Windows, RedHat, etc.). Choose Amazon Linux OS (point 2.) and then following actions will be affected by this selection. If you pick some other OS, steps may vary. Point 3. is related to point 2. - if you pick Amazon Linux this selection box will contain only those values that match what you've chosen as step 2. Finally at point 4. you'll be defining what type of architecture your instance should be: X86 vs. ARM, 32-bit or 64-bit. Finally, you'll be presented with AMI ID - in this case this is the latest AMI instance image: ami-0cff7528ff583bf9a
In the next section - you'll be defining what kind of instance type you will need for EC2 instance. When defining this please keep in mind of workload that you'll be running on this instance and choose accordingly - point 1.
At point 2. - you will have to set-up key-pair. Here I'm using once that I've previously defined - nvirginia-ec2-keypair. Previously created key-pair will be needed to be able to access this EC2 instance using SSH.
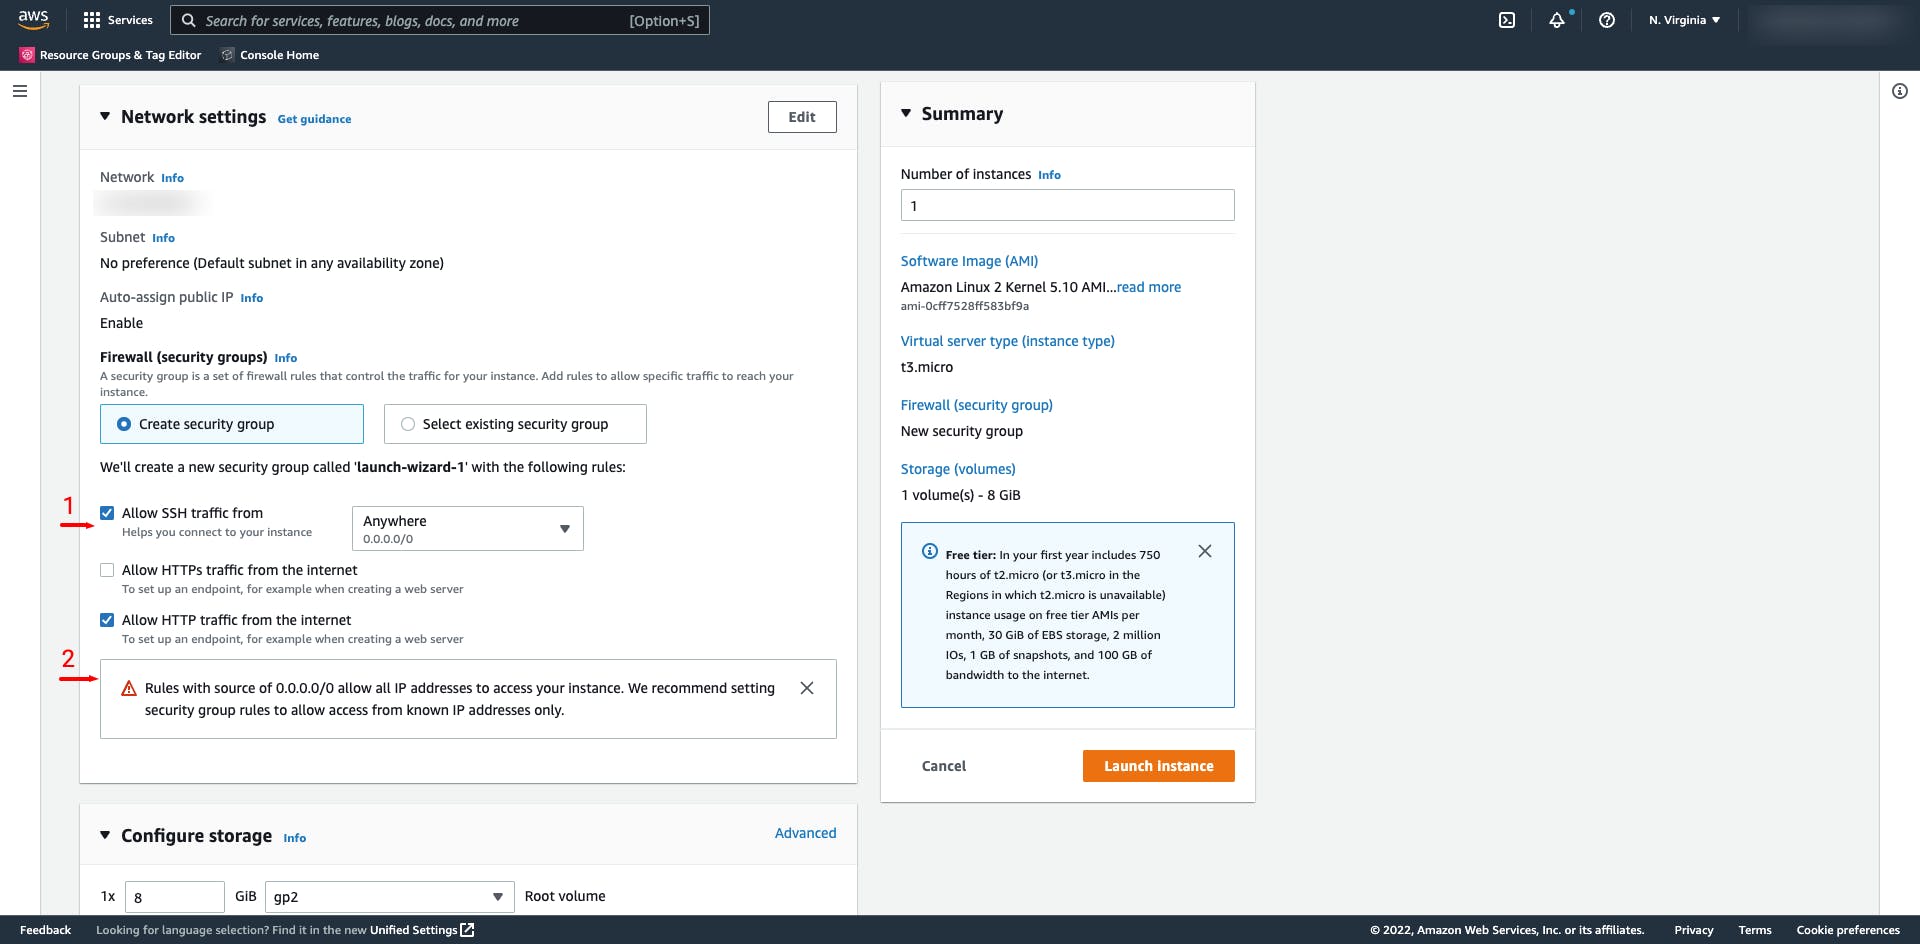
Network section for EC2 is used to configure in which Virtual Private Cloud (VPC) you want this new instance to spin-up. Also you can configure which Security Group (SG) will be applied. Here I've chosen to create new SG that will allow SSH access from anywhere (0.0.0.0/0 - not recommended for production instances) and HTTP.
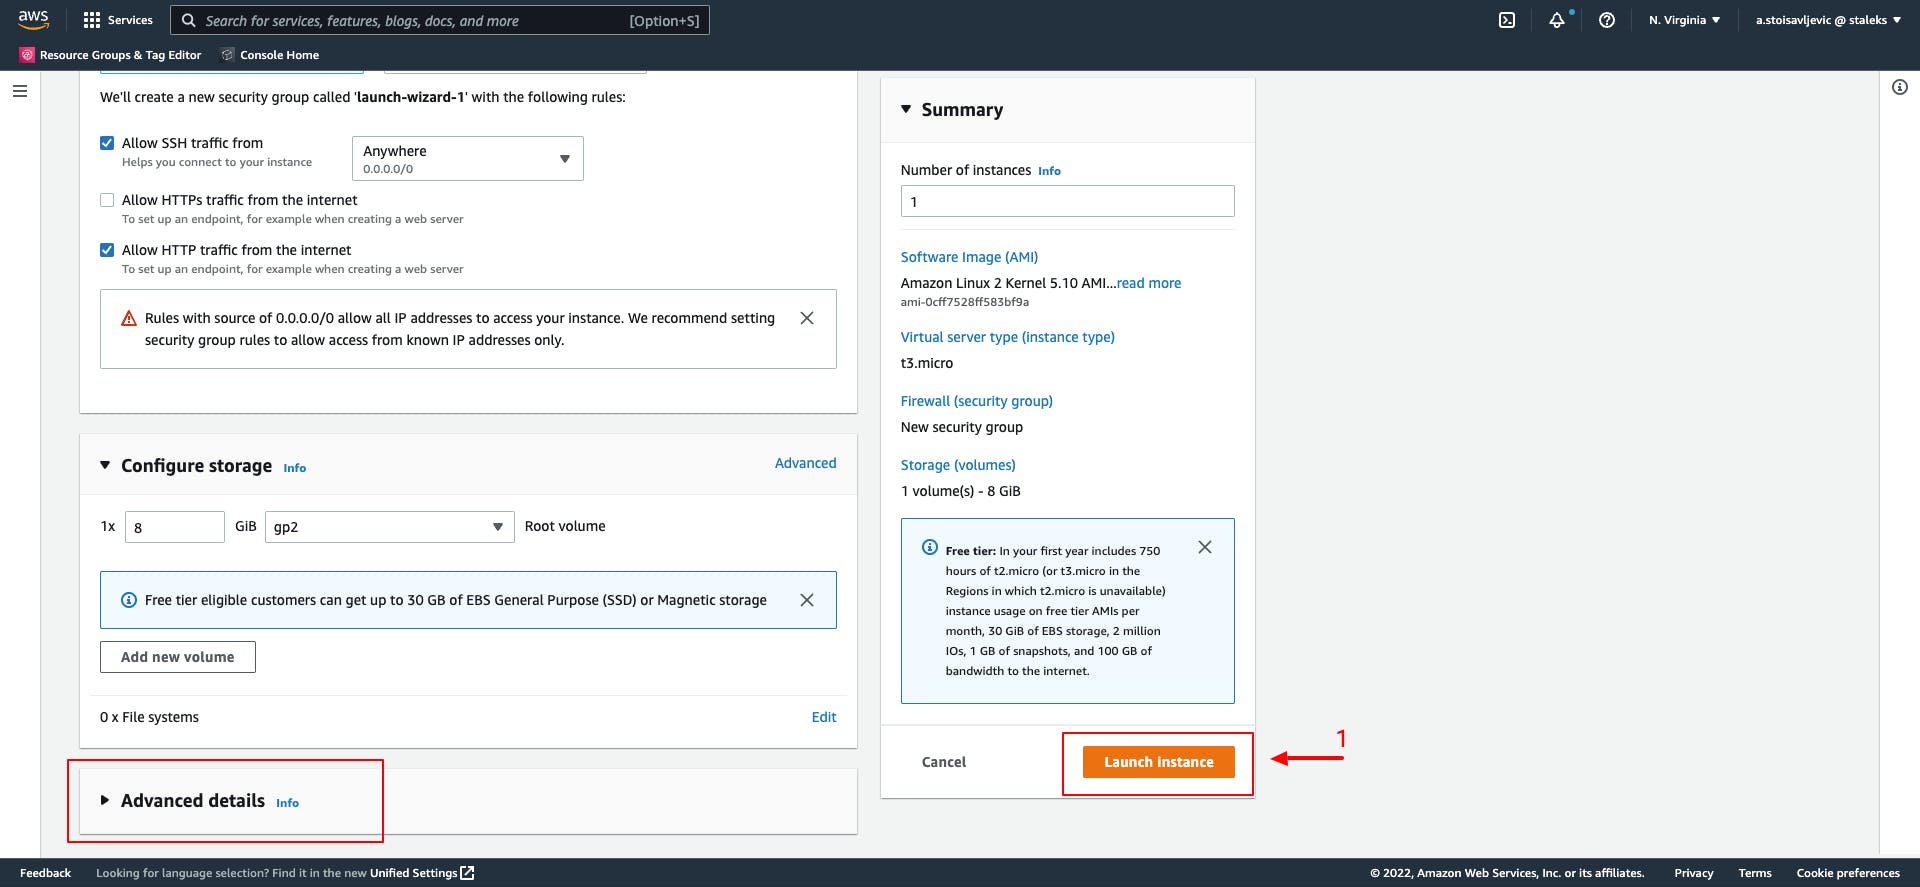
Finally we come to the point where we can "Launch the instance". You can re-check once again all things that you've setup in previous steps and if you are satisfied with all, click on "Launch instance".
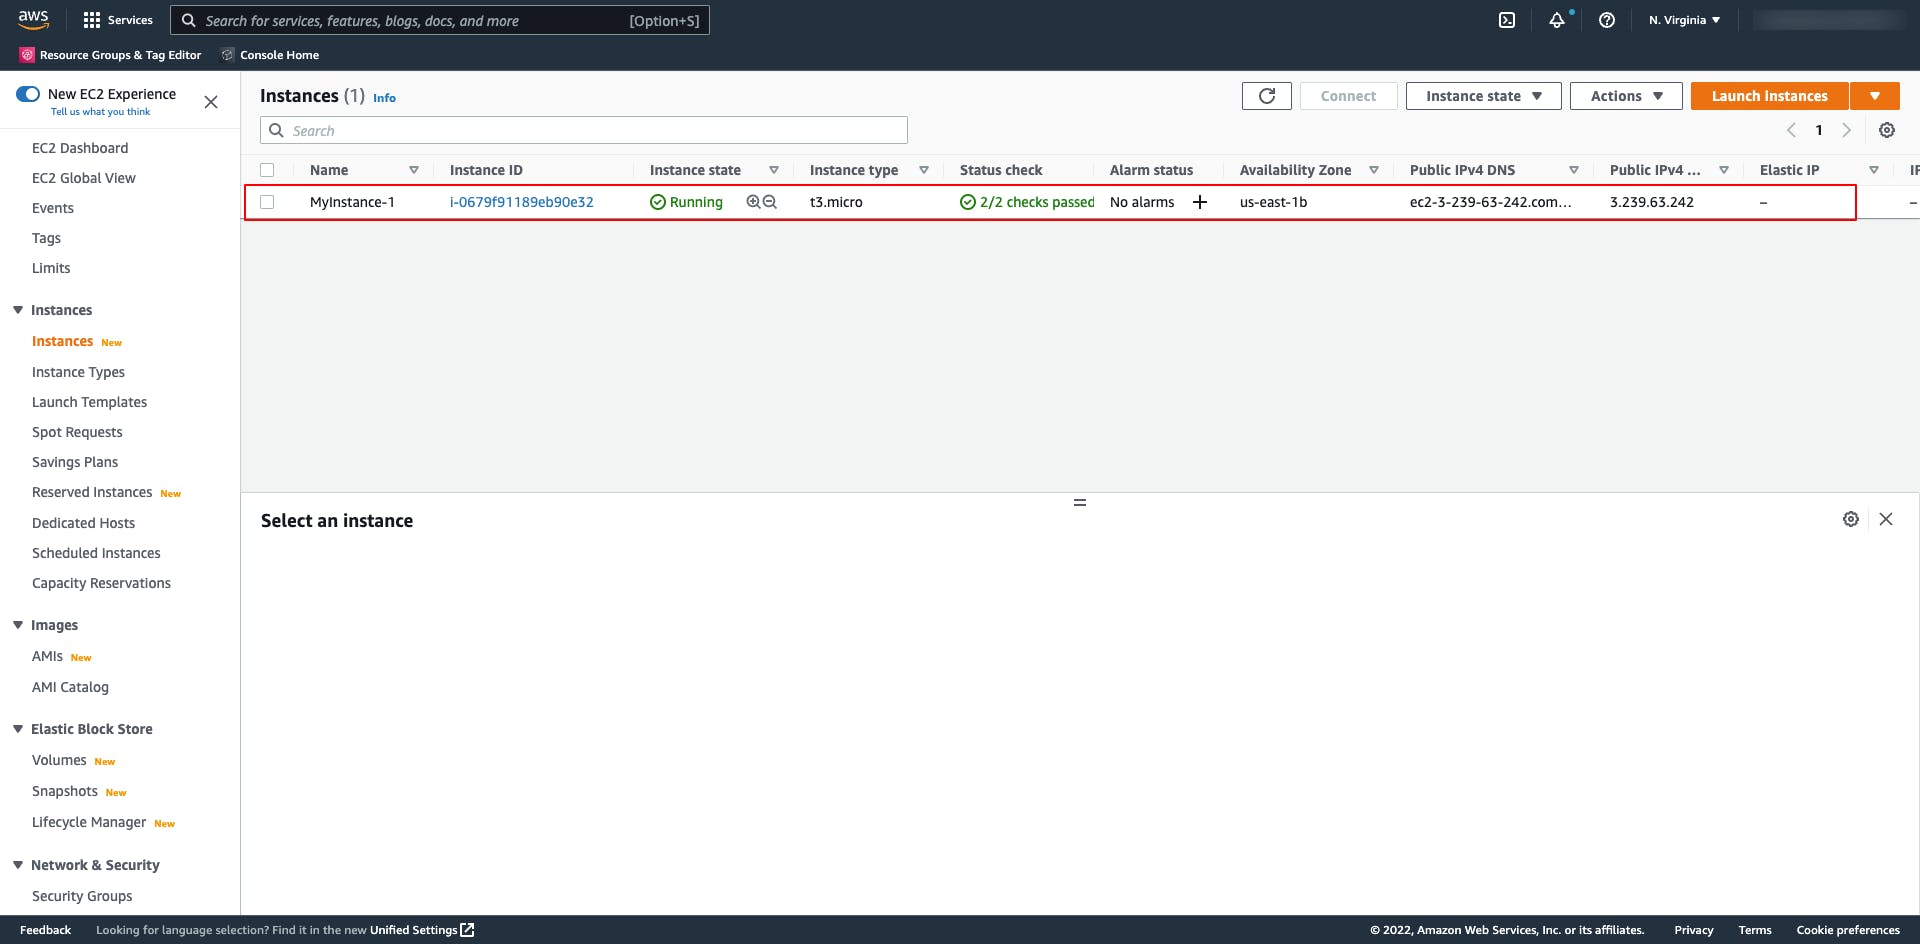
After a couple of minutes, AWS EC2 will be created. Check the EC2 dashboard.
You can also try to connect to this instance using SSH (port 22).
$ ssh -i nvirginia-ec2-keypair.pem ec2-user@ec2-3-239-63-242.compute-1.amazonaws.com

Installing Docker and verify
Now let's start by updating OS and installing Docker.
- First let's update OS by executing following command:
$ sudo yum update -y - Install Docker
$ sudo amazon-linux-extras install docker -y - Start and enable Docker as a service on Amazon Linux
$ sudo systemctl start docker $ sudo systemctl enable docker - In order to be able to run Docker commands without "sudo"-ing, add Docker to ec2-user
$ sudo usermod -a -G docker ec2-user - You can verify, that Docker commands are now available to ec-user by executing following command:
$ docker info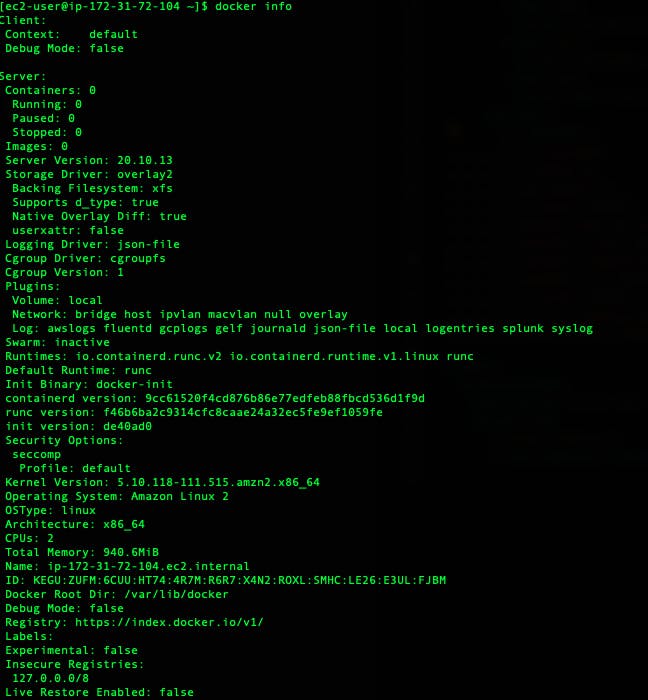
- Let's go one step further and install Docker Compose as well.
$ sudo curl -L "https://github.com/docker/compose/releases/download/v2.7.0/docker-compose-linux-x86_64" -o /usr/local/bin/docker-compose$ sudo chmod +x /usr/local/bin/docker-compose$ docker-compose -h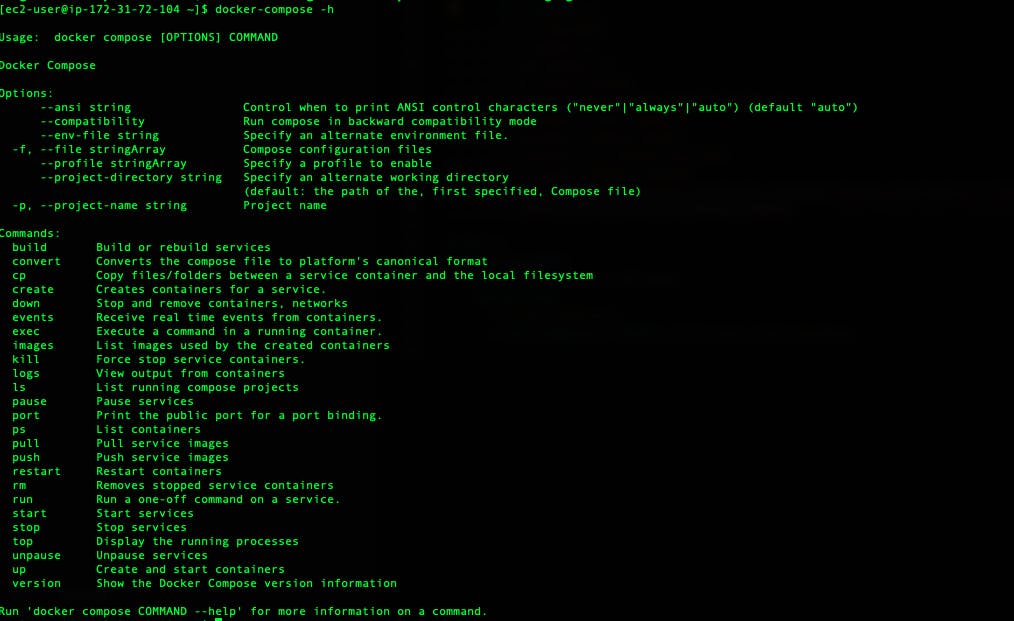
Running simple NGINX Docker container
In order to verify that we can now use this instance as our Docker Container runtime environment, let's run NGINX container on it and verify.
$ docker run --name mynginx1 -p 80:80 -d nginx
If everything is setup correctly you should be able to see following similar output in terminal:
Unable to find image 'nginx:latest' locally
latest: Pulling from library/nginx
461246efe0a7: Pull complete
060bfa6be22e: Pull complete
b34d5ba6fa9e: Pull complete
8128ac56c745: Pull complete
44d36245a8c9: Pull complete
ebcc2cc821e6: Pull complete
Digest: sha256:bd06dfe1f8f7758debd49d3876023992d41842fd8921565aed315a678a309982
Status: Downloaded newer image for nginx:latest
a6bb9527dfbf850f6b990baa61eab28741f1a050f1e2c0175c3240c568973881
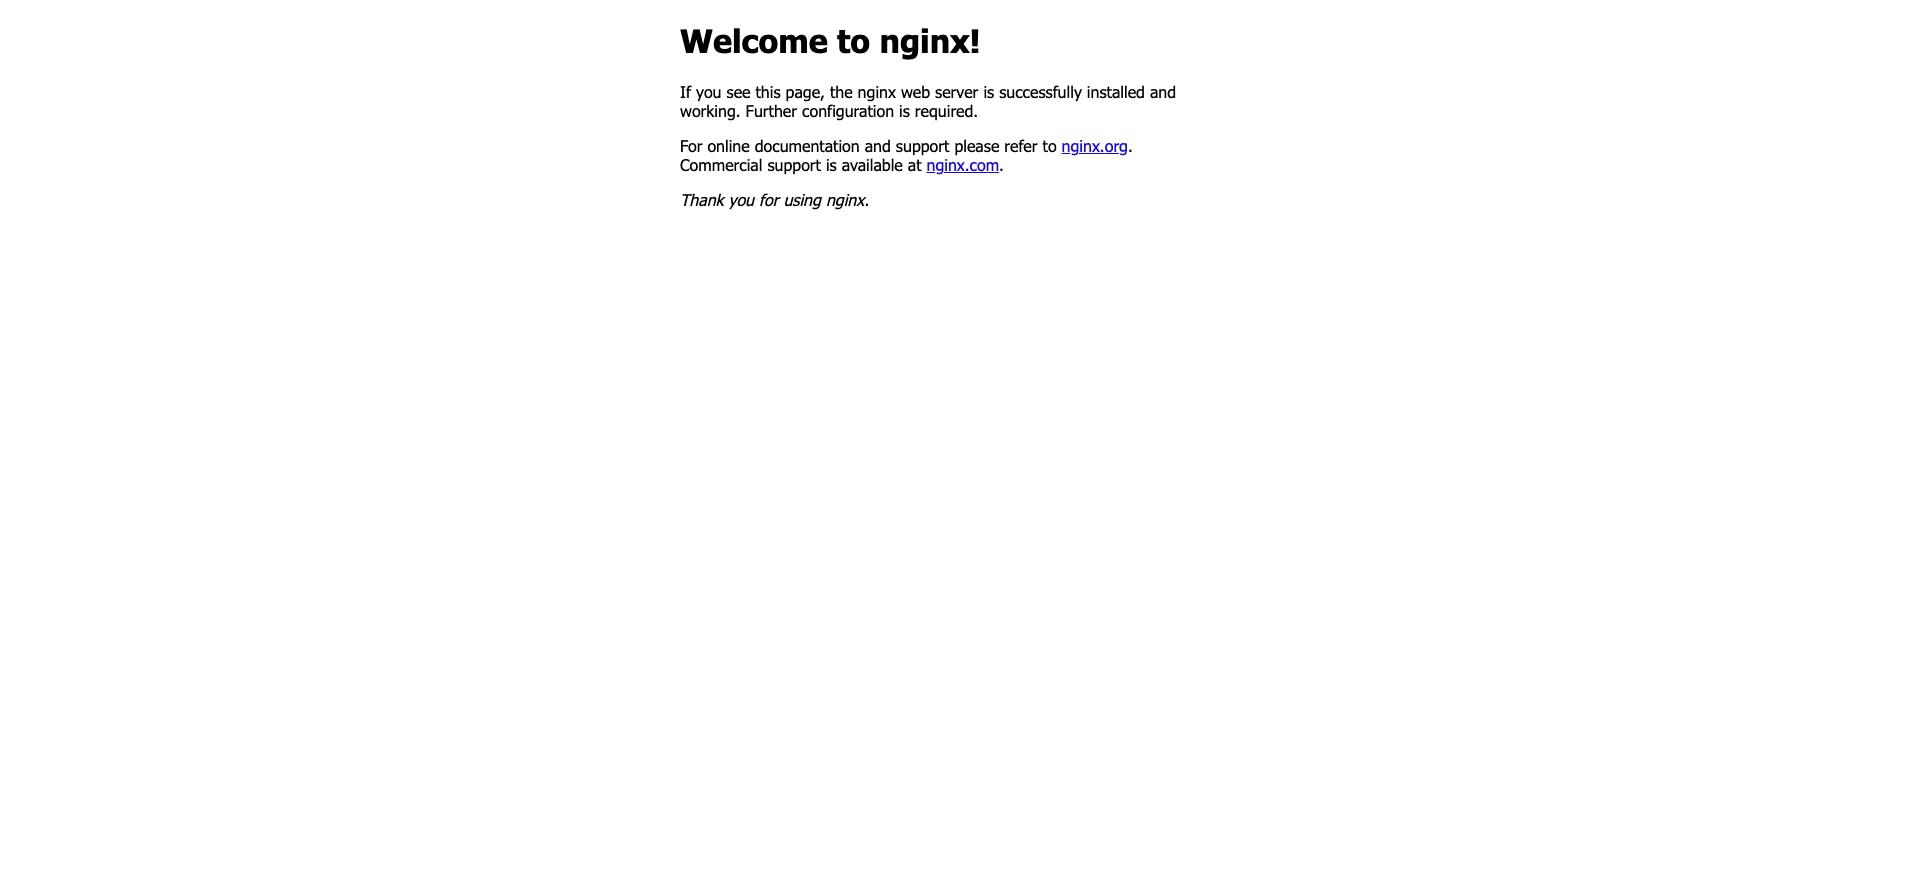
And if you enter dedicated URL of that created EC2 instance: http://ec2-3-239-63-242.compute-1.amazonaws.com/ you'll see NGINX Welcome screen, as follows:
And now ... let's automate
While it looks like this process is not much, spin-up of EC2 instance, can be very tedious task. Specially if you are doing over and over again. Therefore I've created one AWS CloudFormation script that will perform same thing that was the goal of previous tutorial using AWS Management console.
First let's provide script and explain not so obvious stuff.
AWSTemplateFormatVersion: 2010-09-09
Description: >
  This CloudFormation Script creates EC2 Instance enabled with Docker and Docker Compose.
  Same time it will create new SecurityGroup allowing ports HTTP(80, 8080) and SSH(22)
  connecting from anywhere.

Parameters:
  KeyPairName:
    Description: Enter the name of your Key Pair for SSH connections.
    Type: AWS::EC2::KeyPair::KeyName
    Default: "nvirginia-ec2-keypair"
    ConstraintDescription: "Must be the name of an existing EC2 KeyPair"

  CreationDate:
    Description: Enter the date and time when this script is initiated
    Type: String
    Default: "2022-07-29T12:00"
    ConstraintDescription: "Date and time of creation"

Resources:
  EmpoweringRoleforEC2Server:
    Type: "AWS::IAM::Role"
    Properties:
      AssumeRolePolicyDocument:
        Statement:
          - Effect: Allow
            Principal:
              Service:
                - ec2.amazonaws.com
            Action:
              - "sts:AssumeRole"
      ManagedPolicyArns:
        - arn:aws:iam::aws:policy/AmazonEC2ContainerRegistryFullAccess
        - arn:aws:iam::aws:policy/AWSCloudFormationFullAccess
        - arn:aws:iam::aws:policy/AdministratorAccess
  EC2ServerProfile:
    Type: "AWS::IAM::InstanceProfile"
    Properties:
      Roles: #required
        - !Ref EmpoweringRoleforEC2Server

  EC2InstanceSecurityGroup:
    Type: AWS::EC2::SecurityGroup
    Properties:
      GroupDescription: Enable SSH and HTTP for Server
      SecurityGroupIngress:
        - IpProtocol: tcp
          FromPort: 80
          ToPort: 80
          CidrIp: 0.0.0.0/0
        - IpProtocol: tcp
          FromPort: 8080
          ToPort: 8080
          CidrIp: 0.0.0.0/0
        - IpProtocol: tcp
          FromPort: 22
          ToPort: 22
          CidrIp: 0.0.0.0/0

  EC2Instance:
    Type: AWS::EC2::Instance
    Properties:
      ImageId: ami-0cff7528ff583bf9a
      InstanceType: t3.micro
      KeyName: !Ref KeyPairName
      IamInstanceProfile: !Ref EC2ServerProfile
      SecurityGroupIds:
        - !GetAtt EC2InstanceSecurityGroup.GroupId
      Tags:
        - Key: Name
          Value: SimpleEC2Instance
        - Key: Owner
          Value: aleksandar.stoisavljevic@novacode.rs
        - Key: Date
          Value: !Ref CreationDate
      UserData:
        Fn::Base64: |
          #! /bin/bash
          # update os
          yum update -y
          # install docker
          amazon-linux-extras install docker -y
          systemctl start docker
          systemctl enable docker
          usermod -a -G docker ec2-user
          # install docker compose
          curl -L "https://github.com/docker/compose/releases/download/v2.7.0/docker-compose-linux-x86_64" -o /usr/local/bin/docker-compose
          chmod +x /usr/local/bin/docker-compose

Outputs:
  EC2InstanceDNS:
    Description: Server DNS Name
    Value: !Sub
      - ${PublicAddress}
      - PublicAddress: !GetAtt EC2Instance.PublicDnsName
First of all there are some obvious changes that I'll deal with in one of the next tutorials. There are 3 AWS resources more than just simple EC2 server instance. These are:
- AWS Role,
- AWS Profile and
- AWS SecurityGroup. These I'll be using in later tutorials and are not part of this tutorial.
Your focus should be on Resource -> EC2Instance.
It is of a type: AWS::EC2::Instance and we'll be creating EC2 instance of Instance Type: t3.micro. Remember Amazon AMI Id, from previous section, when we were creating EC2 instance manually - ami-0cff7528ff583bf9a ? Now it is time to use it here in AWS CF script :) KeyName property should also be specified here as we will need that in order to access this newly created instance by SSH (port 22).
Properties: IamInstanceProfile and SecurityGroupIds are not of interest in this tutorial, except the fact that SecurityGroupIds is specified here in order to allow access from anywhere (0.0.0.0/0) for ports 22, 80 and 8080 - see the Ingress definition of EC2InstanceSecurityGroup.
Installation of Docker and Docker Compose we've delegated to EC2 Instance UserData and provided script for it. Someone can easily follow commands from previous section (manual installation) and see the similarities.
Let's spin-up EC2 instance using AWS CloudFormation.
Go to AWS main management console and click on "Cloud Formation"
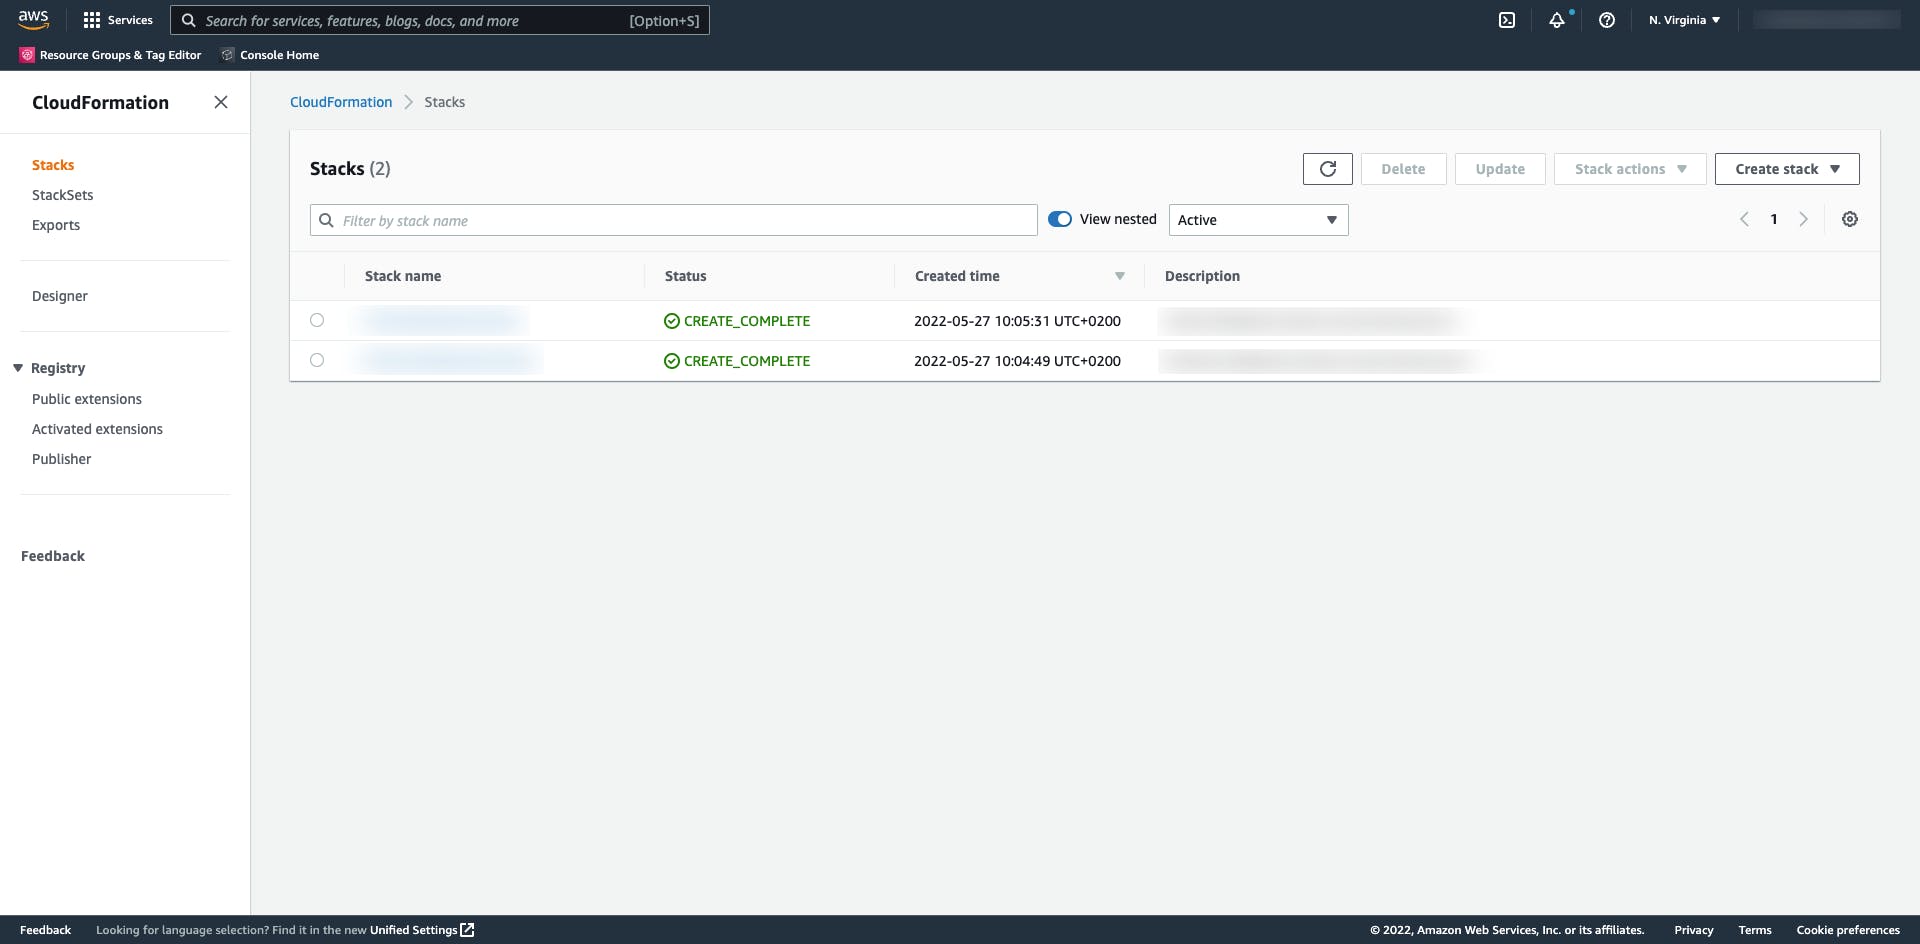
You'll be presented with a list of CloudFormation stacks.
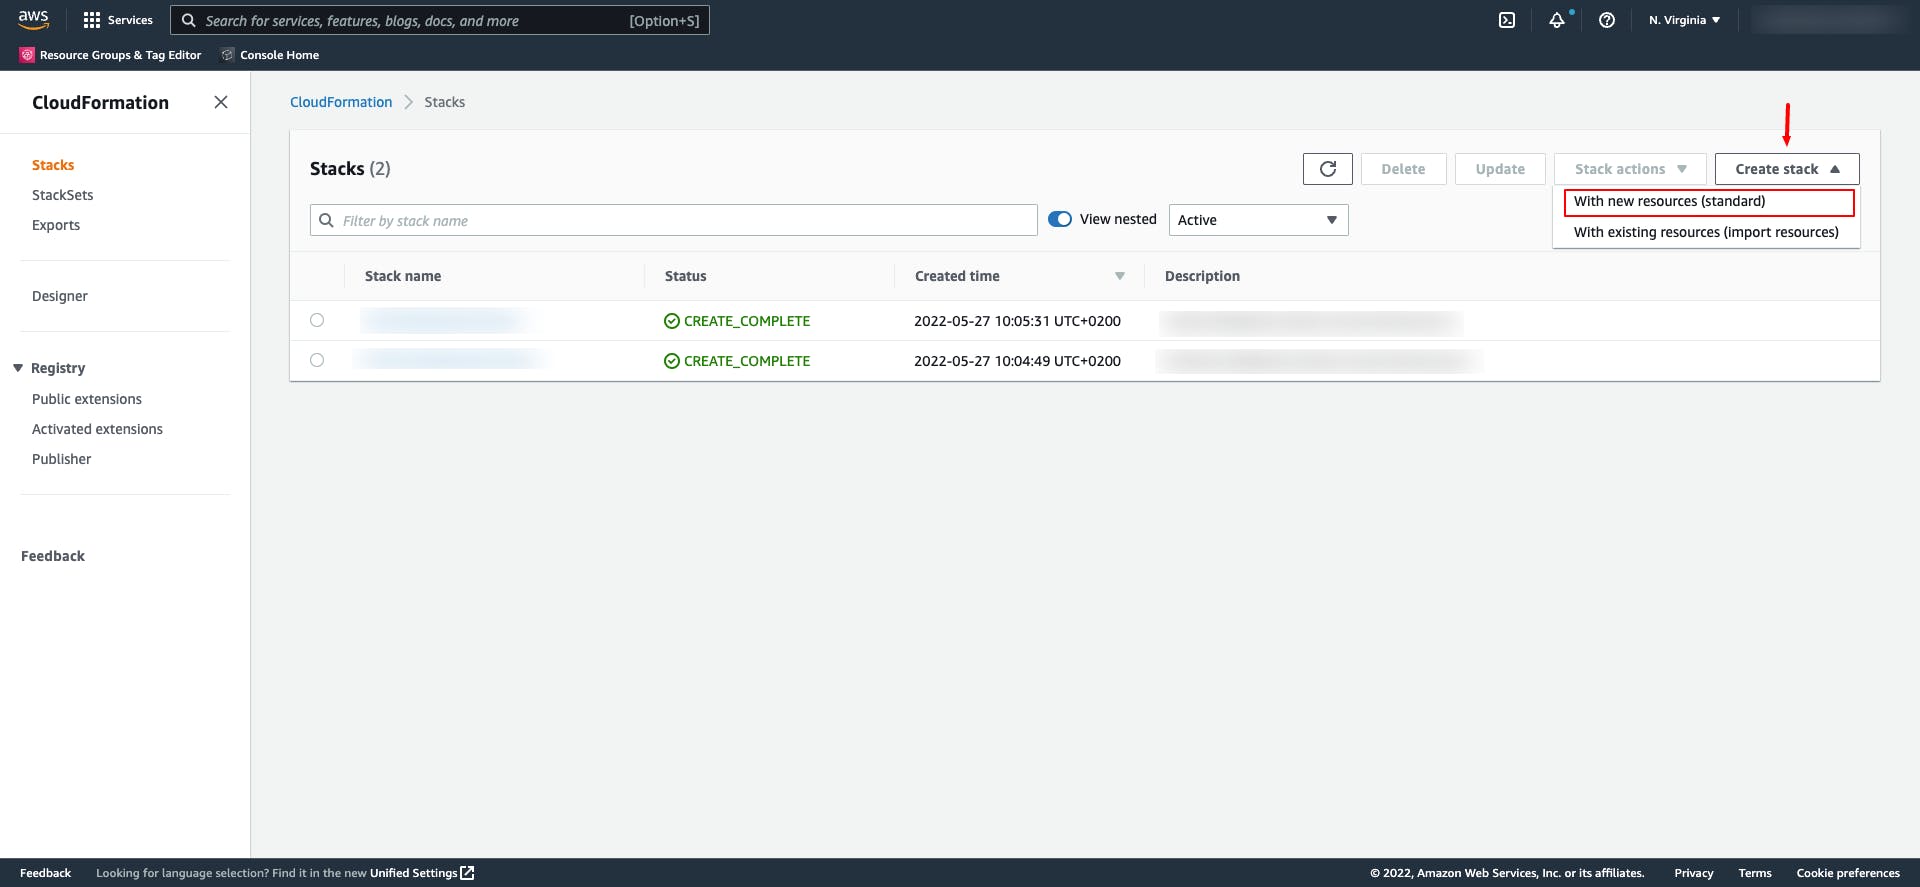
On the right-hand side, top-right, there is a button "Create stack(s)", click on it, you'll get drop-down and pick "Create new resources (standard)".
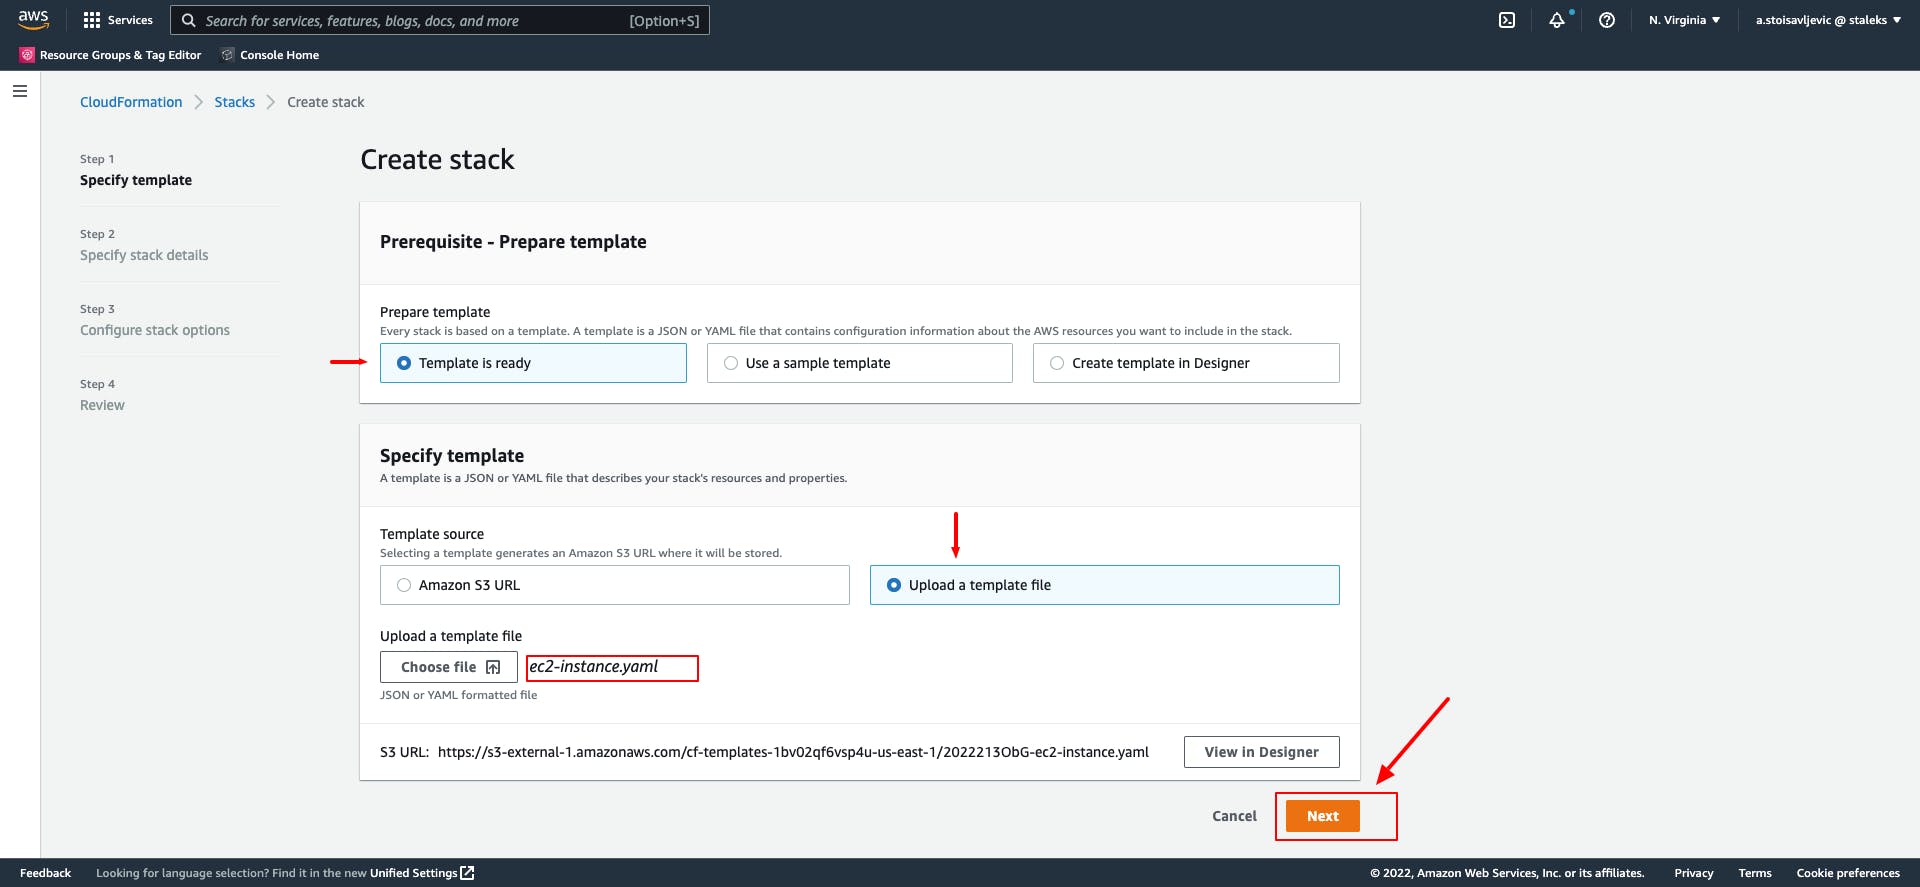
It is 4-steps process where you will have to go through wizard and provide details about your new AWS CF Stack.
Step 1:
Choose: "Template is ready", then "Upload template file", by clicking "Choose file" you'll get a chance to pick(upload your local AWS CF script file) and finally click on "Next".
Step 2:
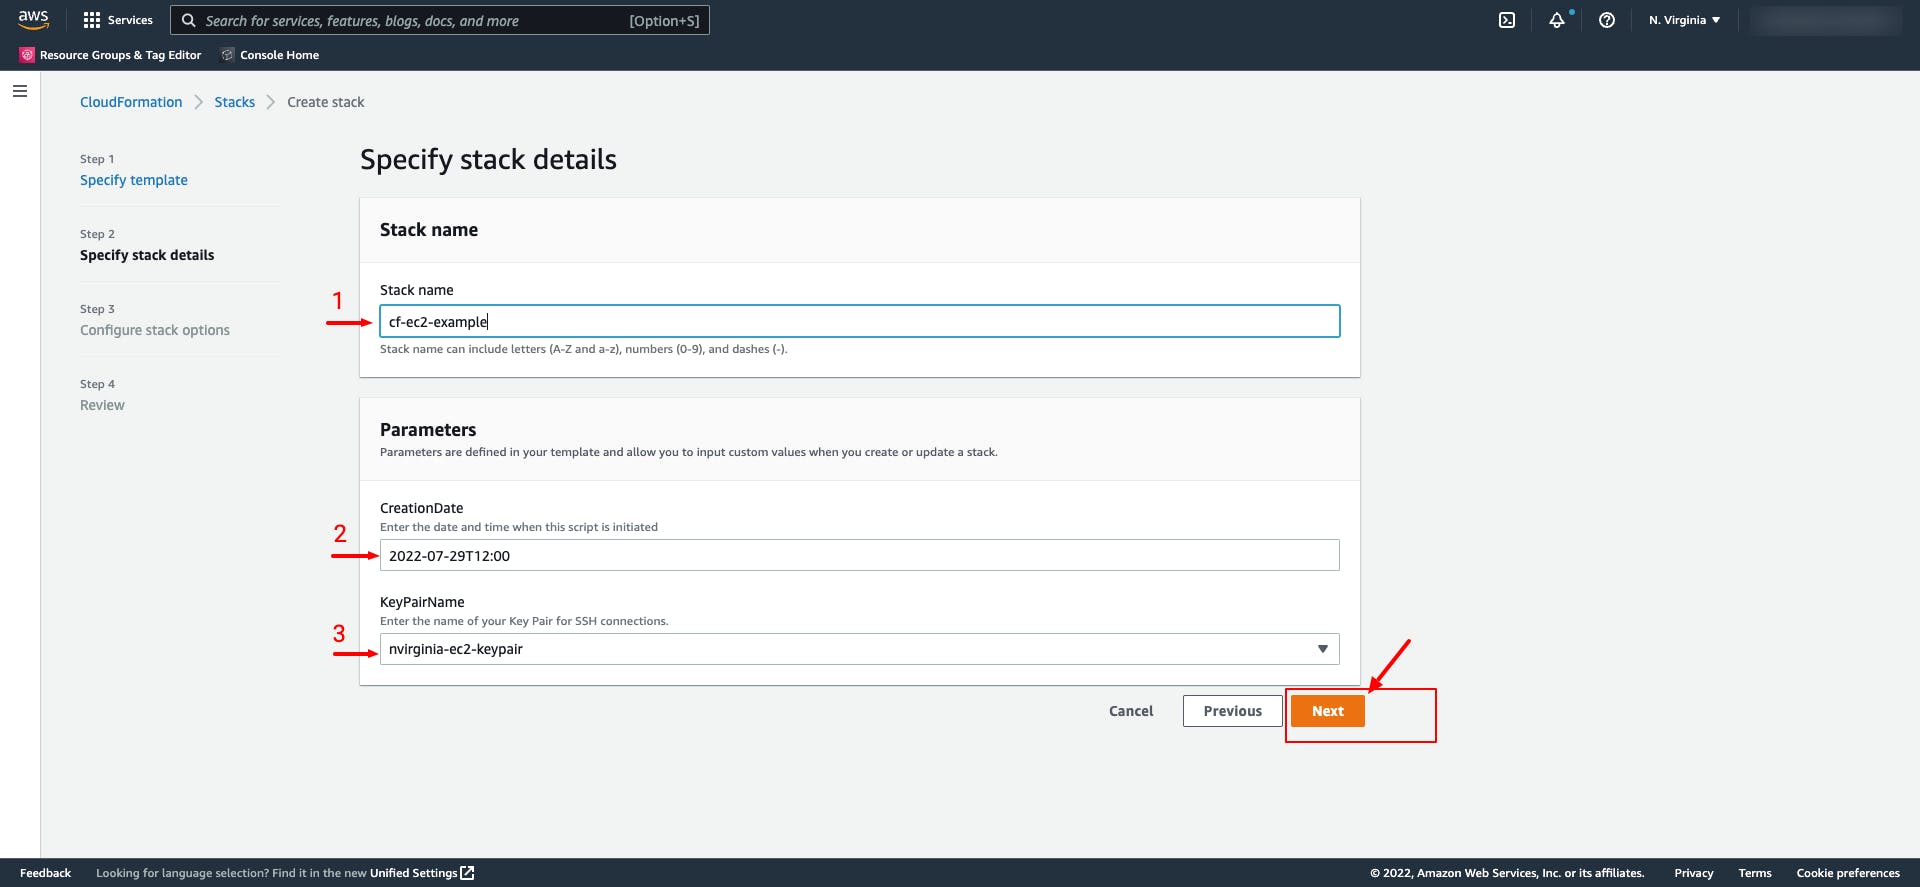
Enter the name of AWS CloudFormation Stack (e.g. cf-ec2-instance), enter the creation date of the Stack (e.g. 2022-08-01) and use the existing key-pair, previously created as we've used for EC2 instance manually created (nvirginia-ec2-keypair).
Step 3:
On the following screen "Configure stack options" leave everything "as-is" and then click "Next"
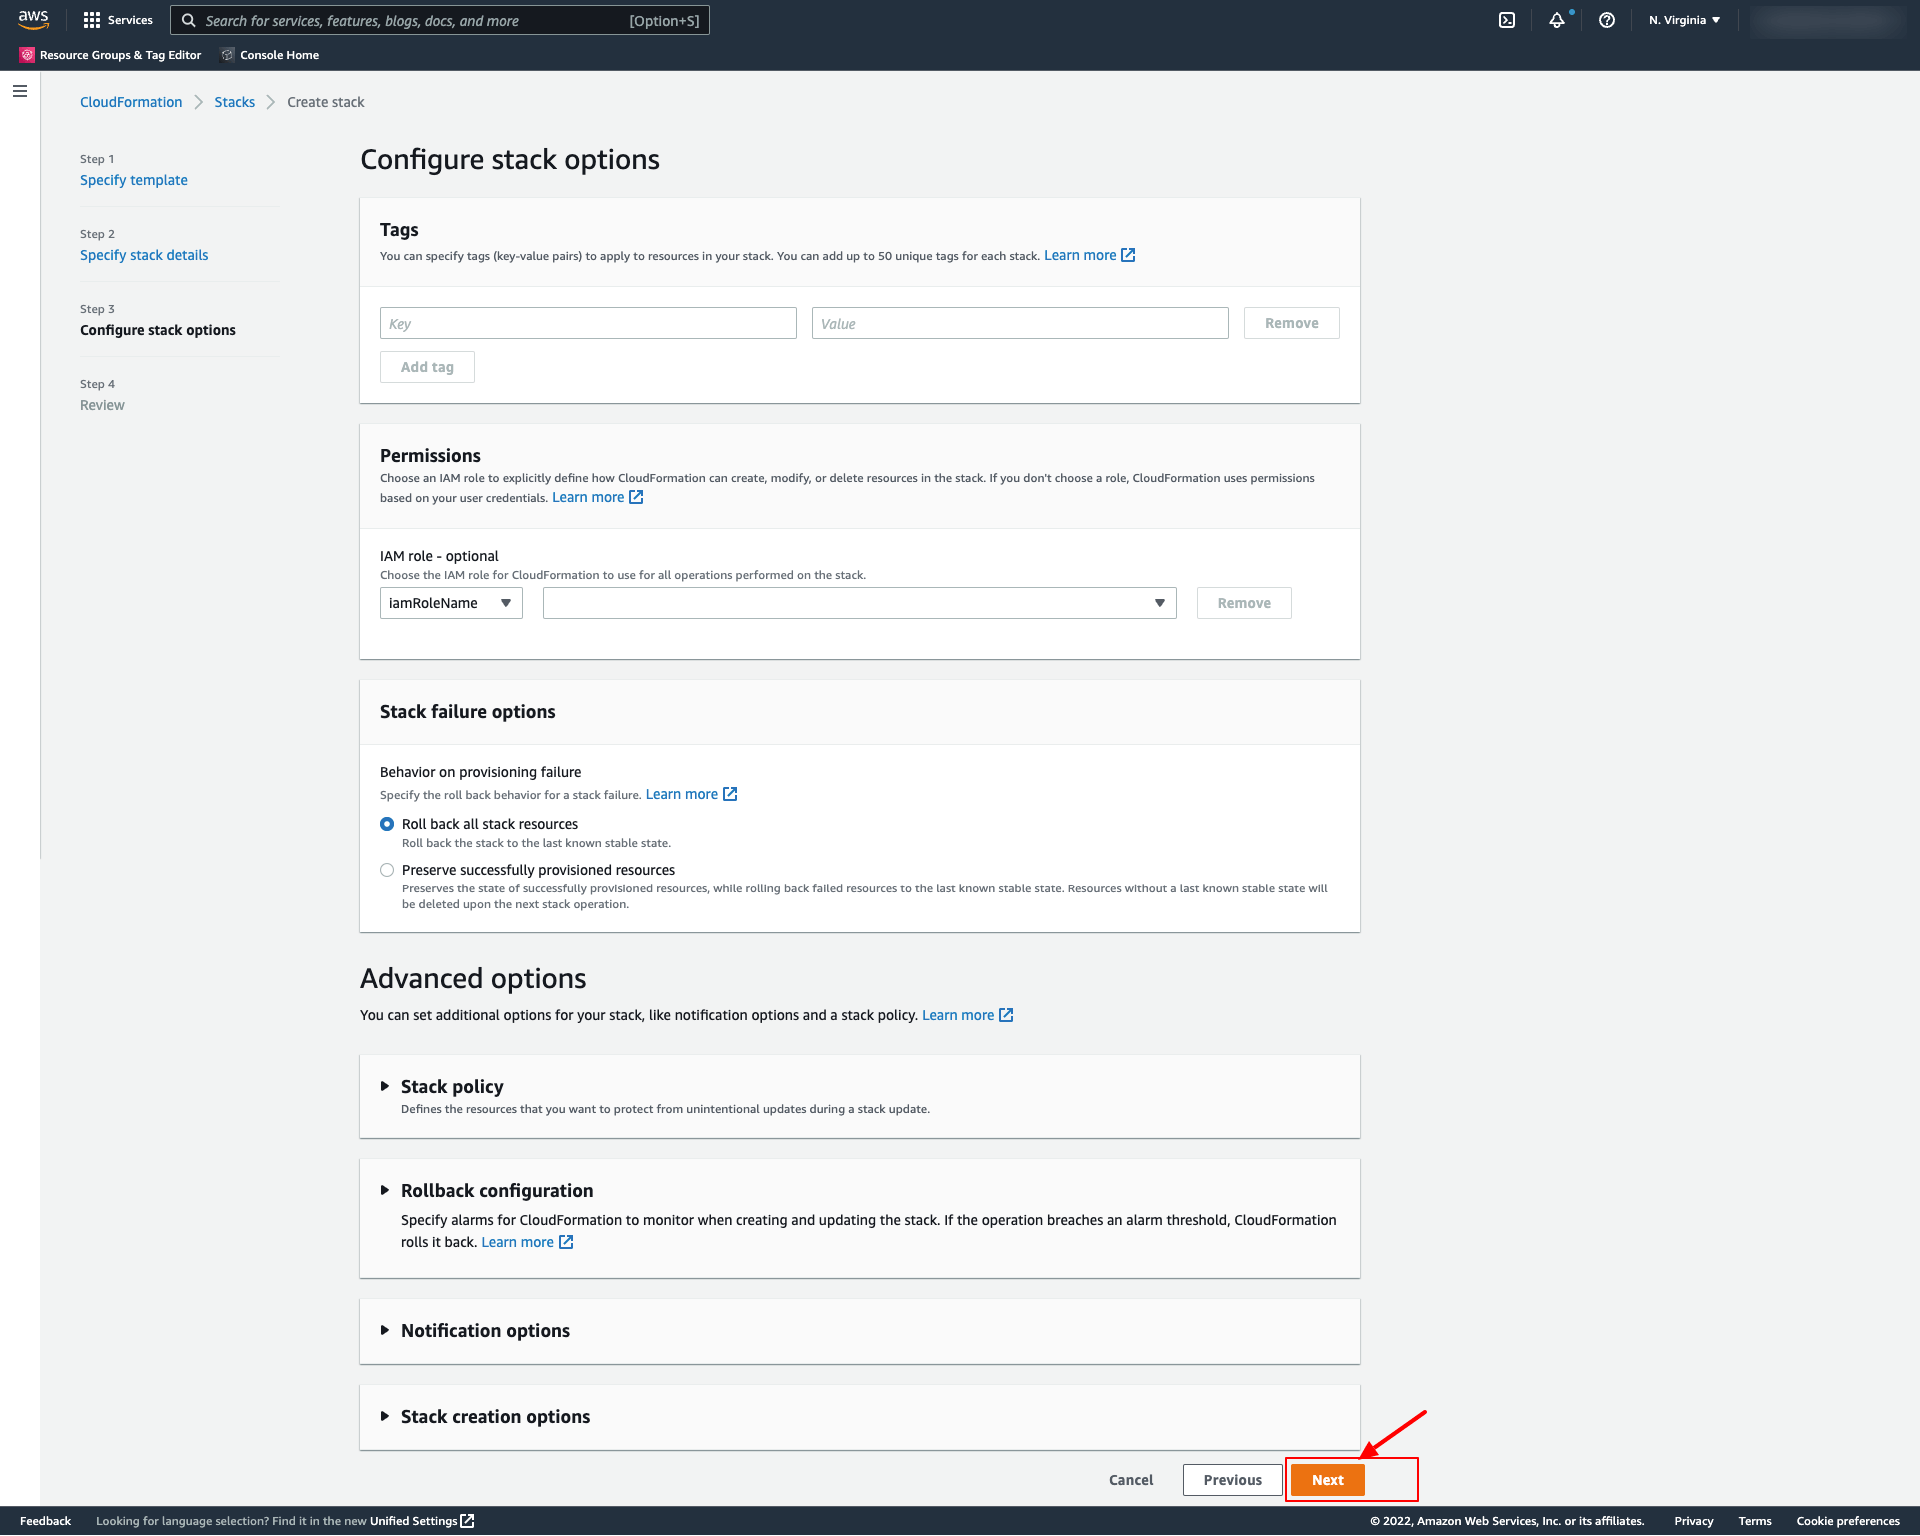
Step 4:
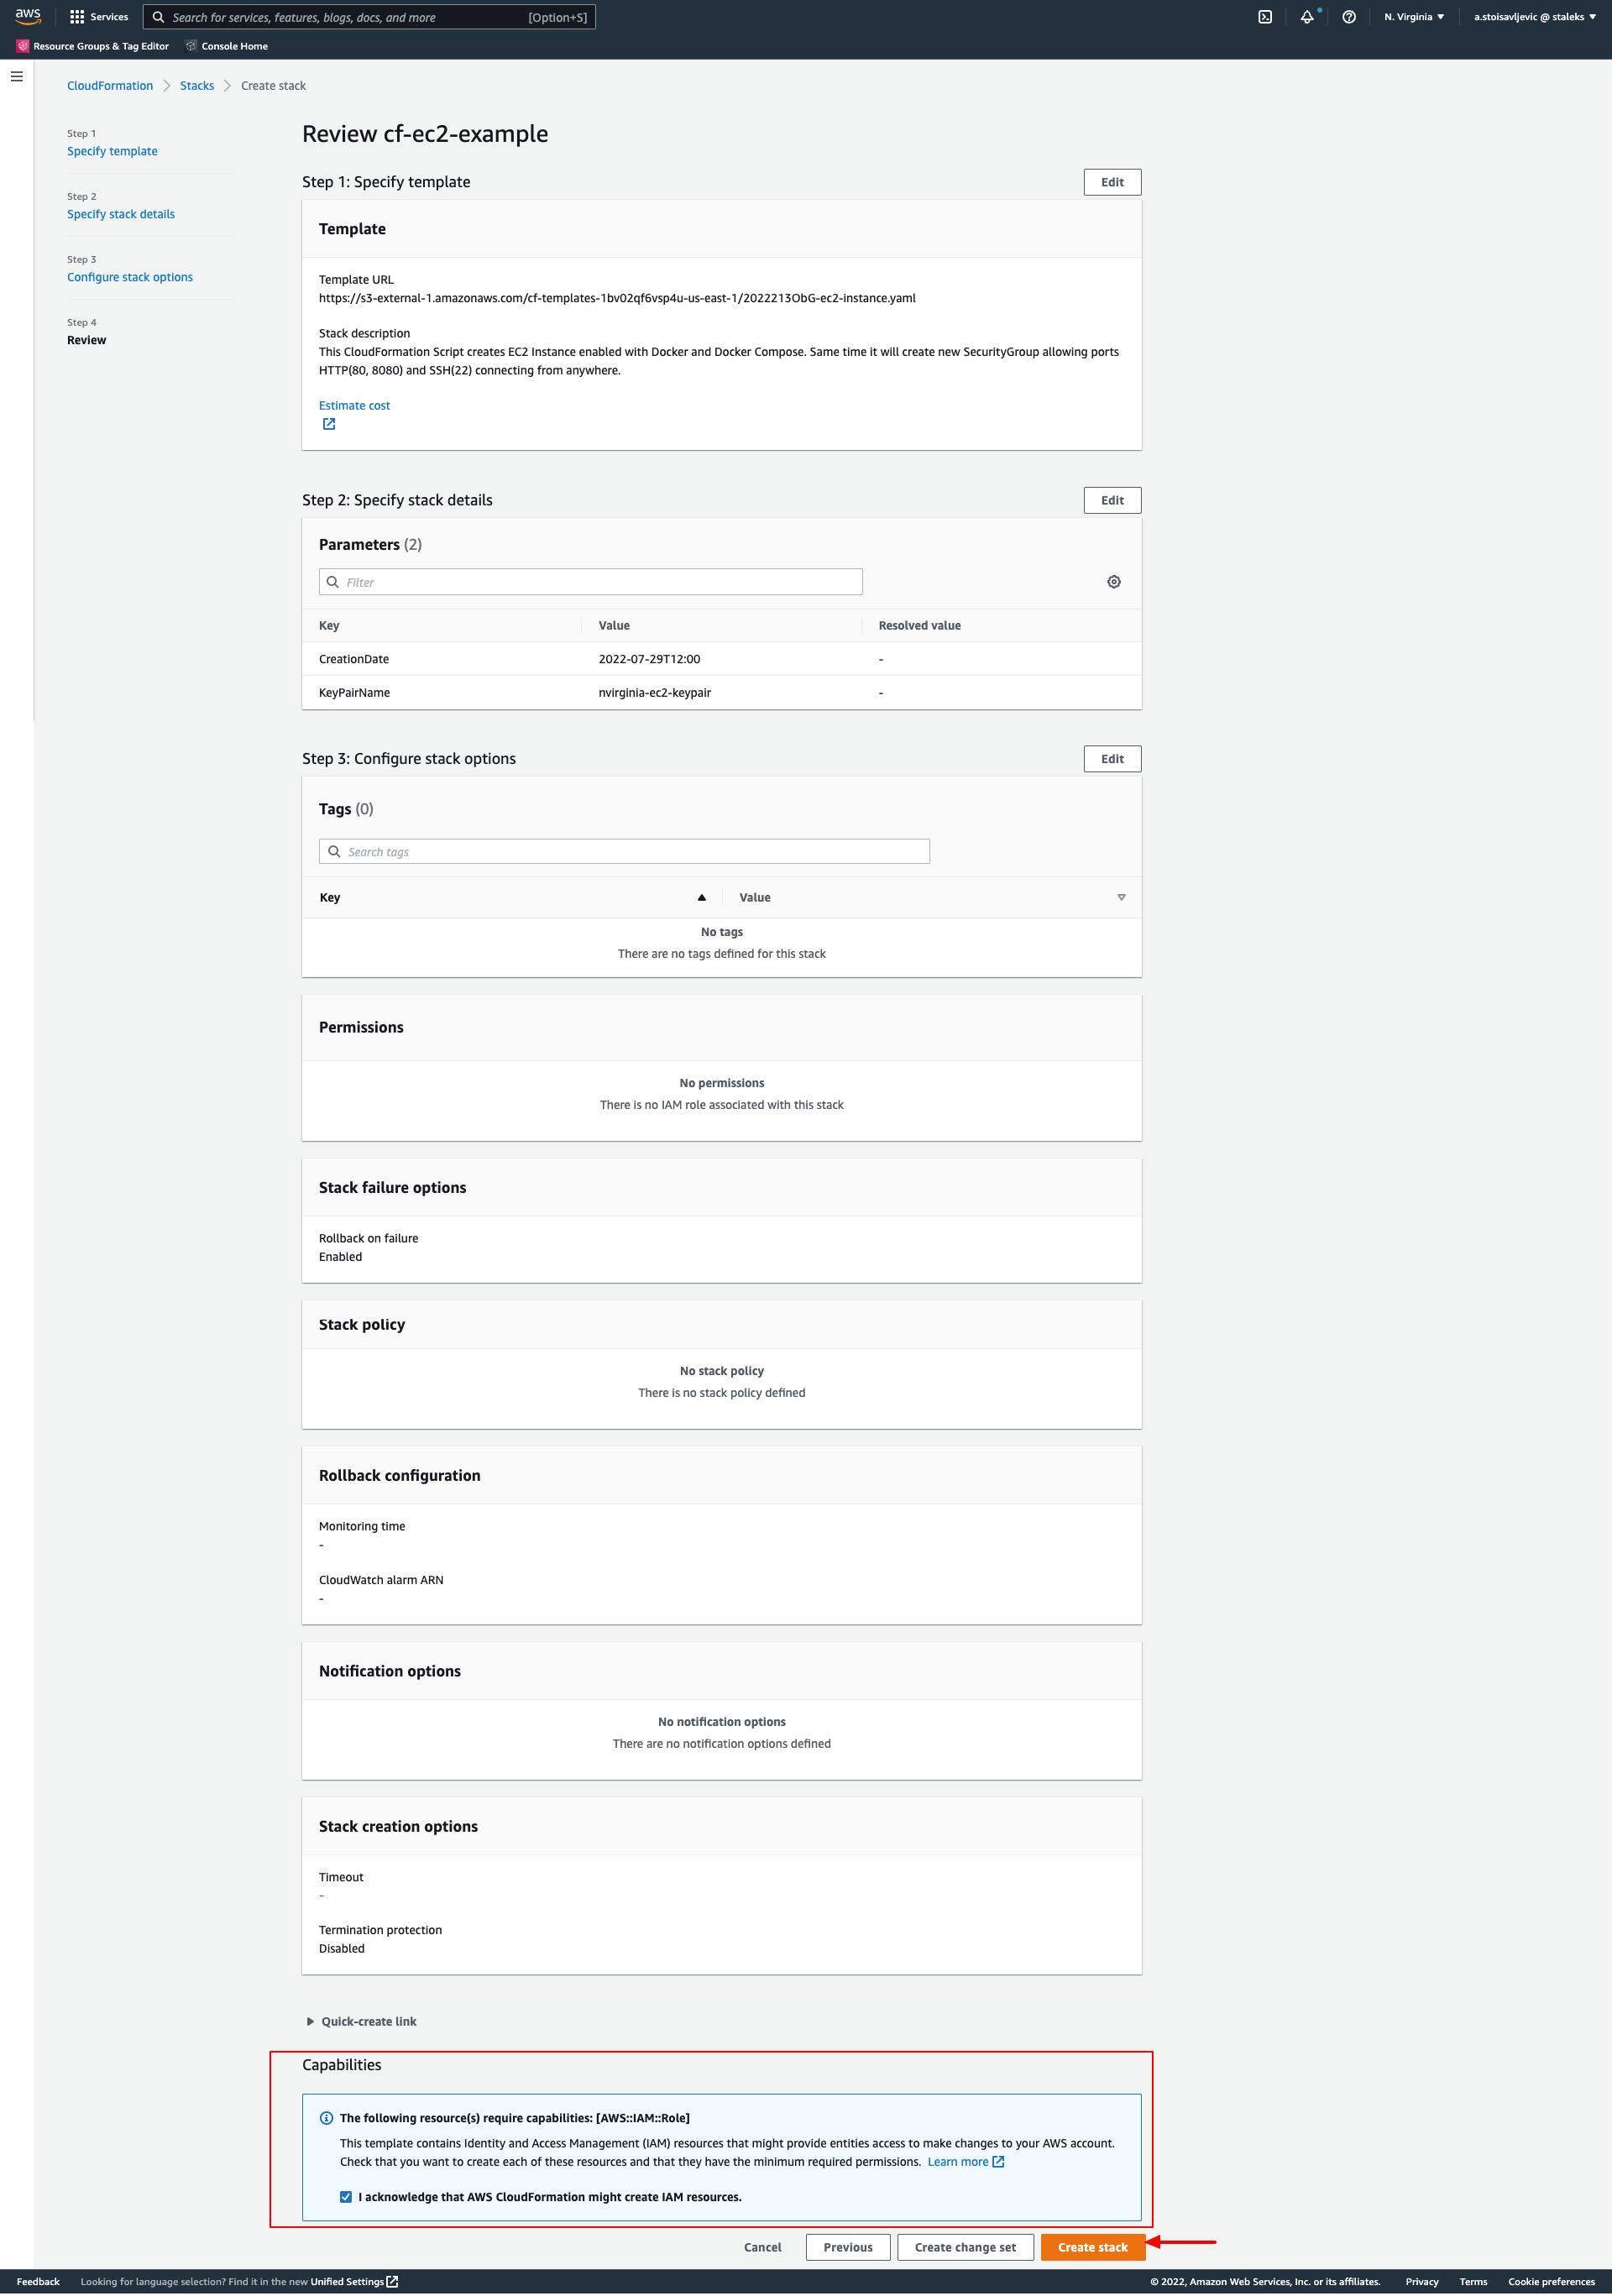
Last step is "Review" page, where we can check everything that we've set-up in previous 3 steps. NOTE: here in order to proceed we'll have to verify that new IAM Role will be created (last section of this page). Check that you are aware and then click on "Create stack" button at the bottom of the page.
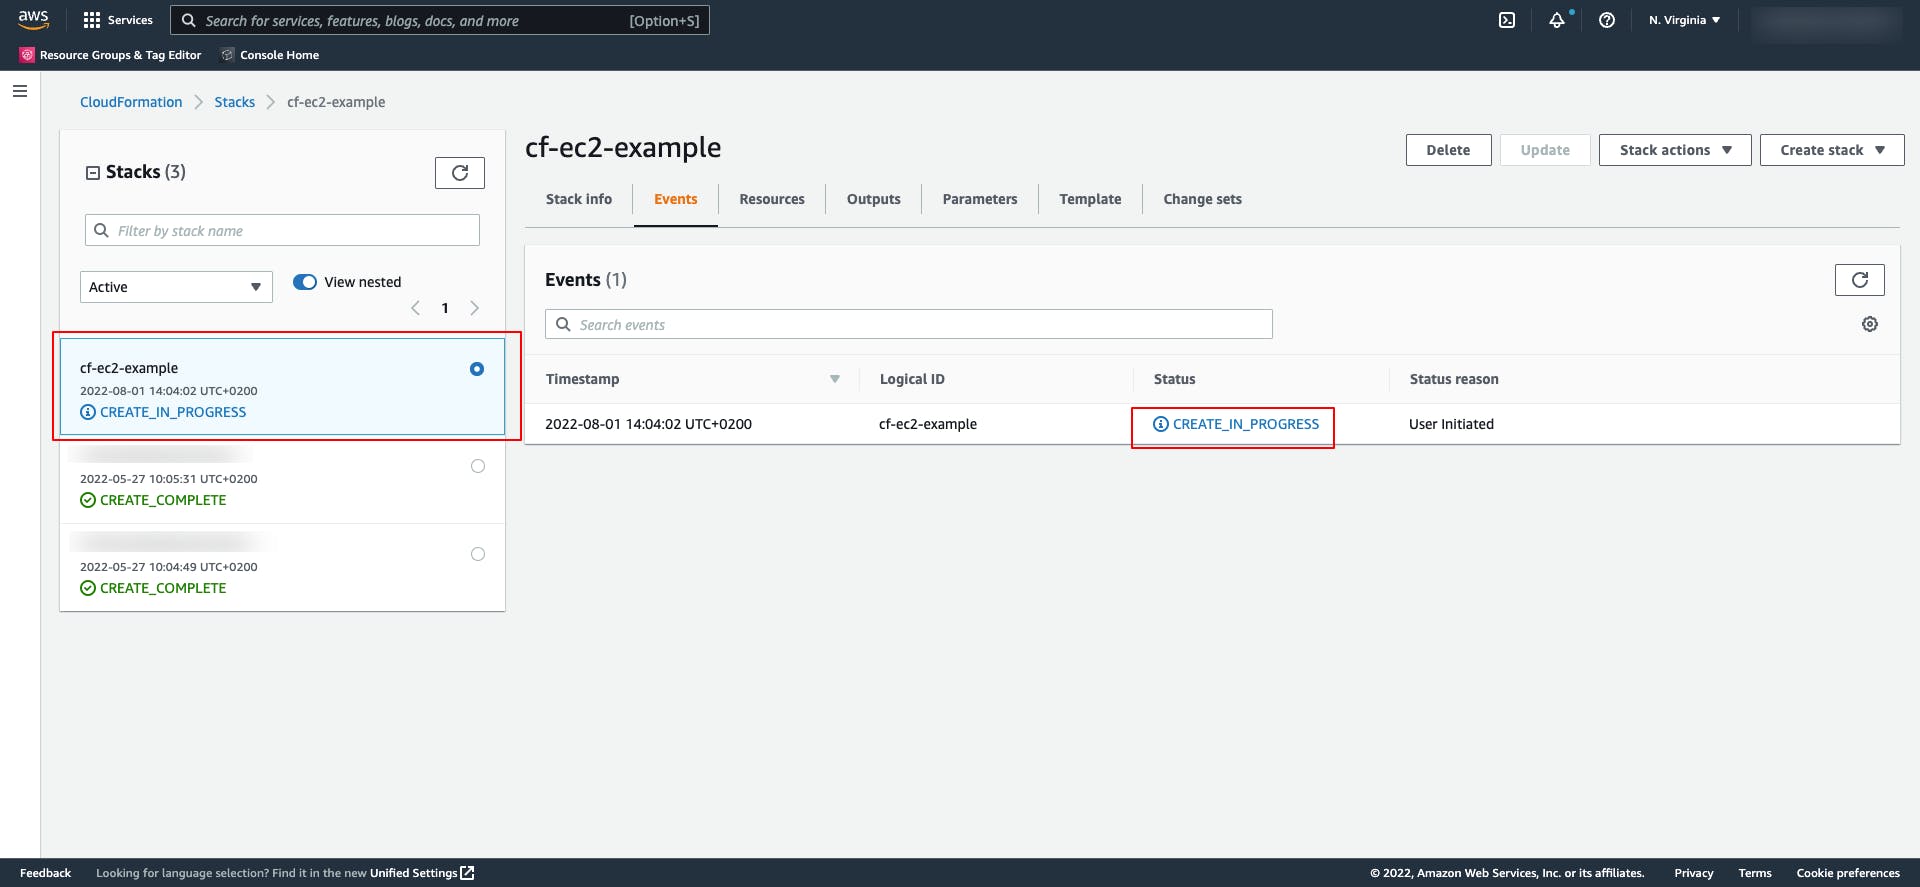
Once creating of AWS CF is initiated, you'll be presented with the following screen:
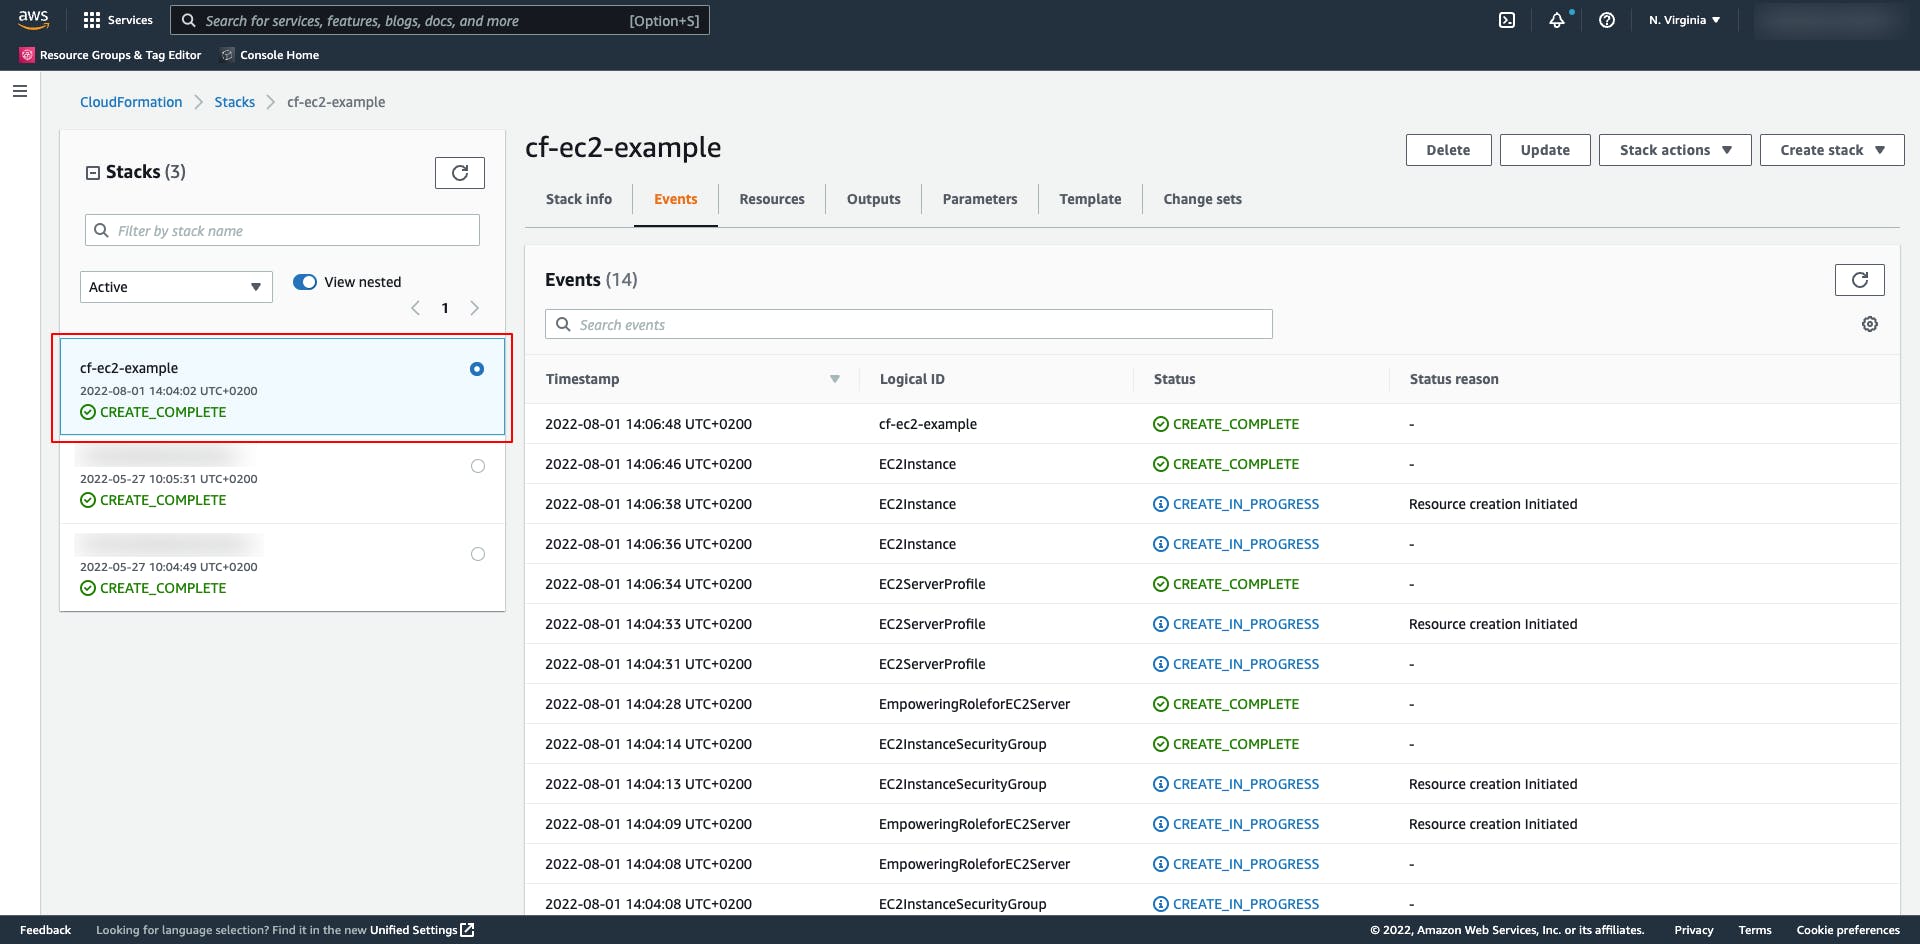
Wait for a couple of minutes and once initialization is finished - status will change to: CREATE_COMPLETE
Now let's jump back to "AWS EC2 management dashboard" and see if EC2 instance is created? As we can see, we have new EC2 instance created
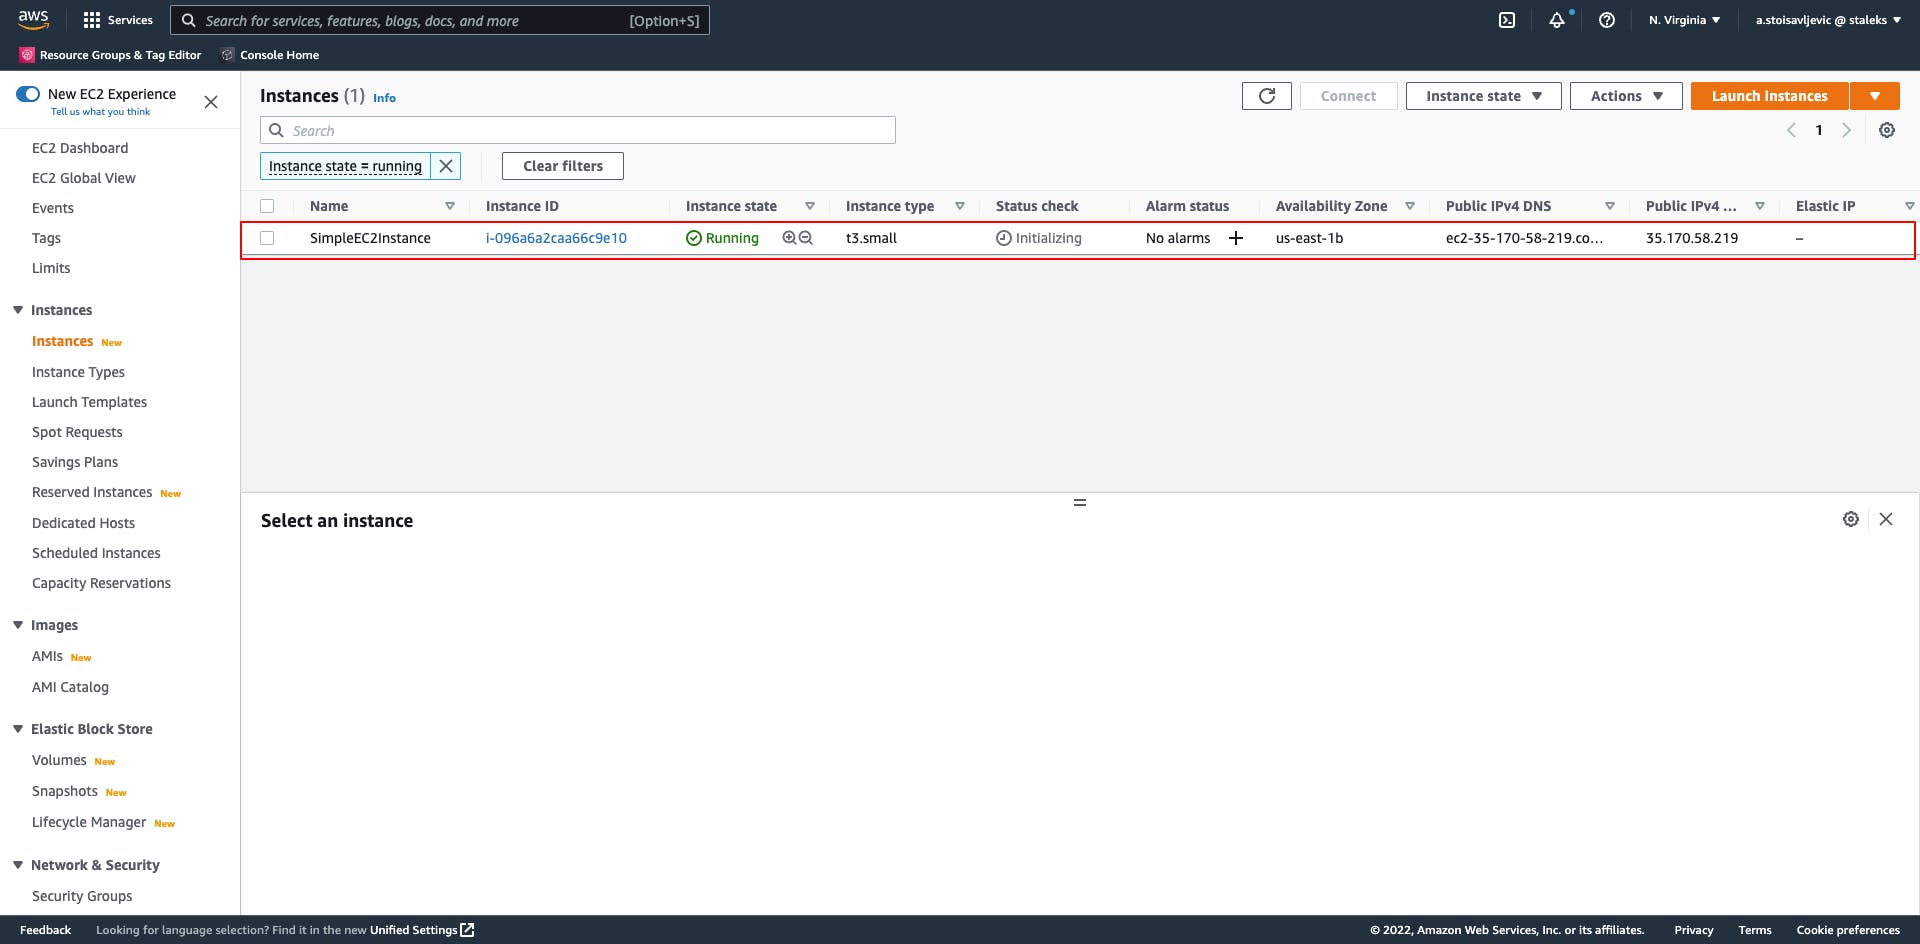
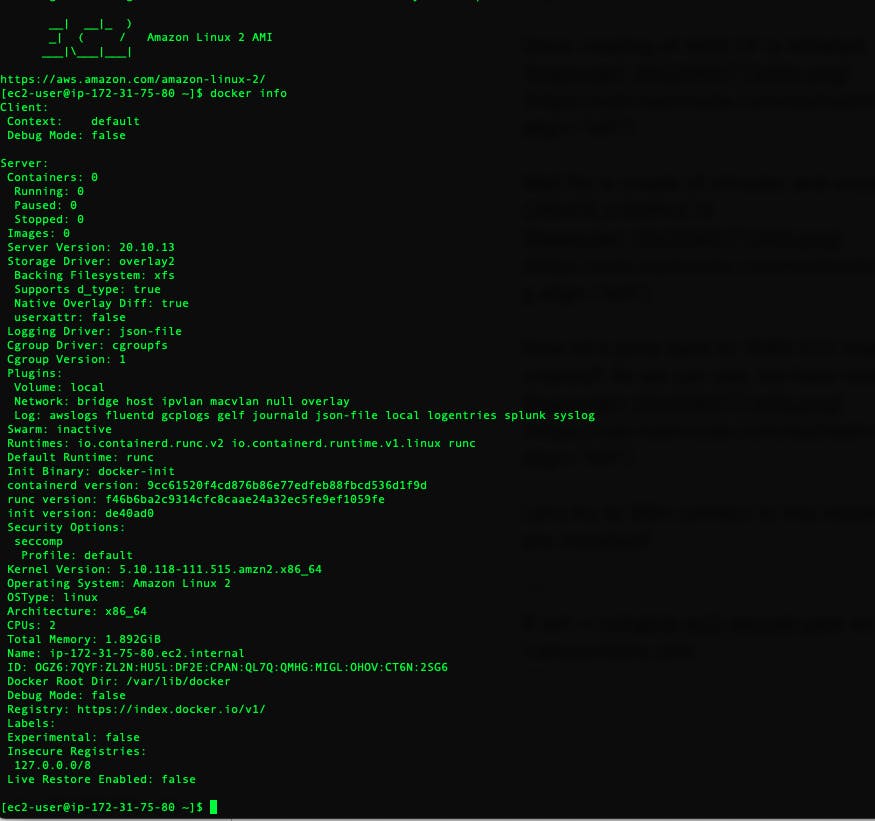
Let's try to SSH connect to this instance and check if Docker and Docker-Compose are pre-installed?
$ ssh -i nvirginia-ec2-keypair.pem ec2-user@ec2-35-170-58-219.compute-1.amazonaws.com
As we can see, Docker is installed.
What about Docker-Compose?
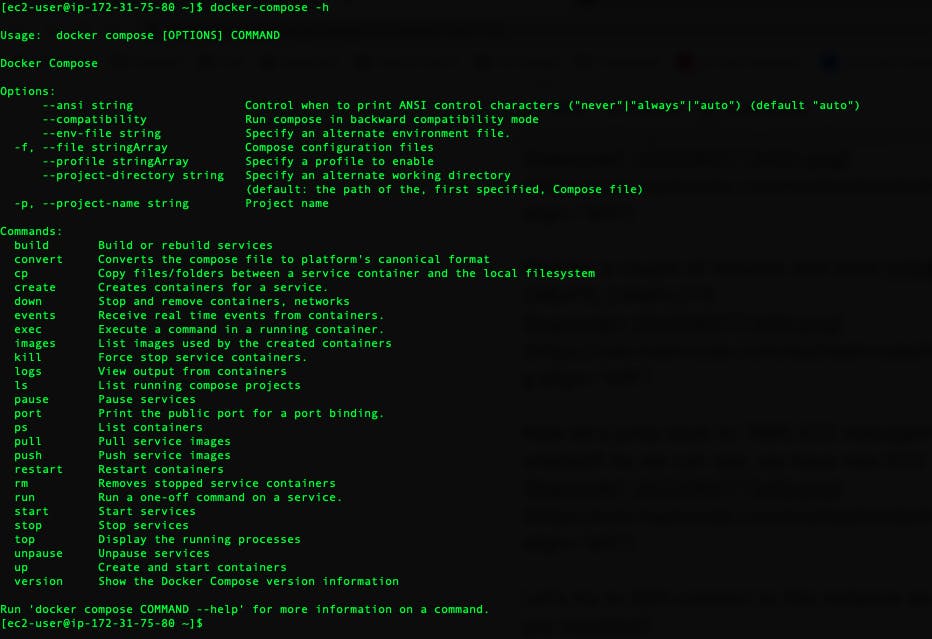
Everything is ready.
Finally let's test simple NGINX. Again, let's execute previous command:
$ docker run --name mynginx1 -p 80:80 -d nginx

Unable to find image 'nginx:latest' locally
latest: Pulling from library/nginx
461246efe0a7: Pull complete
060bfa6be22e: Pull complete
b34d5ba6fa9e: Pull complete
8128ac56c745: Pull complete
44d36245a8c9: Pull complete
ebcc2cc821e6: Pull complete
Digest: sha256:bd06dfe1f8f7758debd49d3876023992d41842fd8921565aed315a678a309982
Status: Downloaded newer image for nginx:latest
0402086f81dfd4af0ab9eb4defbe2c0eb5676b48d17e9324f4e6463e58c818a4
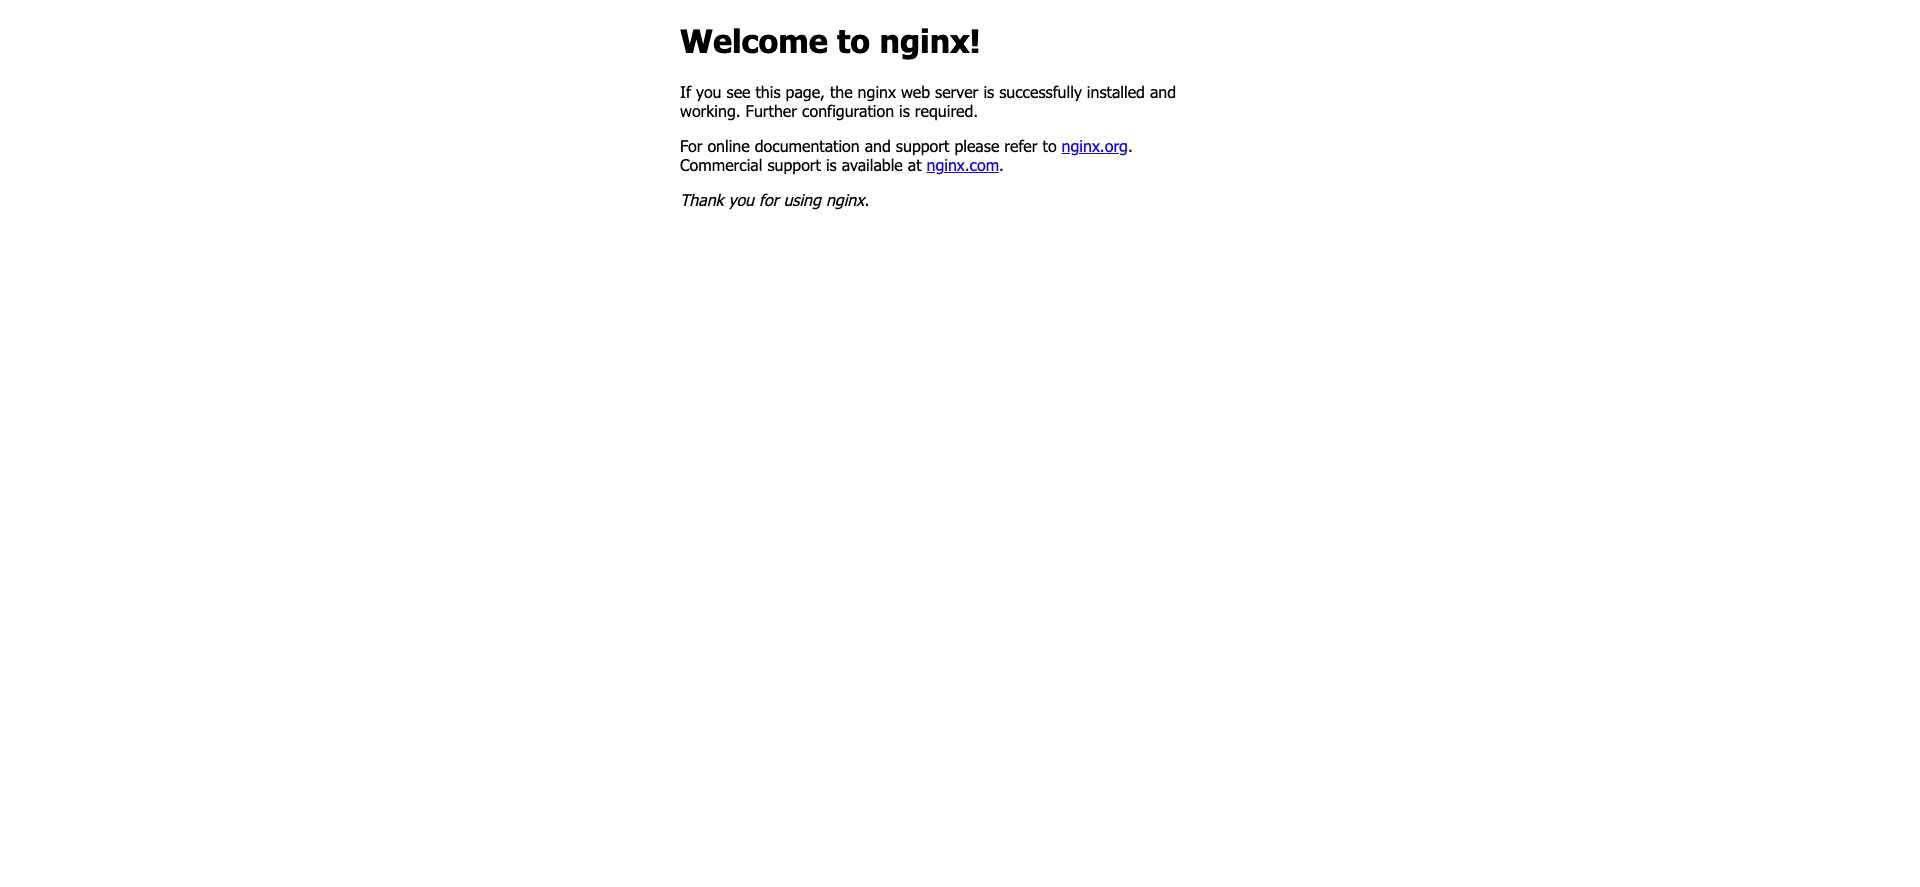
Go to browser and enter dedicated public URL of newly created EC2 instance:
http://ec2-35-170-58-219.compute-1.amazonaws.com
We've ended with same NGINX welcome screen as previously done with manual installation
Conclusion
I hope you find this "2-in-1" tutorial (manual + automate) useful and will trigger you to think of automation. It is ok to do some things once, twice but in case when you do things 3, 4 or more time then automation will save you a lot of time (and nerves :) )
