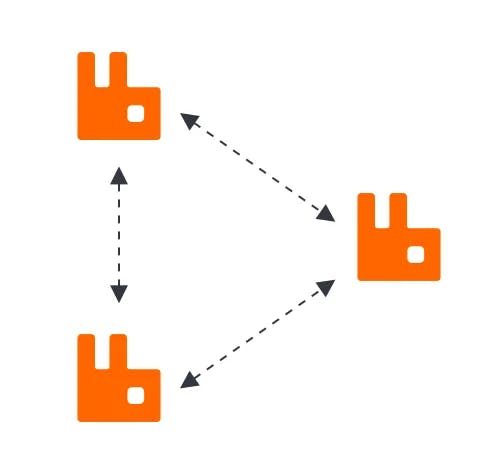
This is 2nd part of previous tutorial. Initial idea of the first part, was to create single node RabbitMQ server with rabbitmq-mqtt plugin enabled, to test connection and check if sending messages works. Now we are going to extend our knowledge and create 3 nodes RabbitMQ cluster. Final goal should be working RabbitMQ cluster of 3 nodes.
Some of the stuff, regarding how to setup single node RabbitMQ with MQTT, was already covered so it won't be part of this tutorial. If you need to refer to it please go to previous post and check there.
Prerequisites
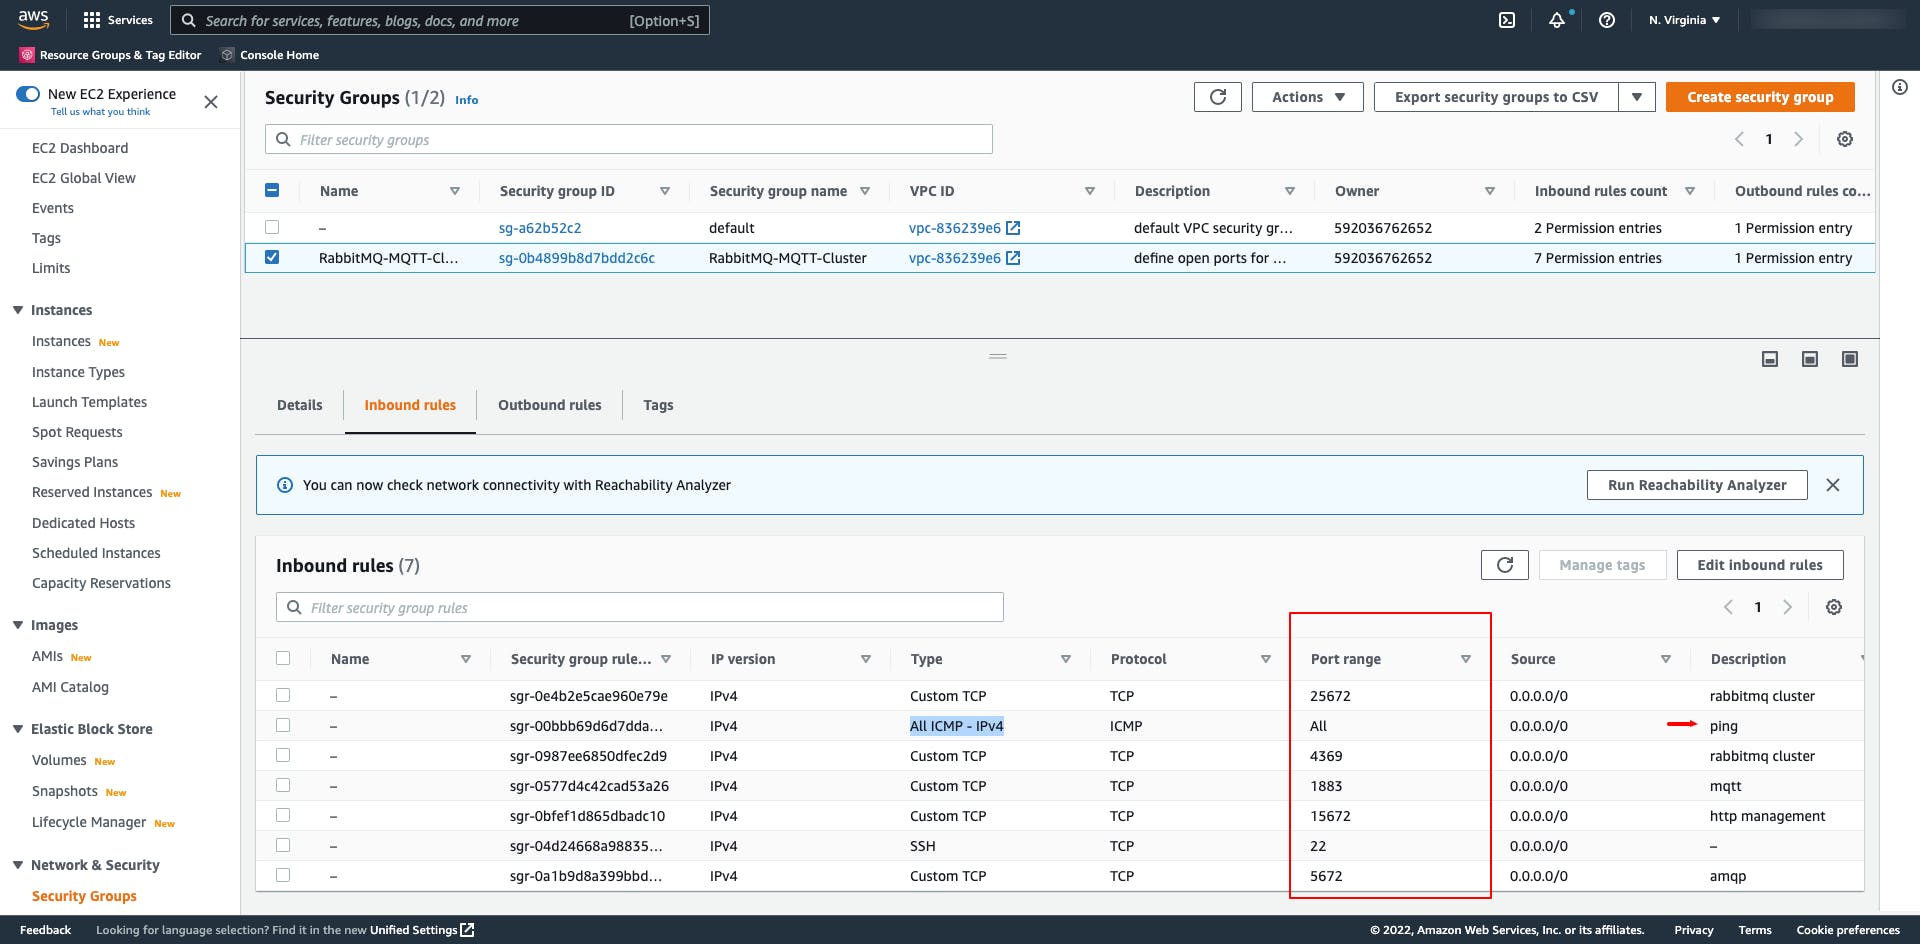
First step in this post, similar to previous one, will be to create Security Group (sg). Here, due to fact that we will need to establish cluster, small changes must take effect. According to RabbitMQ clustering documentation, additional ports must be open in order peer discovery to take place.
Except already used ports in previous post (22, 1883, 5679 and 15679), we will create new Security Group with additional opened ports 4369 and 25672. Also let's open port for ping: Type: All ICMP - IPv4, Protocol: ICMP.
Following image shows created new Security Group, with name "RabbitMQ-MQTT-Cluster" and attached 7 Inbound security rules.
Creating 3 EC2 instances
Now we can start creating 3 EC2 instances, nodes of the future cluster. We will keep everything same as it was explained in previous post, with just two modifications. First modification is to attach newly created aforementioned security group - "RabbitMQ-MQTT-Cluster". Second modification is related to "Network" settings. Since we want to make sure to have robust and highly available solution we want to make sure to place all three of EC2 instances in different availability zones (AZs) so that our message broker solution can continue to work even in case of some disaster in one of region data centers.
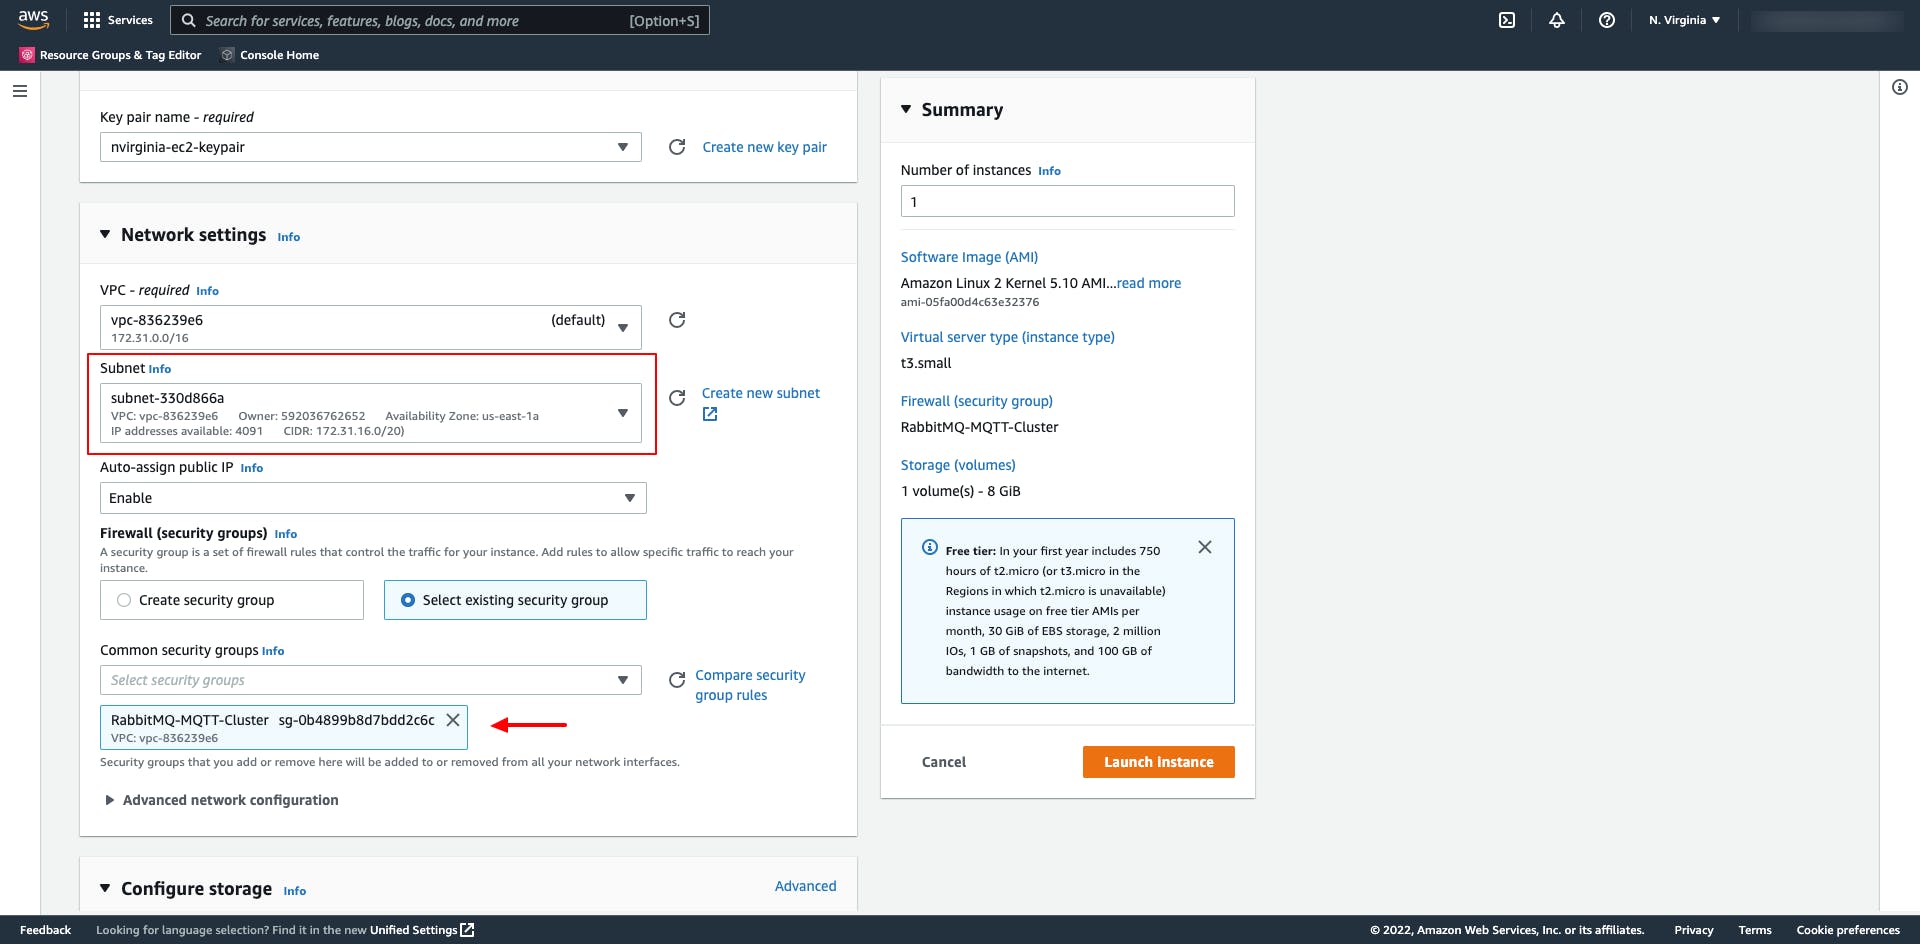
Therefore EC2 instances will be created in us-east-1a, us-east-1b and us-east-1c, respectively.
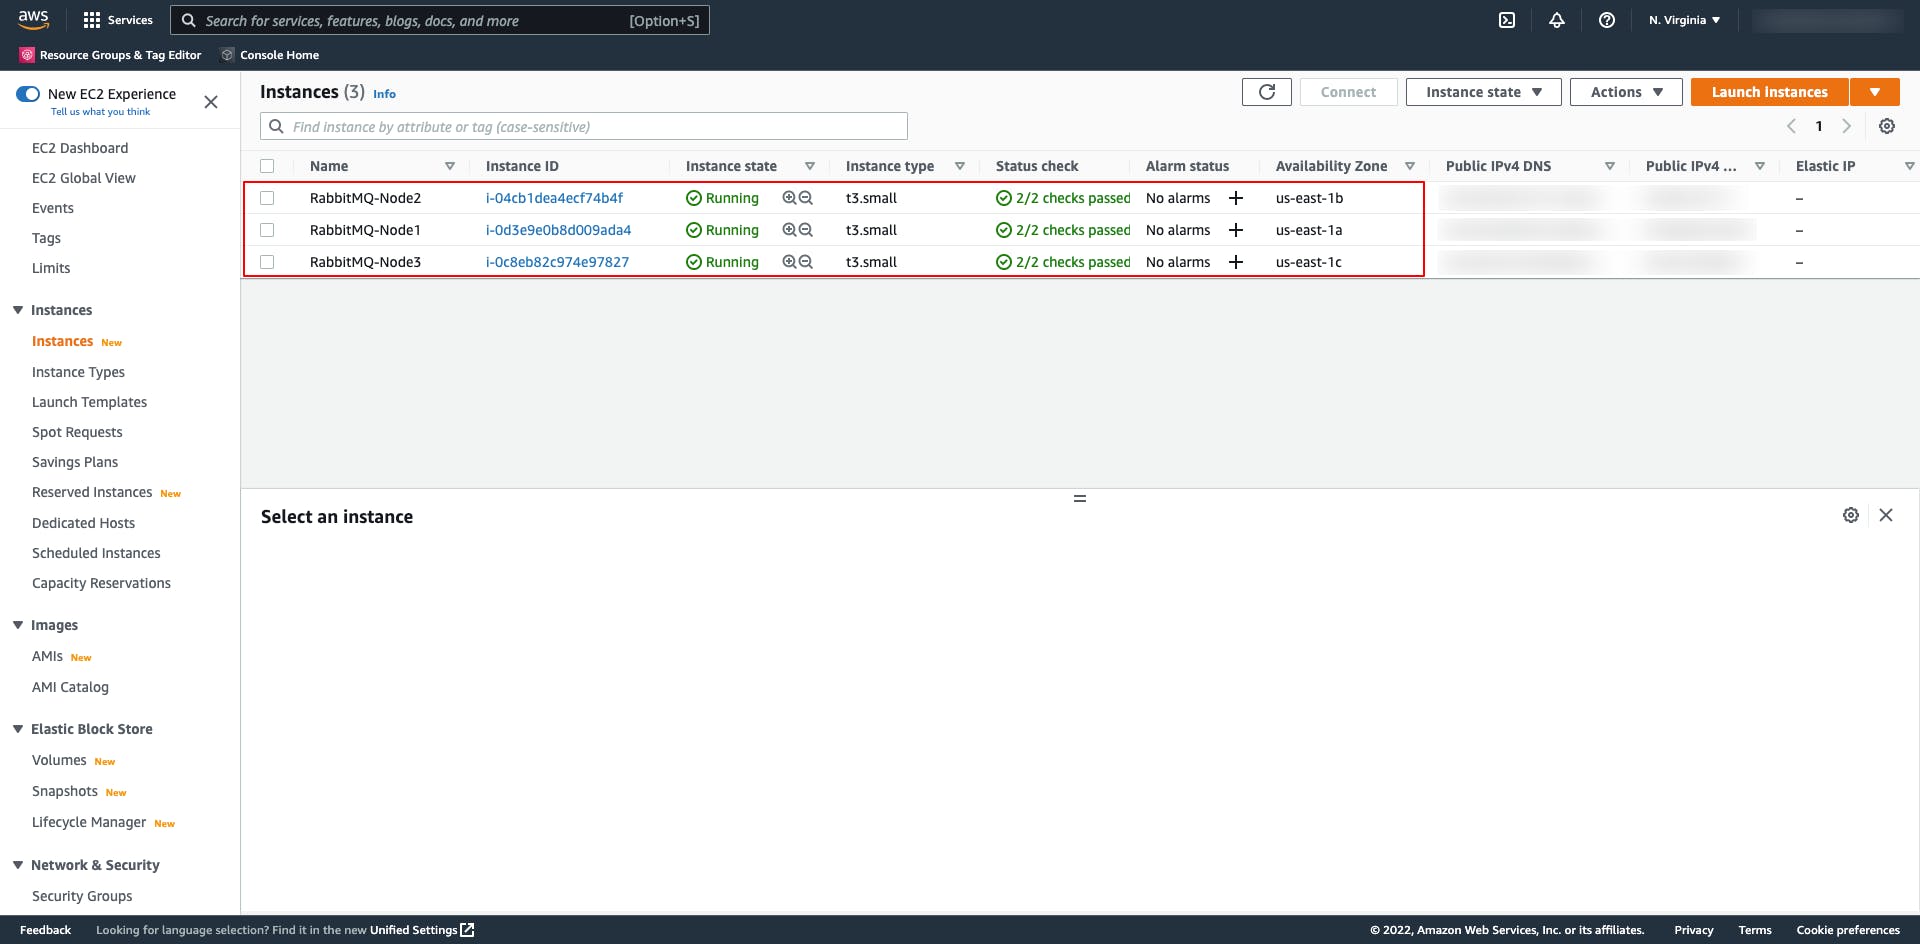
After these 3 nodes are created/started now let's try connecting each of them. Private IP addresses for these 3 nodes are:
- node1 - 172.31.30.95,
- node2 - 172.31.71.2 and
- node3 - 172.31.57.178
Before we proceed to Erlang and RabbitMQ installation, as described in previous post, let's check connectivity between these three nodes. In order to support that, let's change /etc/hosts file. The format of this file should be IP-address hostname. Make following changes:
172.31.30.95    node1
172.31.71.2     node2
172.31.57.178   node3
Now we can test connectivity between these nodes if we ping nodes 2 & 3 from node1 and vice-versa.
[ec2-user@ip-172-31-30-95 ~]$ ping -c 3 node2
PING node2 (172.31.71.2) 56(84) bytes of data.
64 bytes from node2 (172.31.71.2): icmp_seq=1 ttl=255 time=0.736 ms
64 bytes from node2 (172.31.71.2): icmp_seq=2 ttl=255 time=0.761 ms
64 bytes from node2 (172.31.71.2): icmp_seq=3 ttl=255 time=0.816 ms

--- node2 ping statistics ---
3 packets transmitted, 3 received, 0% packet loss, time 2050ms
rtt min/avg/max/mdev = 0.736/0.771/0.816/0.033 ms
[ec2-user@ip-172-31-30-95 ~]$ ping -c 3 node3
PING node3 (172.31.57.178) 56(84) bytes of data.
64 bytes from node3 (172.31.57.178): icmp_seq=1 ttl=255 time=1.26 ms
64 bytes from node3 (172.31.57.178): icmp_seq=2 ttl=255 time=0.854 ms
64 bytes from node3 (172.31.57.178): icmp_seq=3 ttl=255 time=0.830 ms

--- node3 ping statistics ---
3 packets transmitted, 3 received, 0% packet loss, time 2028ms
rtt min/avg/max/mdev = 0.830/0.981/1.261/0.201 ms
Erlang and RabbitMQ installation
Now we can proceed and install all described in previous post:
- Erlang & RabbitMQ prerequisites (
unixODBC ncurses ncurses-compat-libs socat logrotate), - Erlang v25 and
- RabbitMQ v3.10.7
After successful installation, apply all other Configuration options (start RabbitMQ server, enable starting RabbitMQ on startup, enable RabbitMQ management plugin, enable RabbitMQ MQTT plugin, add new Administration user, delete default guest account).
After the we ended up with 3 independent RabbitMQ servers. You can check if all of them are working by checking their WebUI management interface.
If so, let's start joining all three of them in one RabbitMQ cluster.
Joining nodes in RabbitMQ cluster
Erlang cookie - security
One of the key parts of cluster enablement is Erlang cookie. We will proceed with creating cluster in a way to fetch this Erlang cookie value from node1 and then to copy/paste it in other 2 nodes (node2 & node3).
You can find Erlang cookie value on node1 in following folder /var/lib/rabbitmq.
$ cd /var/lib/rabbitmq

$ sudo cat .erlang.cookie
Take a note of this 20 char array: KZWPFXZRZZGNBBXKBIYQ.
Use this value and copy it to same file in node2 and node3. After applying changes now let's restart node2 and node3 RabbitMQ server;
$ sudo systemctl stop rabbitmq-server

$ sudo systemctl start rabbitmq-server
In order to join into a cluster, RabbitMQ needs to evaluate each RabbitMQ node hostname in order to achieve uniqueness of member of a cluster.
Detect node names
There is a useful utility that we can use in order to ensure that each node is unique, before joining RabbitMQ cluster.
Node1
[ec2-user@ip-172-31-30-95 ~]$ sudo rabbitmqctl eval "node()."
'rabbit@ip-172-31-30-95'
Node2
[ec2-user@ip-172-31-71-2 ~]$ sudo rabbitmqctl eval "node()."
'rabbit@ip-172-31-71-2'
Node3
[ec2-user@ip-172-31-57-178 ~]$ sudo rabbitmqctl eval "node()."
'rabbit@ip-172-31-57-178'
Now let's stop rabbitmq app. on node2 and node3 and execute command to join node2 and node3 to join node1.
Node2
$ sudo rabbitmqctl stop_app

$ sudo rabbitmqctl reset

$ sudo rabbitmqctl join_cluster rabbit@ip-172-31-30-95

$ sudo rabbitmqctl start_app

$ sudo rabbitmqctl cluster_status
Same should be applied to node3.
Node3
$ sudo rabbitmqctl stop_app

$ sudo rabbitmqctl reset

$ sudo rabbitmqctl join_cluster rabbit@ip-172-31-30-95

$ sudo rabbitmqctl start_app

$ sudo rabbitmqctl cluster_status
Now we can check RabbitMQ Web UI interface on 1st node to verify that we now can see all 3 nodes.
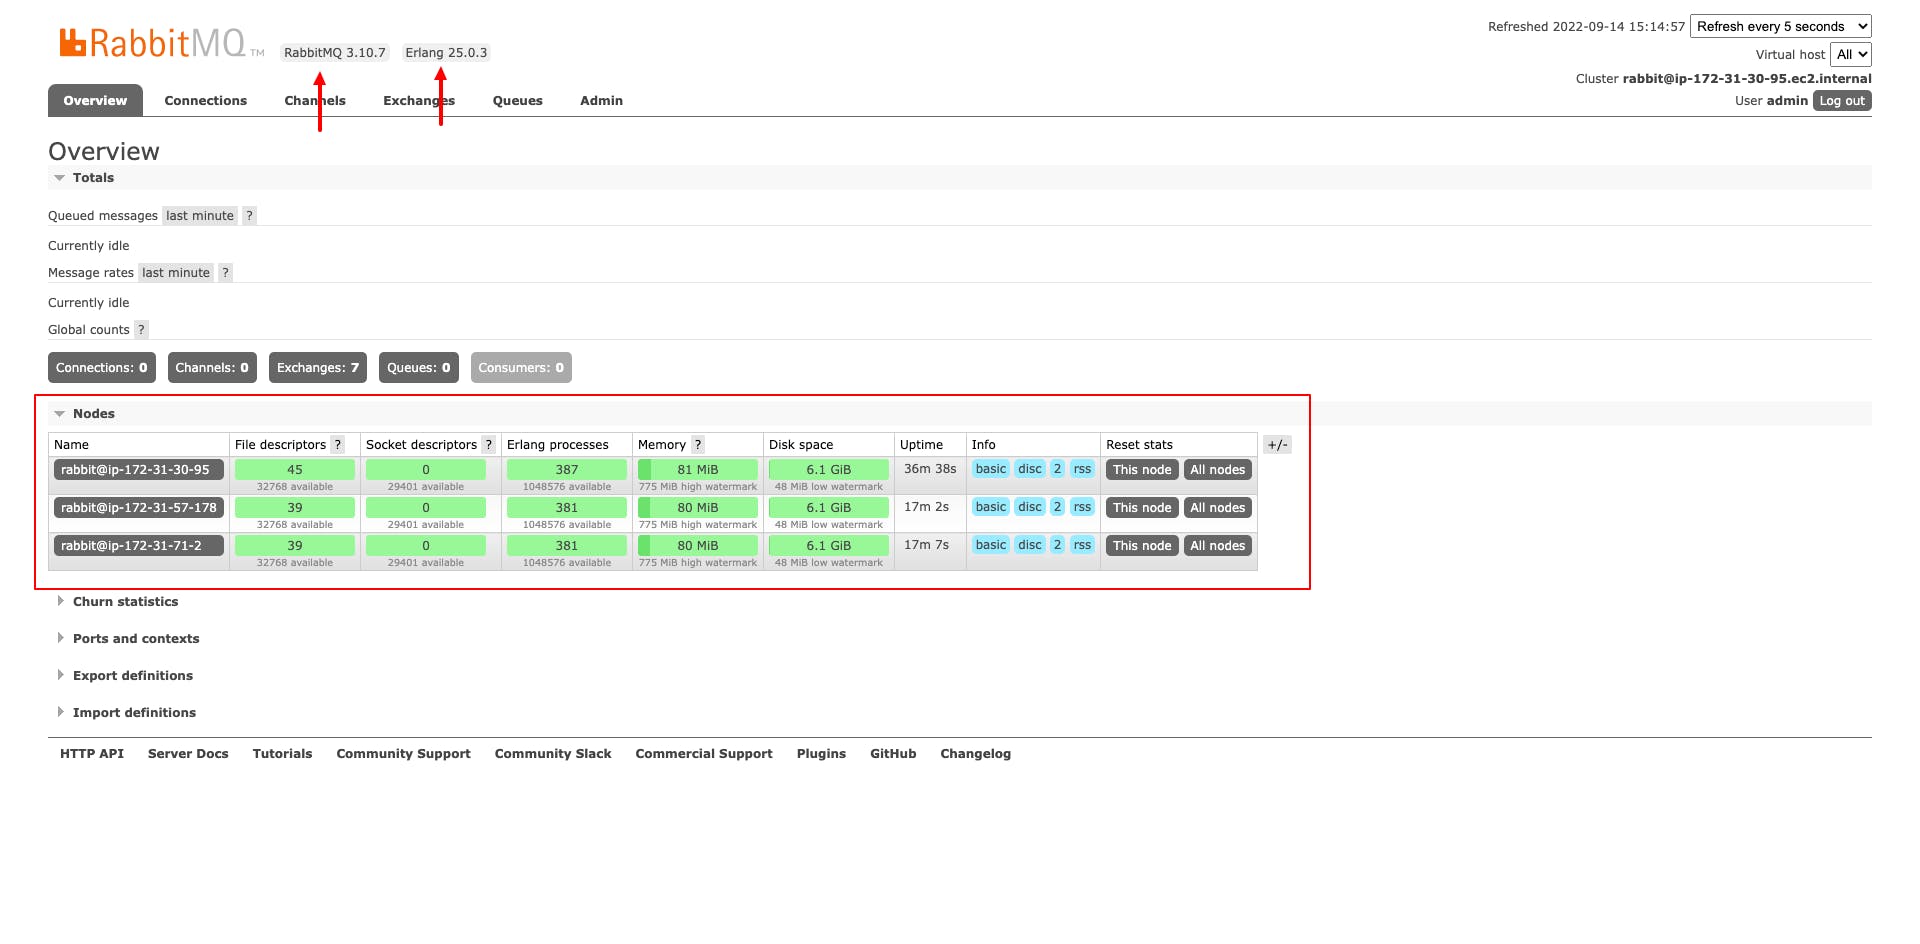
As we can see, there are 3 nodes that we've added to final RabbitMQ cluster.
What is Replicated
All data/state required for the operation of a RabbitMQ broker is replicated across all nodes. An exception to this are: message queues, which by default reside on one node, though they are visible and reachable from all nodes. To replicate queues across nodes in a cluster, use a queue type that supports replication.
This means that queue of type Classic won't replicate on other nodes. This is not what we want to achieve. Our goal is to increase resilience of our system. In case that one of AZs goes down, degrade in performances or some other disaster happen in one of region data centers, our solution must be able to recover from such situation and continuously work.
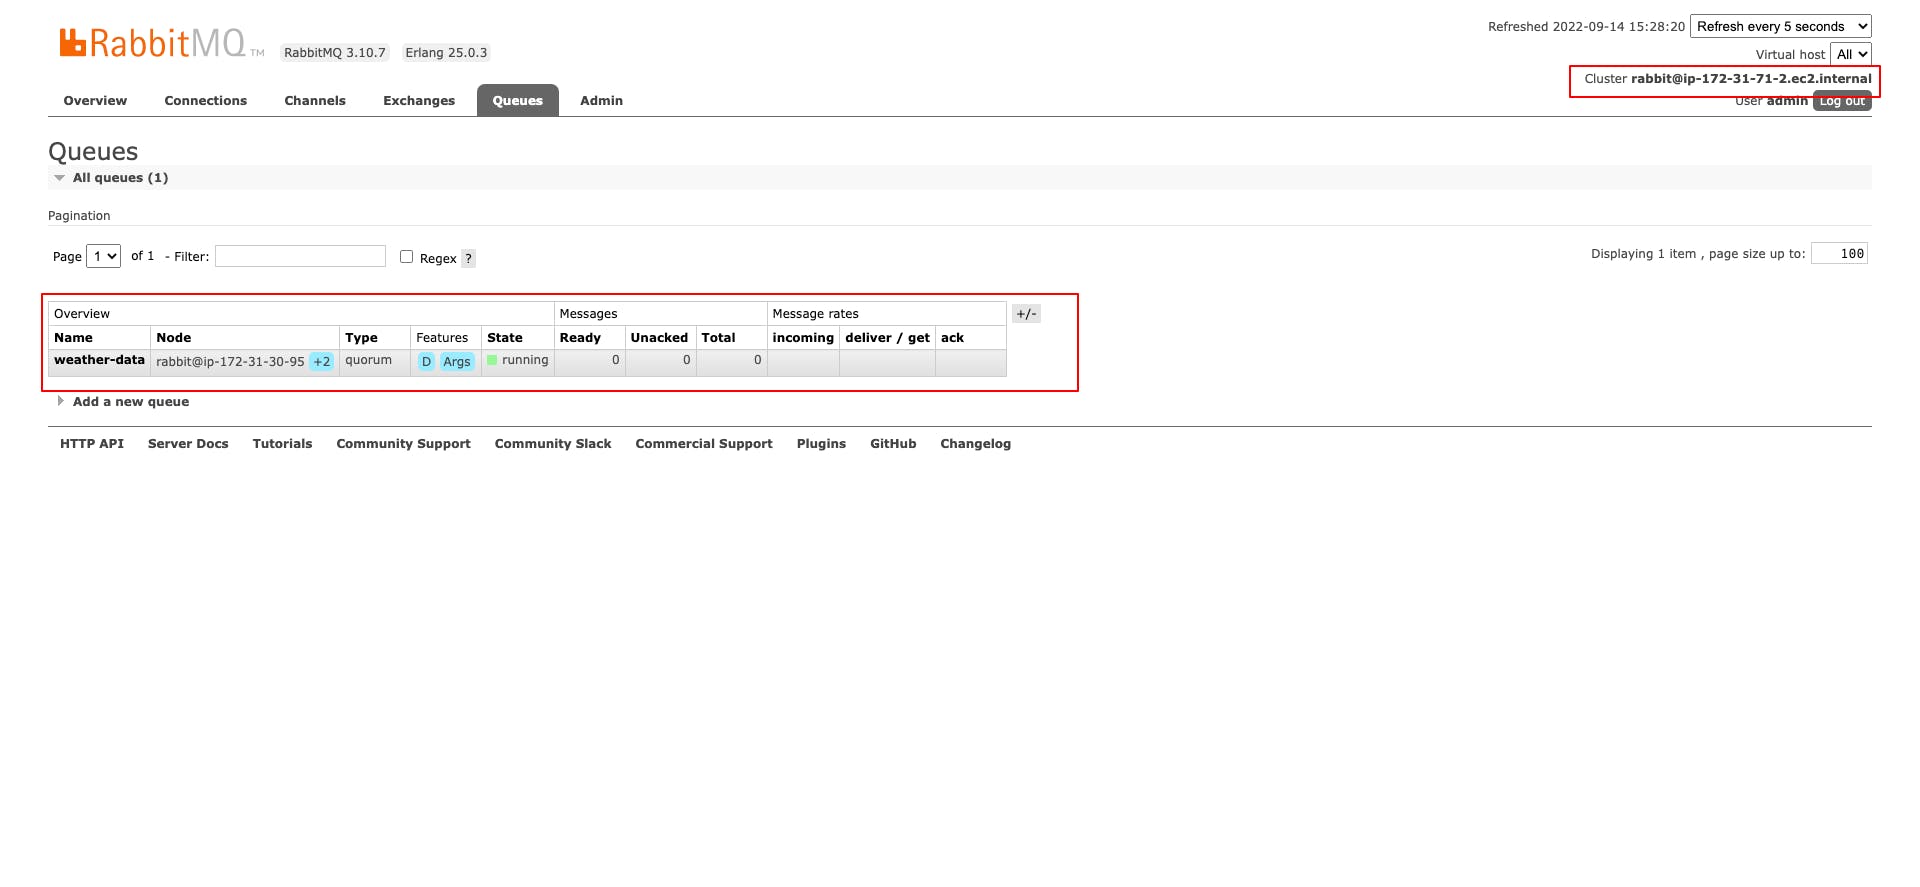
In order to do so, let's create new queue with same name as before weather-data, but this time let's make a Type: "Quorum".
Now if I login to RabbitMQ Web UI management interface on node2 or node3, using their respective IP_ADDRESSes (IP_ADDRESS:15672), using same credentials as for node1, we can see that newly created queue is visible from both of those other two nodes, no matter that I've created this queue on node1.
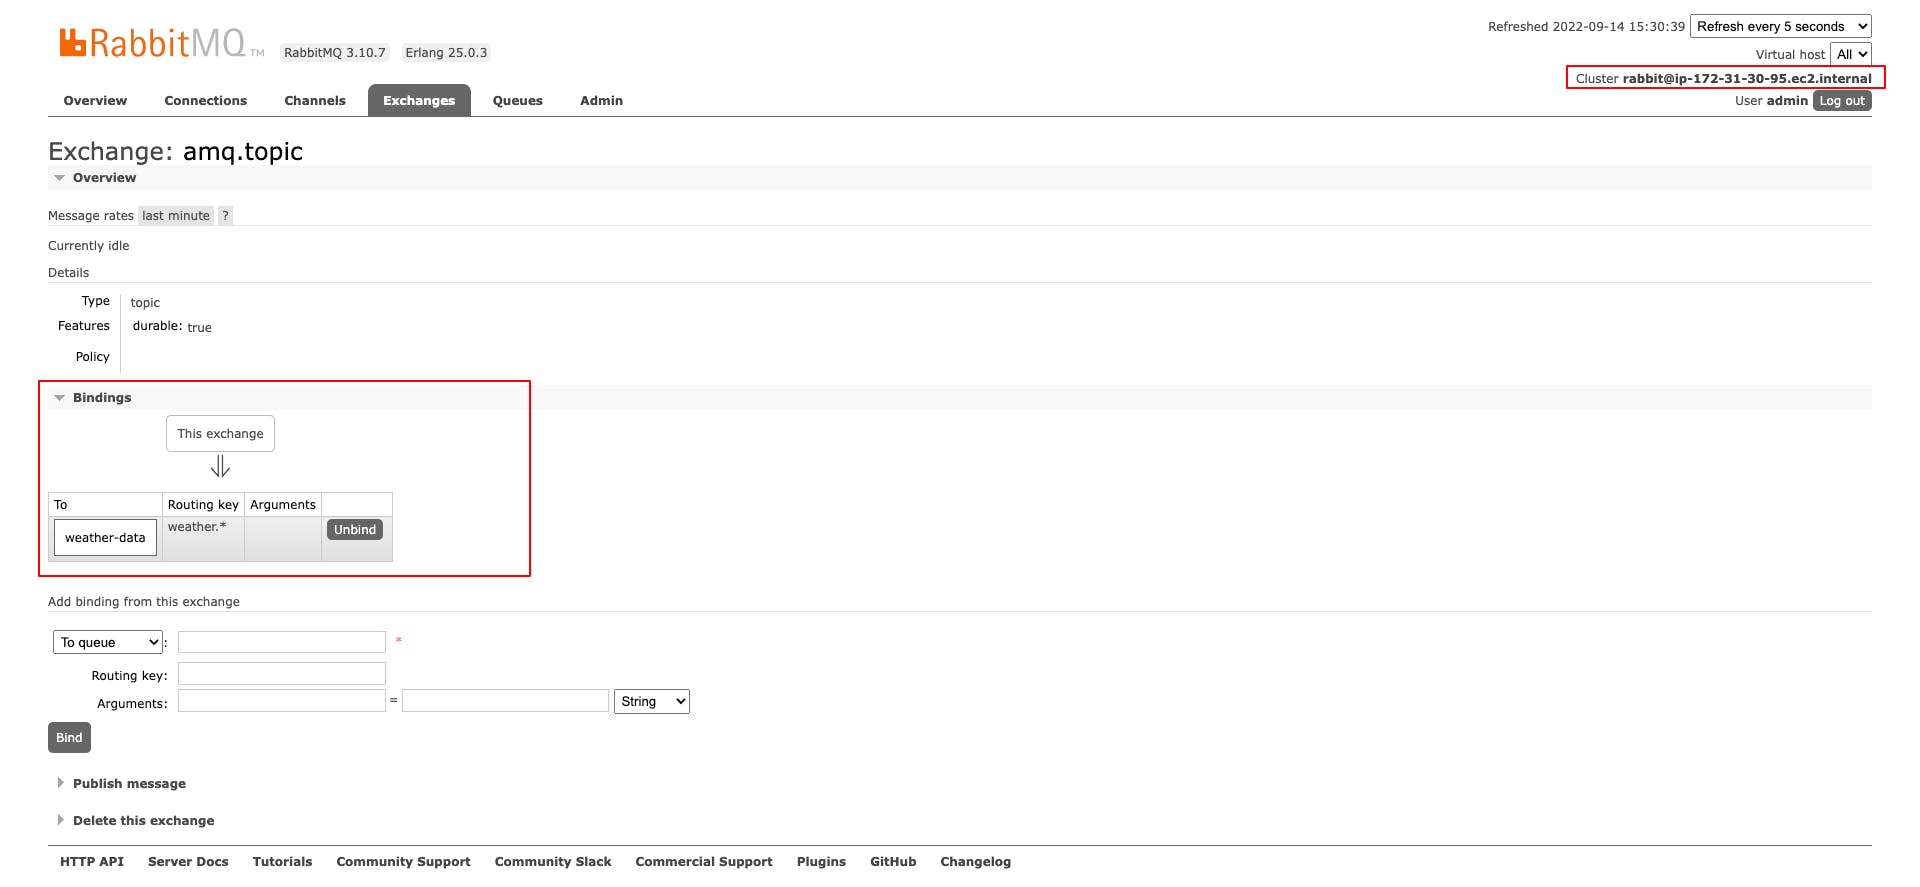
Now let's establish Binding between DEFAULT exchange topic for MQTT (amq.topic) and this newly created queue, with again same Routing key as we had before: weather.*.
MQTT testing
Let's do another round of testing with nice desktop app MQTT X (mqttx.app).
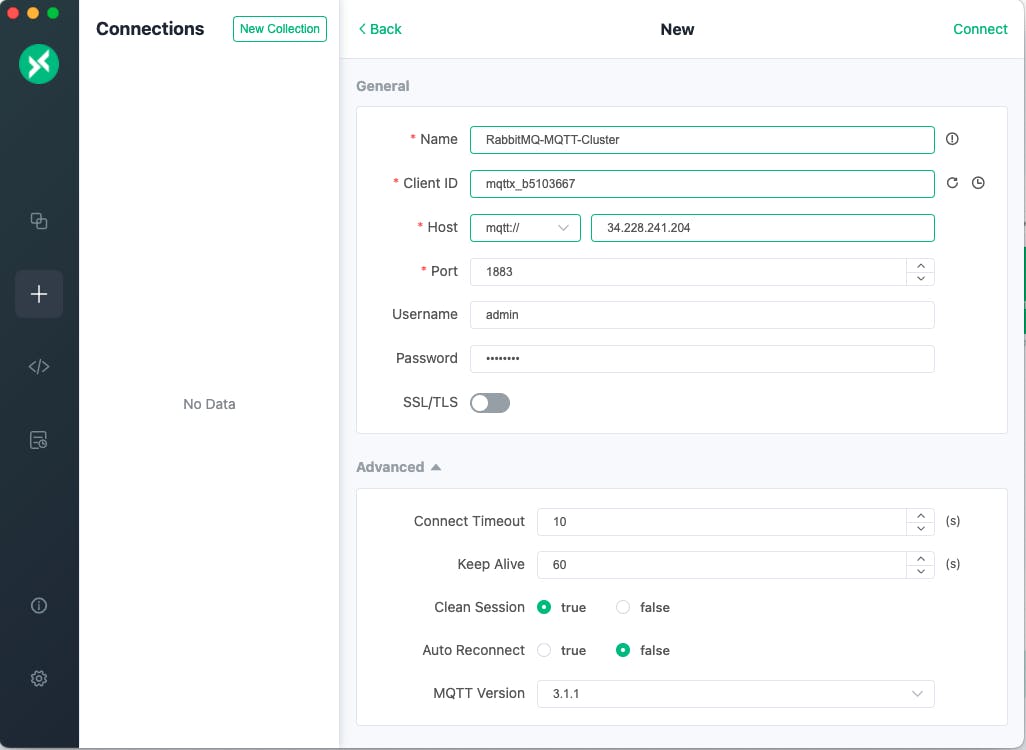
First let's create "New Connection", providing details of a MQTT connection: host, credentials, MQTT version:
Then let's add topic (subscription) weather.office:
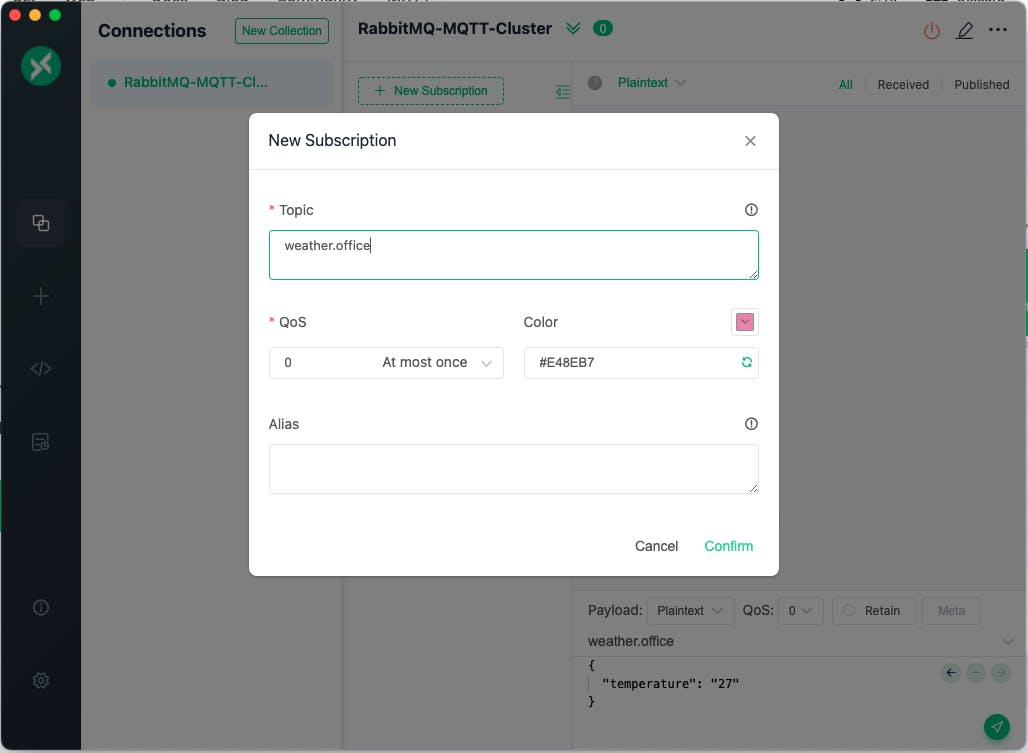
At last provide message (in a JSON format, temperature and it's value: 27) and click on send.
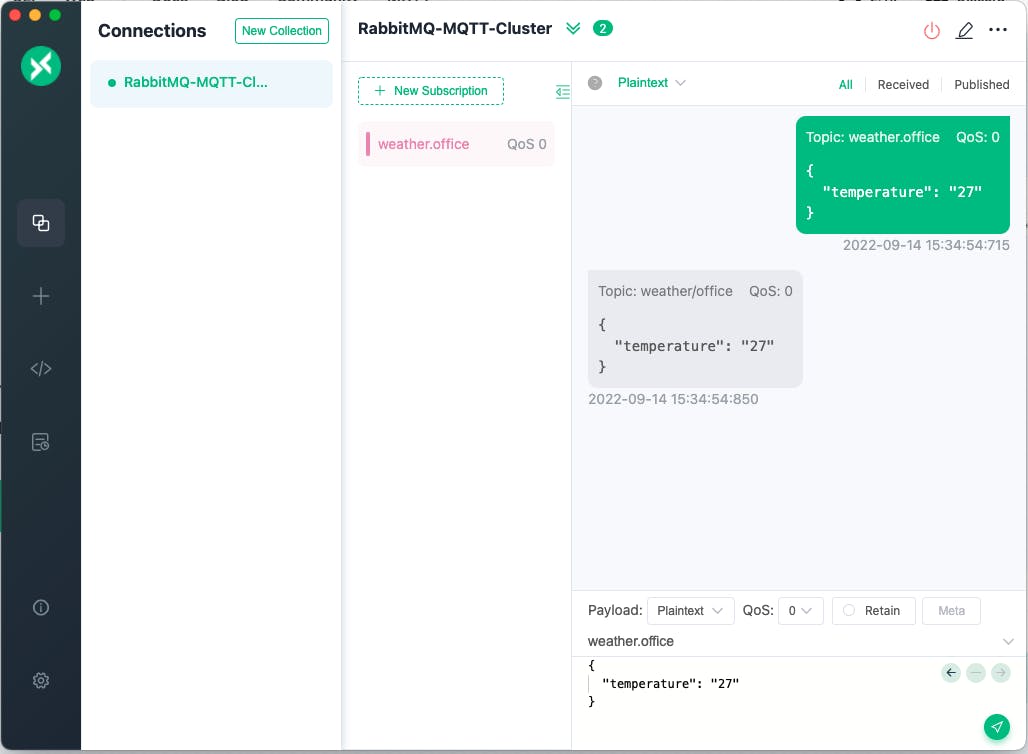
In order to verify that message can be consumed from any node (replication took part), let's go to RabbitMQ Web UI interface and execute Get message from UI:
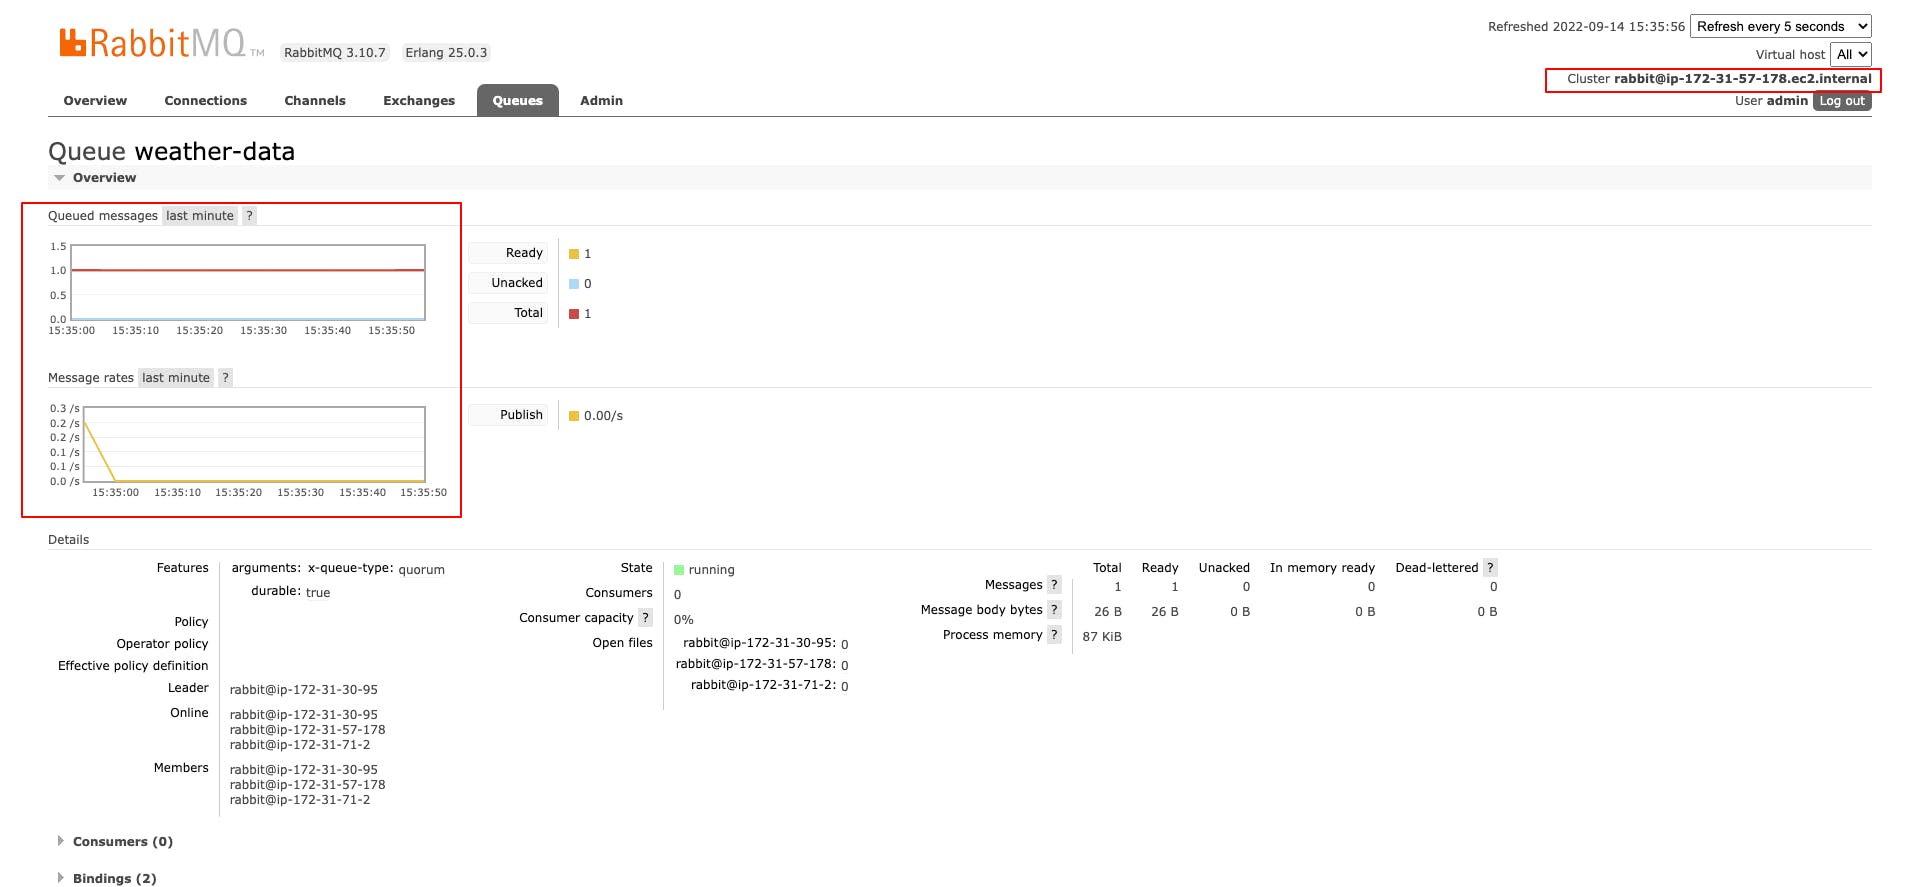
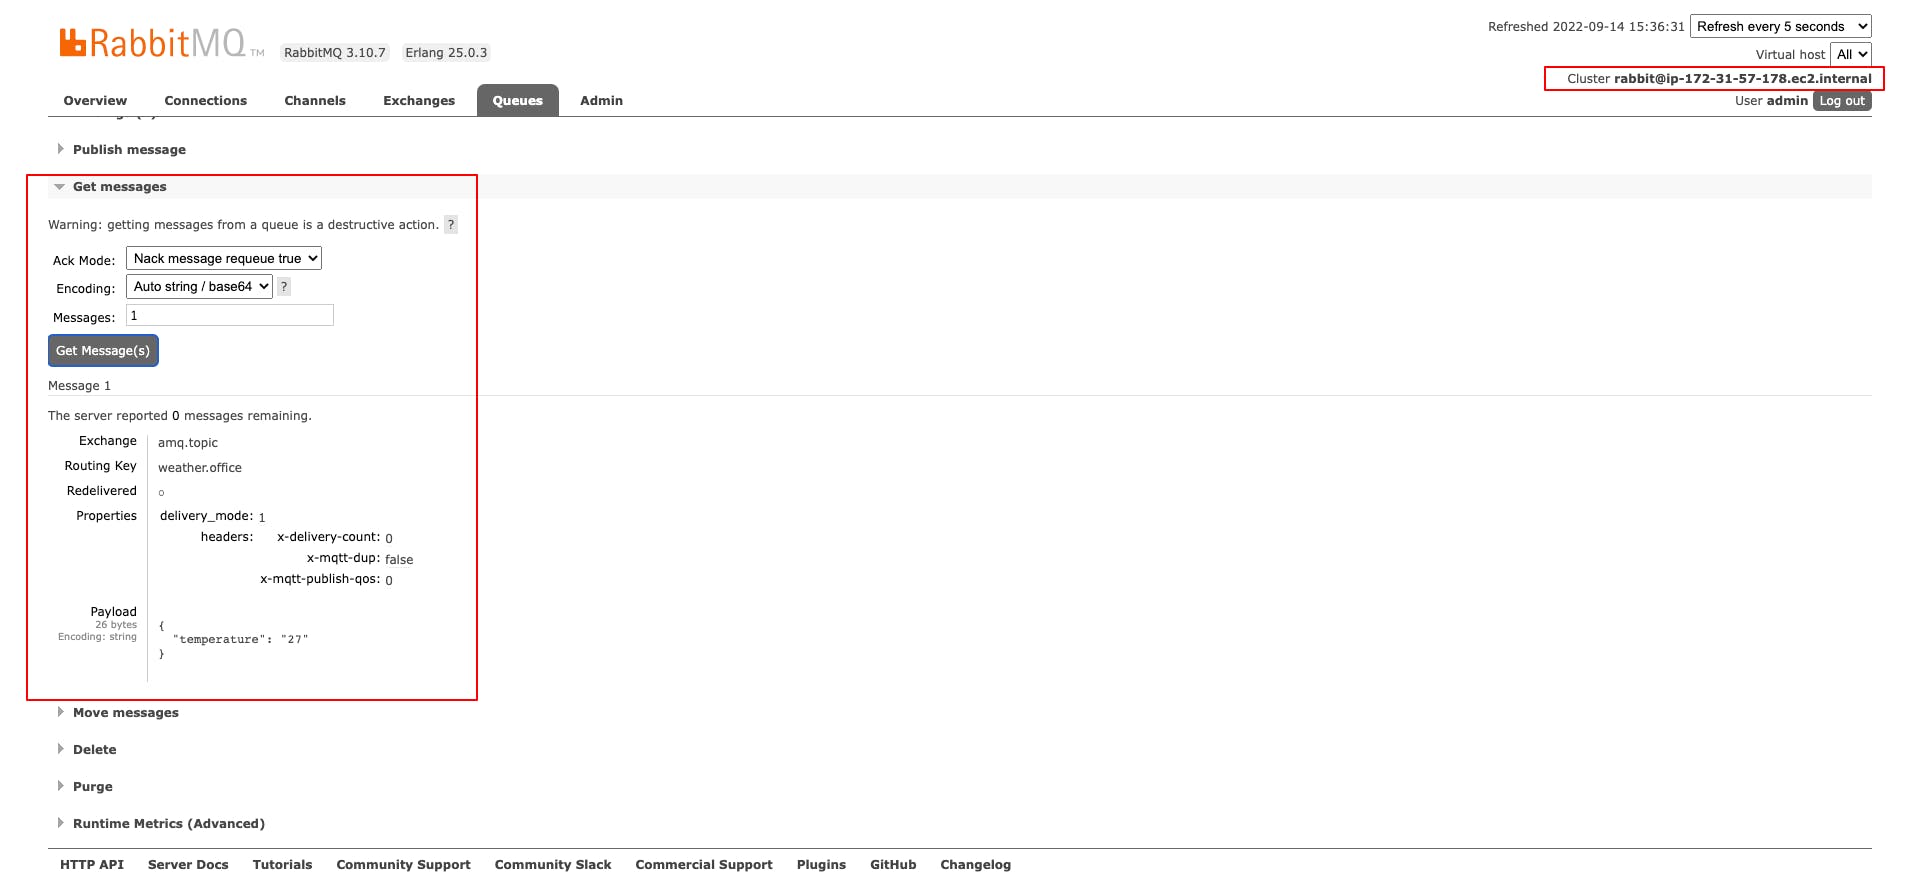
We witness that message that we've sent from MQTT X, client, ended up and can be seen from node3 in a RabbitMQ cluster.
Conclusion
This 2 post tutorial aimed to help you through the process of setting up RabbitMQ Server on a single node EC2 instance and cluster. You’ve also learned the basic administration of the RabbitMQ server and how to create queues that support high availability on RabbitMQ.

