Table of contents
- IoT in Agriculture: Smart Farming Using MQTT Protocol
- Setting up RabbitMQ in AWS by using EC2 with MQTT support
- MQTT testing
- MQTT X desktop application
- Conclusion
IoT in Agriculture: Smart Farming Using MQTT Protocol
Latest trends in agriculture show that a demand for better crops is rapidly increasing. In order to achieve that goal development of crop production needs proper management. The principle objective is to reduce breach between agriculture and digital world. Agriculture, farming and breeding live stock is ready for "4th Industrial Revolution". We can accomplish this by implementing usage of technology, e.g. using IoT and sensors to enhance the efficiency of the farming systems. If we succeed in providing farmers facility to utilize their time and interests we can help them to complete their potential. Today, we are witnessing that there are a lot of custom-built, cost-effective devices that make usage of MQTT protocol.
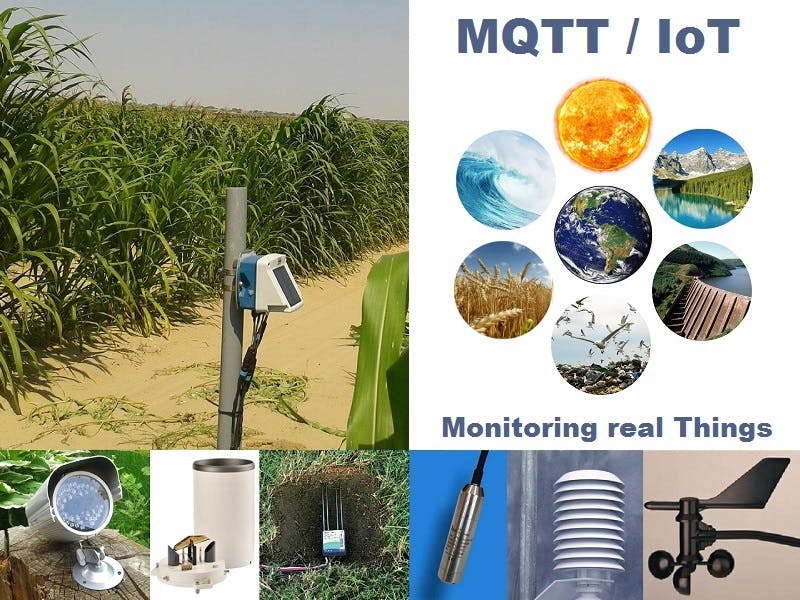
The major aim is to collect instantaneous data on agricultural field using instruments and sensors (that supports MQTT protocol), transfers data through the network systems and collects reports about the soil condition so that the farmers can be informed about proper maintenance of the fields and thus maintain ideal crop growing environment. These factors include the temperature, moisture for soil, light availability, air temperature, humidity and criteria of pH, etc. These has to be taken into account presenting conditions of the plant.
Acquiring data and generating reports in human readable form is just first step. Further more these systems can be made more complex involving ML and AI. At the moment we see a trend in #agtech that IoT based systems can also influence in following: automated irrigation systems, frost protection systems, fertilization systems, etc.
The idea behind this is to start with series of blog posts explaining main components of more complex #agtech system solutions. This post will cover key parts of such infrastructure system, message broker, that can support MQTT IoT protocol.
Setting up RabbitMQ in AWS by using EC2 with MQTT support
Launch the EC2 instance
I'll first start simple, with single node of RabbitMQ server and then in the following part will explain why you should go with RabbitMQ cluster in PRODUCTION environment.
- Login to AWS account and go to "Console Home".
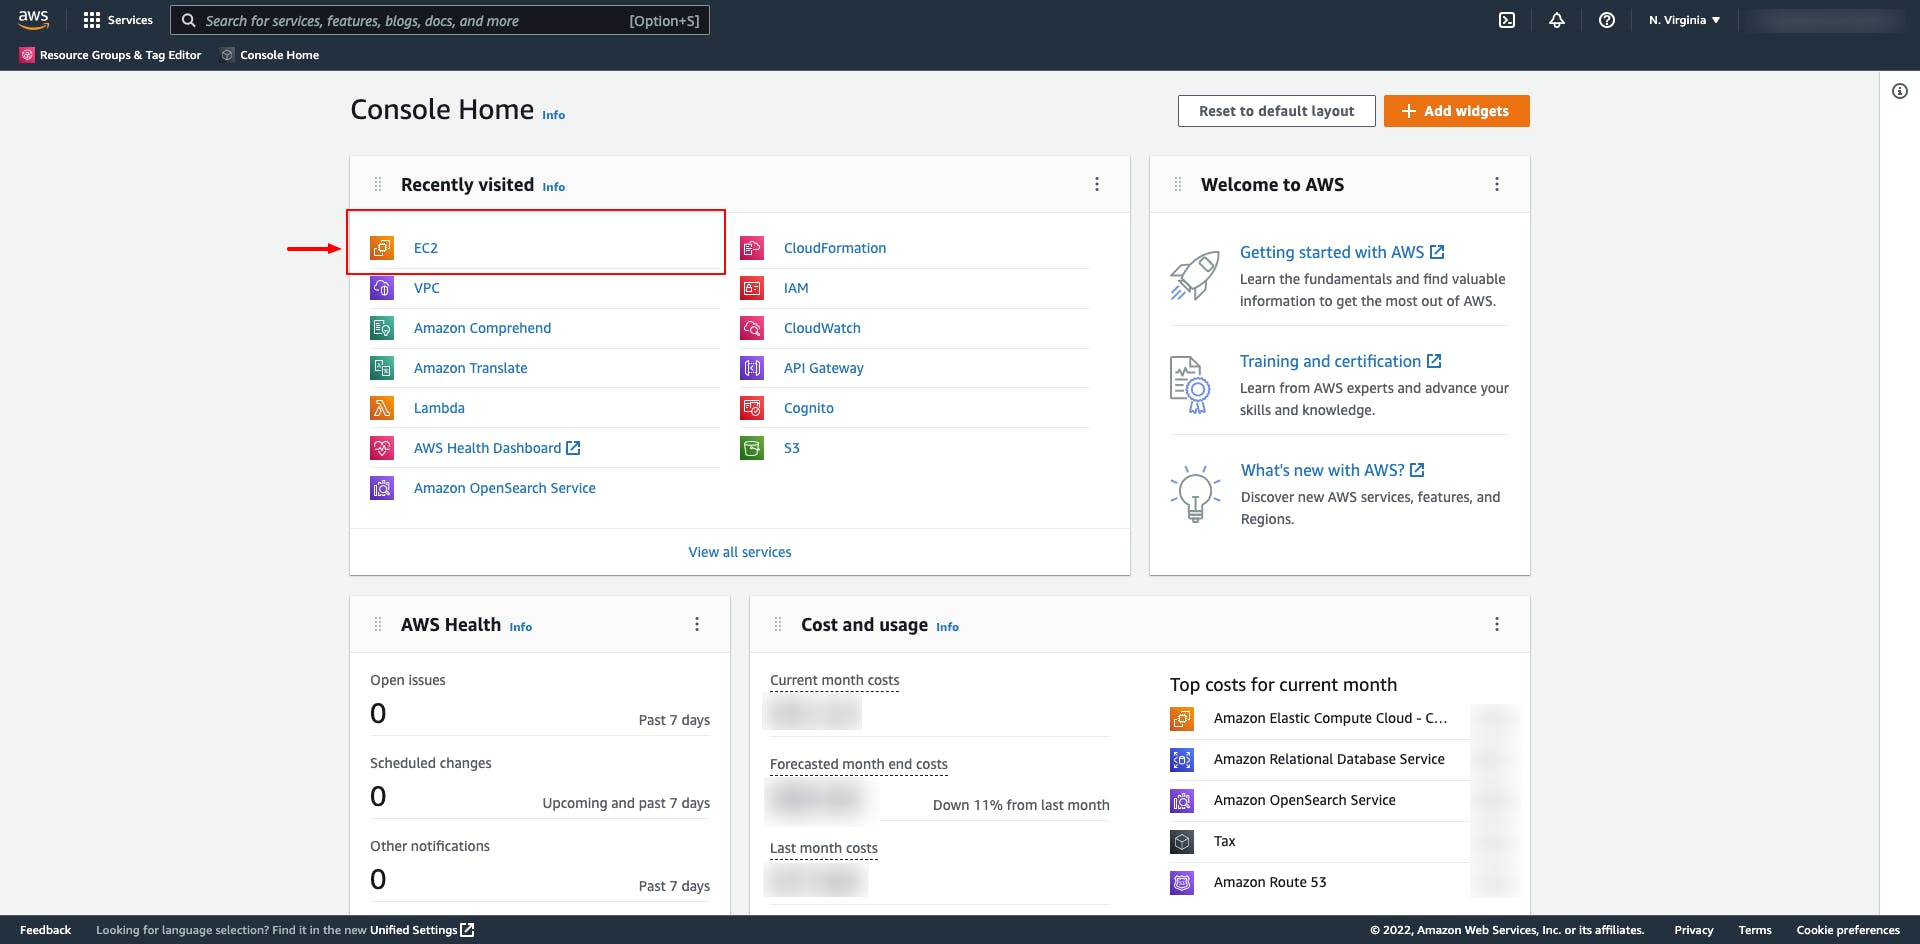
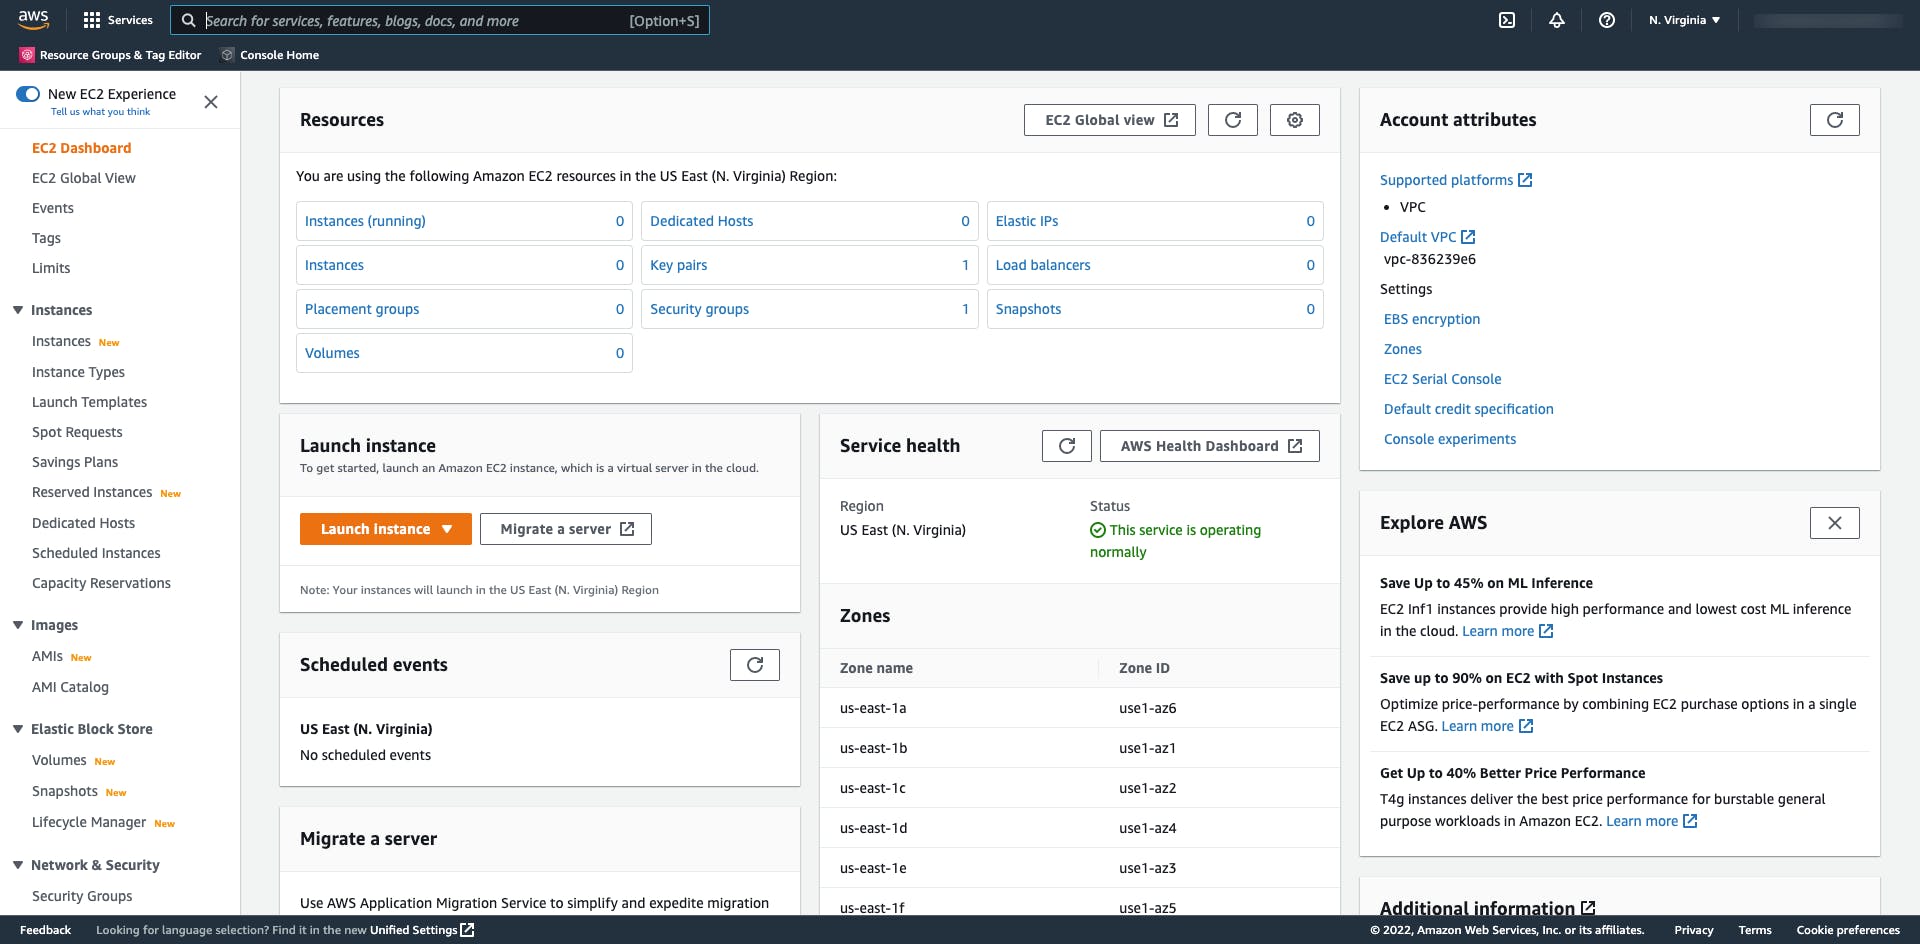
- From there, idea is to create one EC2 instance and to setup single-node RabbitMQ server with MQTT support. Click on EC2 and you will end-up in EC2 main console section.
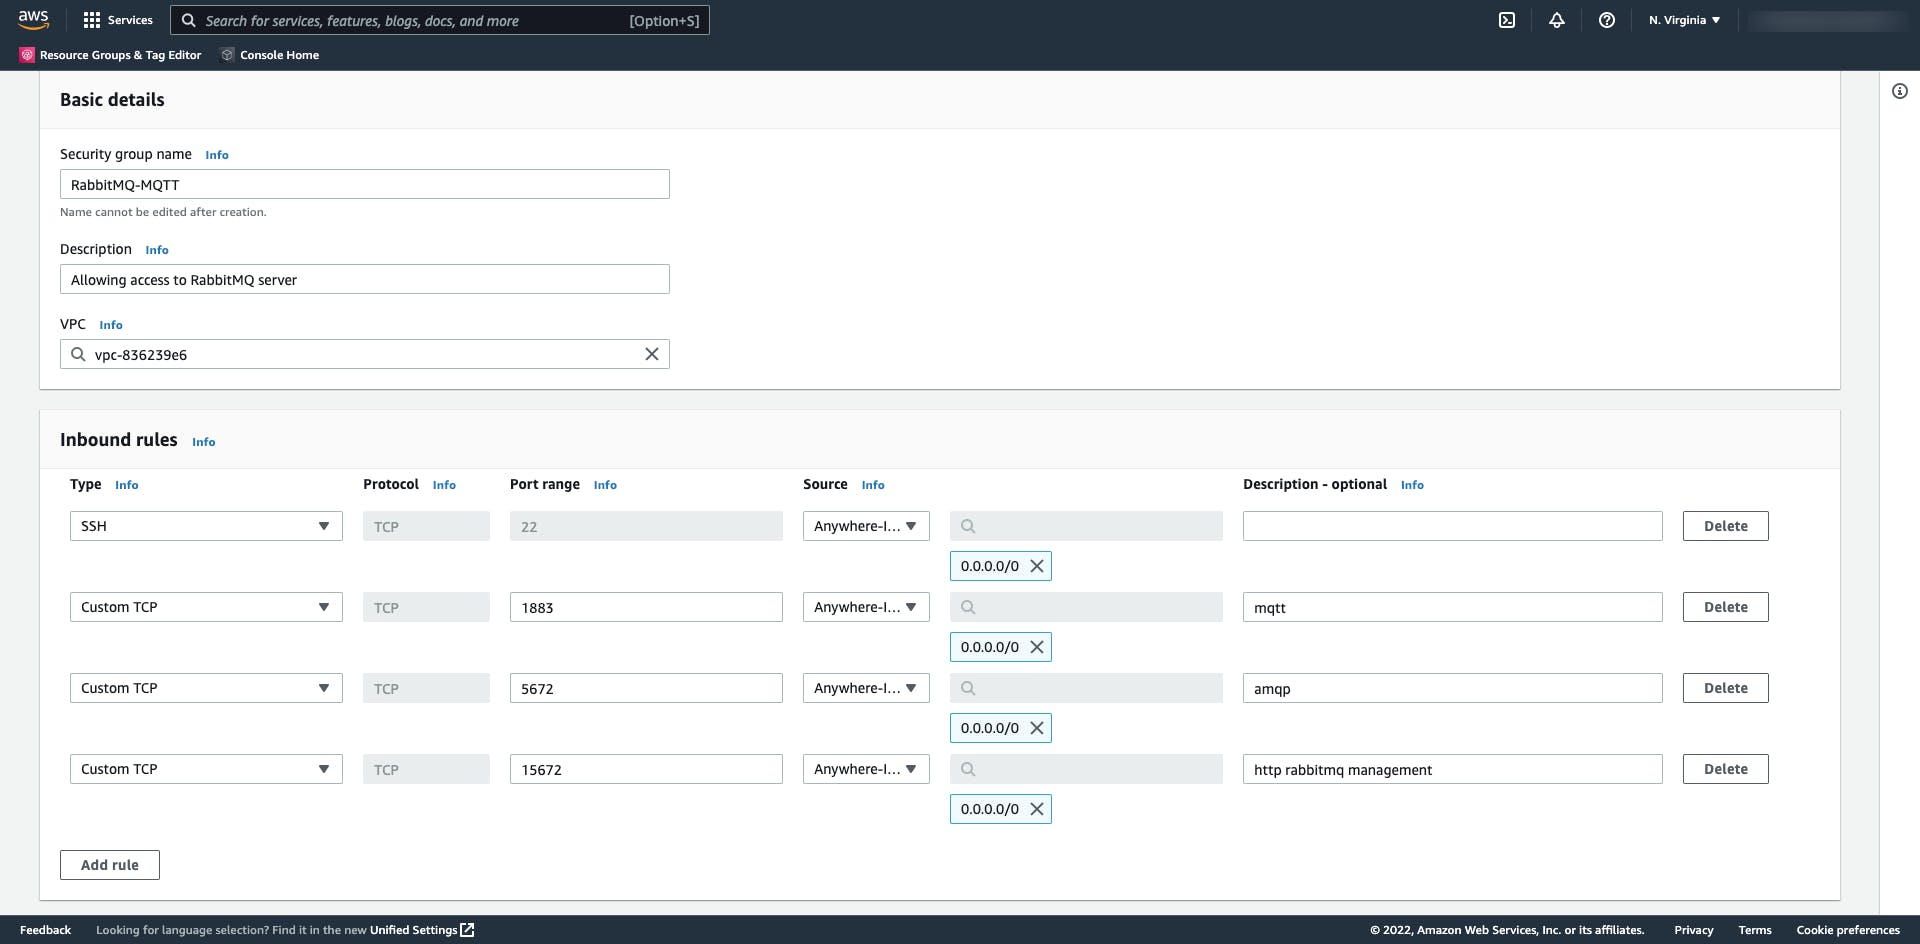
- Let's first start by creating/preparing Security Group (sg) for RabbitMQ server that we will create later on. For sure we will need Inbound rules set to open 4 ports: 22 (SSH), 1883 (MQTT), 5672 (AMQP) and 15672 (HTTP for management).
- Now we can start creating EC2 instance that will host RabbitMQ server.
NOTE: Before you create EC2 instance, you should be familiar what kind of EC2 type you need for your workload. That can be done if you perform series of performance tests and thus get some initial idea what kind of instances you need for your specific case. Here I'll be using
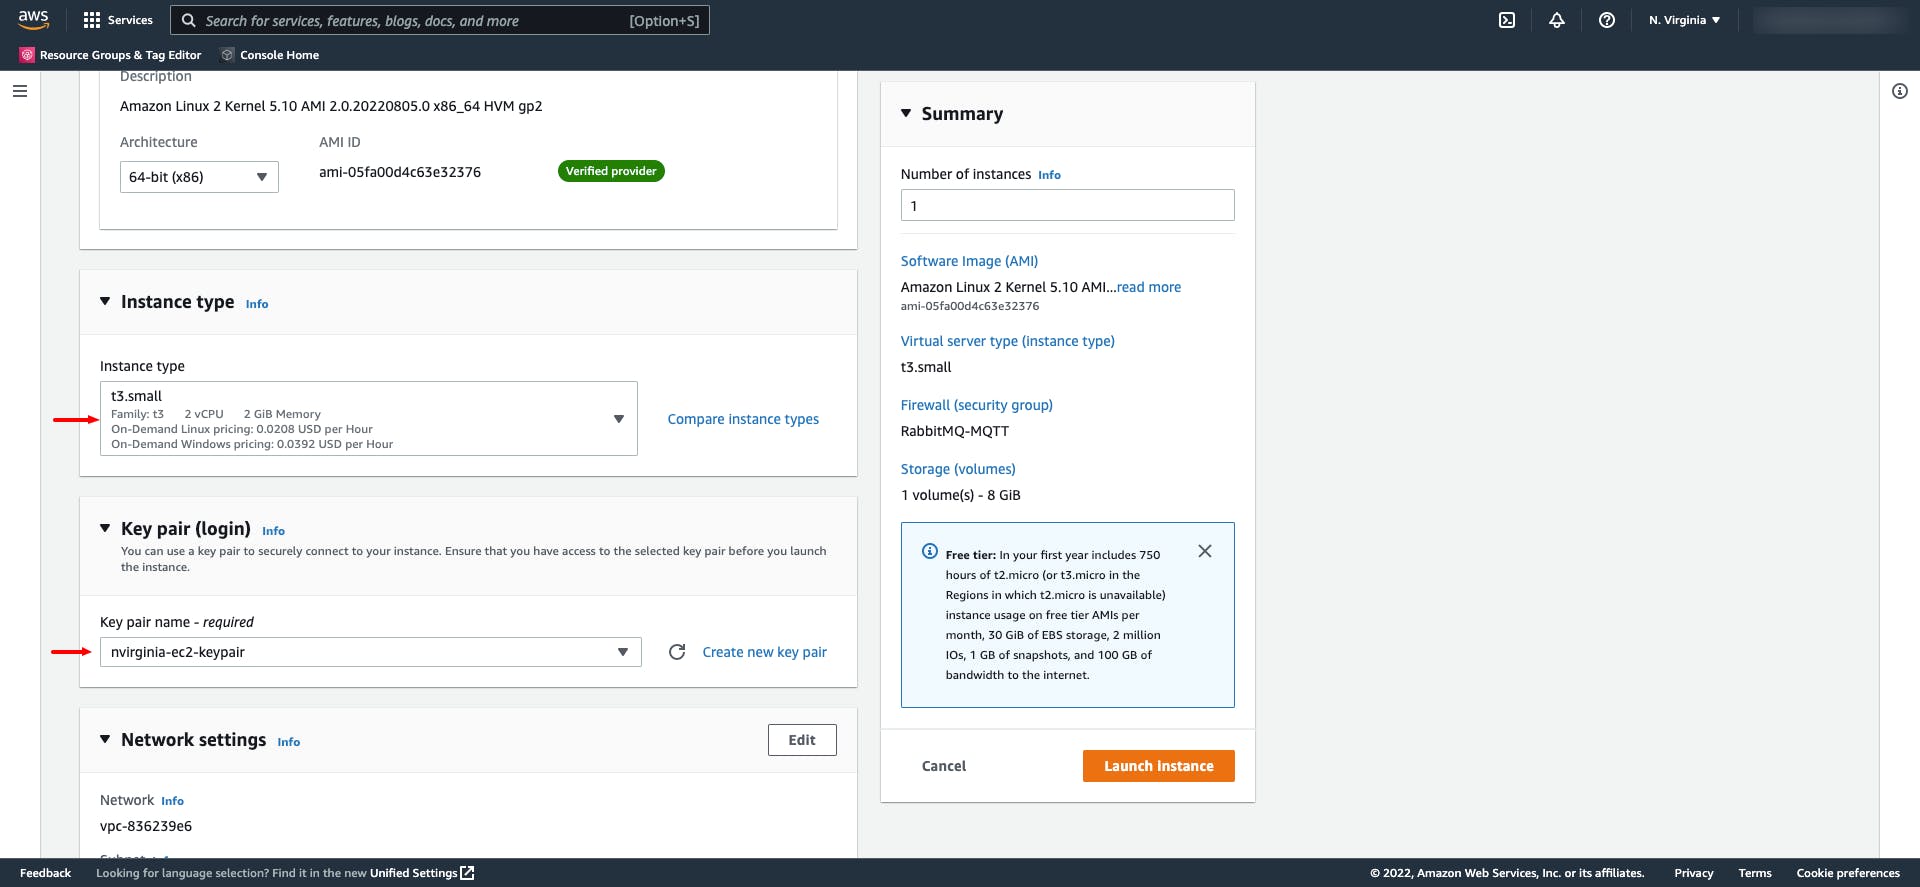
t3.smalltype (2vCPU with 2 GB of RAM) I'll name new server as "RabbitMQ-Server". Server OS will be: Amazon AWS Linux, ami-05fa00d4c63e32376 based on 64-bit(x86) architecture. As noted before I'll be using t3.small instance type. And I'll set key-pair to be used, the one that I've downloaded on my laptop before.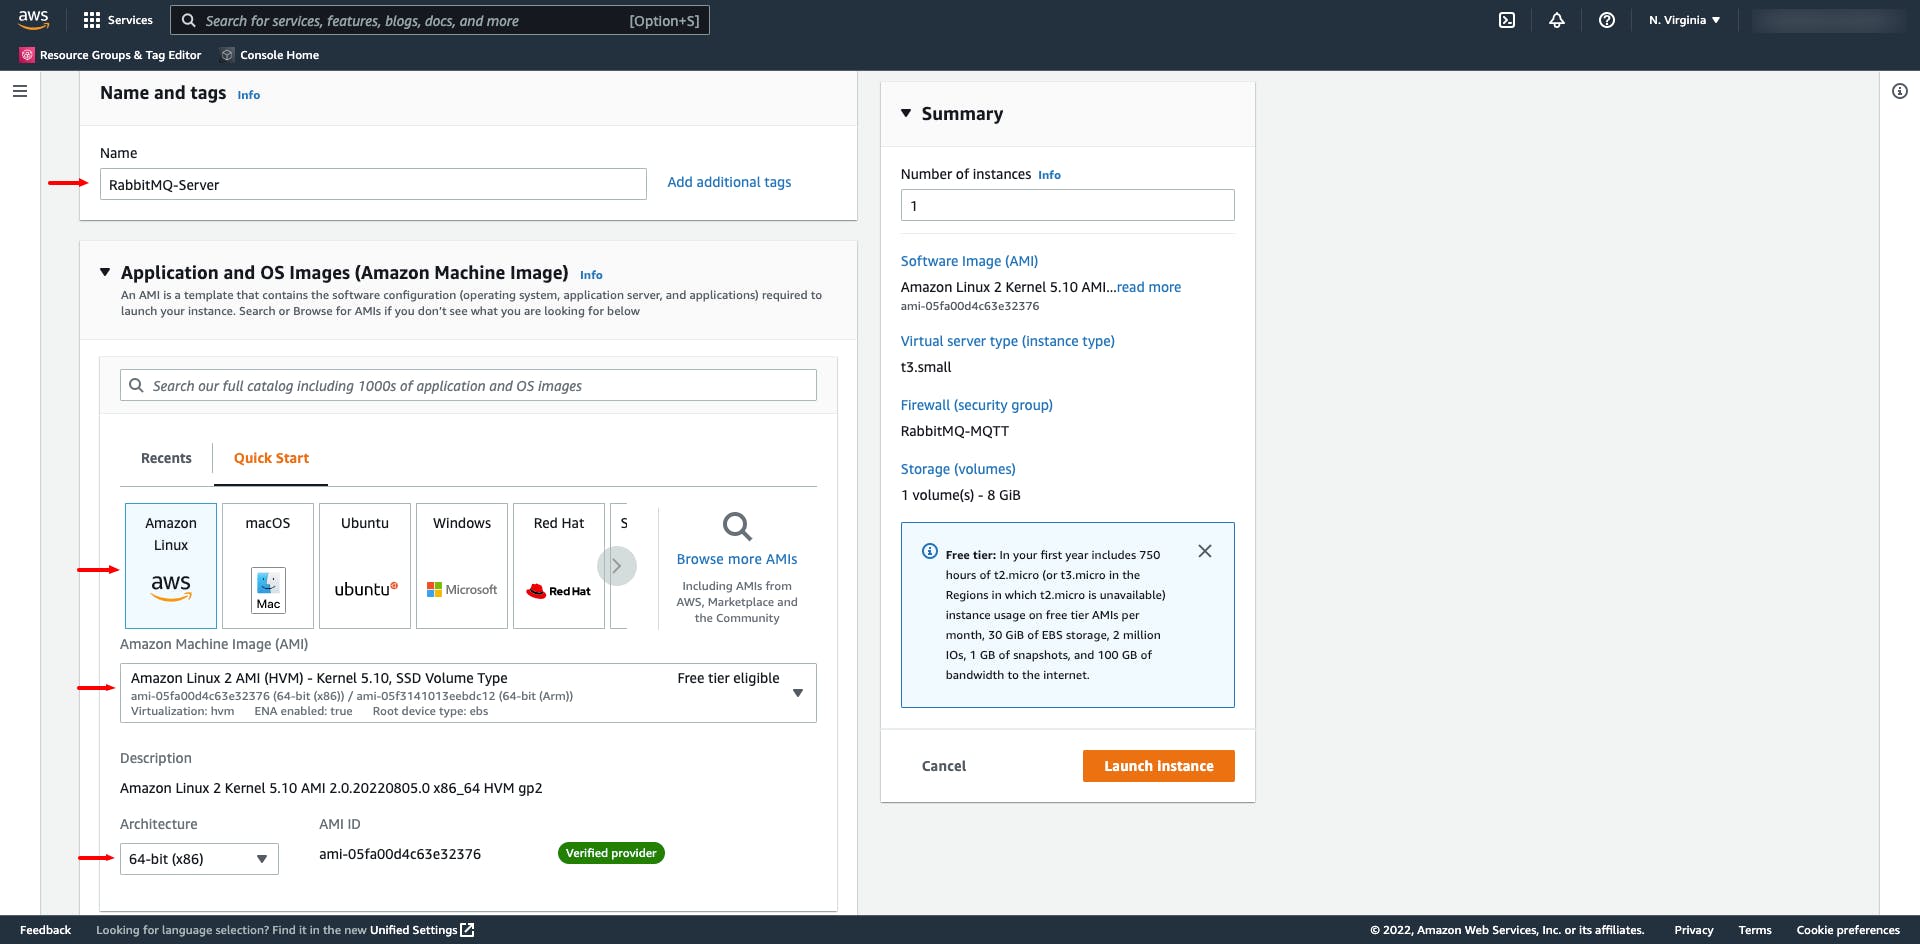
 As a last step, we should accommodate "Network settings" to "attach" previously created Security Group -> "RabbitMQ-MQTT" (refer to Step 3.)
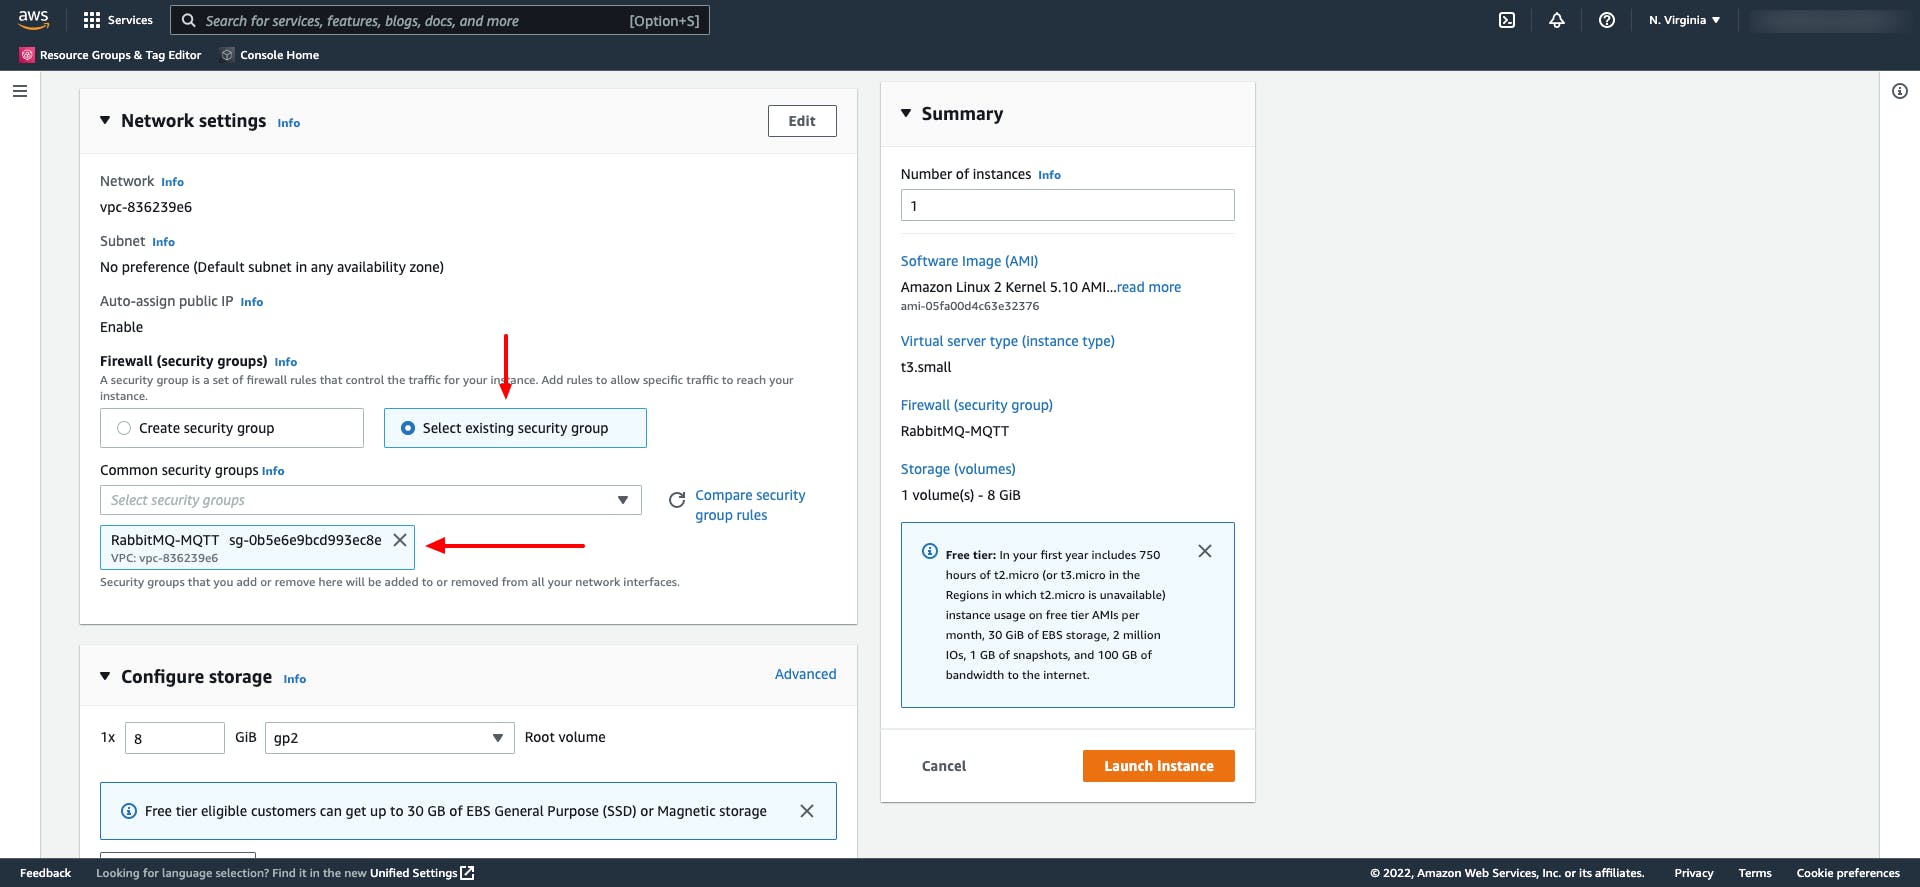 For this demo, I'm leaving attached storage as default (8 GB) but if you thinking of PRODUCTION, storage is also one of the things that should be tested during performance testing.
 - Launch the instance Once you ensured that EC2 instance is running, we can proceed with RabbitMQ installation.
RabbitMQ installation
Connect to newly created EC2 instance using SSH port and public IP address assigned by AWS.
$ ssh -i key-pair.pem ec2-user@ip-address
Let's first start by updating
$ sudo yum update -y
As you may know RabbitMQ depends on Erlang, so we will first need to install Erlang RPM package. At the moment of writing this post, actual version of RabbitMQ is 3.10.7. This version depends on Erlang version 25.
But just before we start installing Erlang v25, this RPM has some prerequisites that we will need to install e.g. unixODBC, ncurses, ncurses-compat-libs, socat, logrotate.
$ sudo yum -y install unixODBC ncurses ncurses-compat-libs socat logrotate
Following that we can proceed by downloading & installing Erlang v25 RPM package.
$ wget https://packages.erlang-solutions.com/erlang/rpm/centos/7/x86_64/esl-erlang_25.0.3-1~centos~7_amd64.rpm

$ sudo rpm -Uvh esl-erlang_25.0.3-1~centos~7_amd64.rpm
After that you'll end-up with successful Erlang installation message:
Erlang OTP 25.0.3 installed!
We are now finally ready to download and install RabbitMQ RPM package.
$ wget https://github.com/rabbitmq/rabbitmq-server/releases/download/v3.10.7/rabbitmq-server-3.10.7-1.el8.noarch.rpm

$ sudo rpm -Uvh rabbitmq-server-3.10.7-1.el8.noarch.rpm
Start, Status and Stop scripts to manipulate RabbitMQ server
By now you're able to install RabbitMQ server. Now let's start RabbitMQ server. You can do it by executing following script:
$ sudo systemctl start rabbitmq-server
Other two scripts, beside starting RabbitMQ server are:
a. Check status:
$ sudo systemctl status rabbitmq-server
b. Stop RabbitMQ server:
$ sudo systemctl stop rabbitmq-server
Other important configurations to take place (after installation)
Enable RabbitMQ at startup
We should ensure that RabbitMQ server is going to be started right after EC2 instance is started (at boot time). Therefore execute following script:
$ sudo systemctl enable rabbitmq-server
Ensure that SELinux is disabled
SELinux should be disabled on this instance. You can check this status by issuing following command:
$ sestatus
SELinux status:                 disabled
NOTE: In case that SELinux is not disabled, you can do it by executing following command:
$ sudo setsebool -P nis_enabled 1
Enable RabbitMQ management plugin
In order to be able to offer a admin user option to monitor and manage RabbitMQ server using web UI interface, it is wise to add support for RabbitMQ management.
$ sudo rabbitmq-plugins enable rabbitmq_management
Enable RabbitMQ MQTT plugin
In order to enable MQTT, following plugin of RabbitMQ must be enabled:
$ sudo rabbitmq-plugins enable rabbitmq_mqtt
Change the ownership of /var/lib/rabbitmq folder
$ sudo chown -R rabbitmq:rabbitmq /var/lib/rabbitmq/
Add new Administration user
Following commands should be executed in order to create/add new Administration user.
$ sudo rabbitmqctl add_user admin password
Then we should add newly created user to "group" of Administrators
$ sudo rabbitmqctl set_user_tags admin administrator
And set proper permissions for newly created Administrator
$ sudo rabbitmqctl set_permissions -p / admin "." "." ".*"
Remove default guest account
During RabbitMQ installation procedure, default guest account is created. Therefore it is wise to delete this account in order to prevent possible intrusion to our system.
$ sudo rabbitmqctl delete_user guest
Access Web UI interface
Now we are ready to go to our Web UI interface. Use IP address and port: 15672 in order to access RabbitMQ UI -> http://YOUR_IP_ADDRESS:15672
 Provide credentials for newly created user (Administrator) and then you will get main admin dashboard of RabbitMQ.
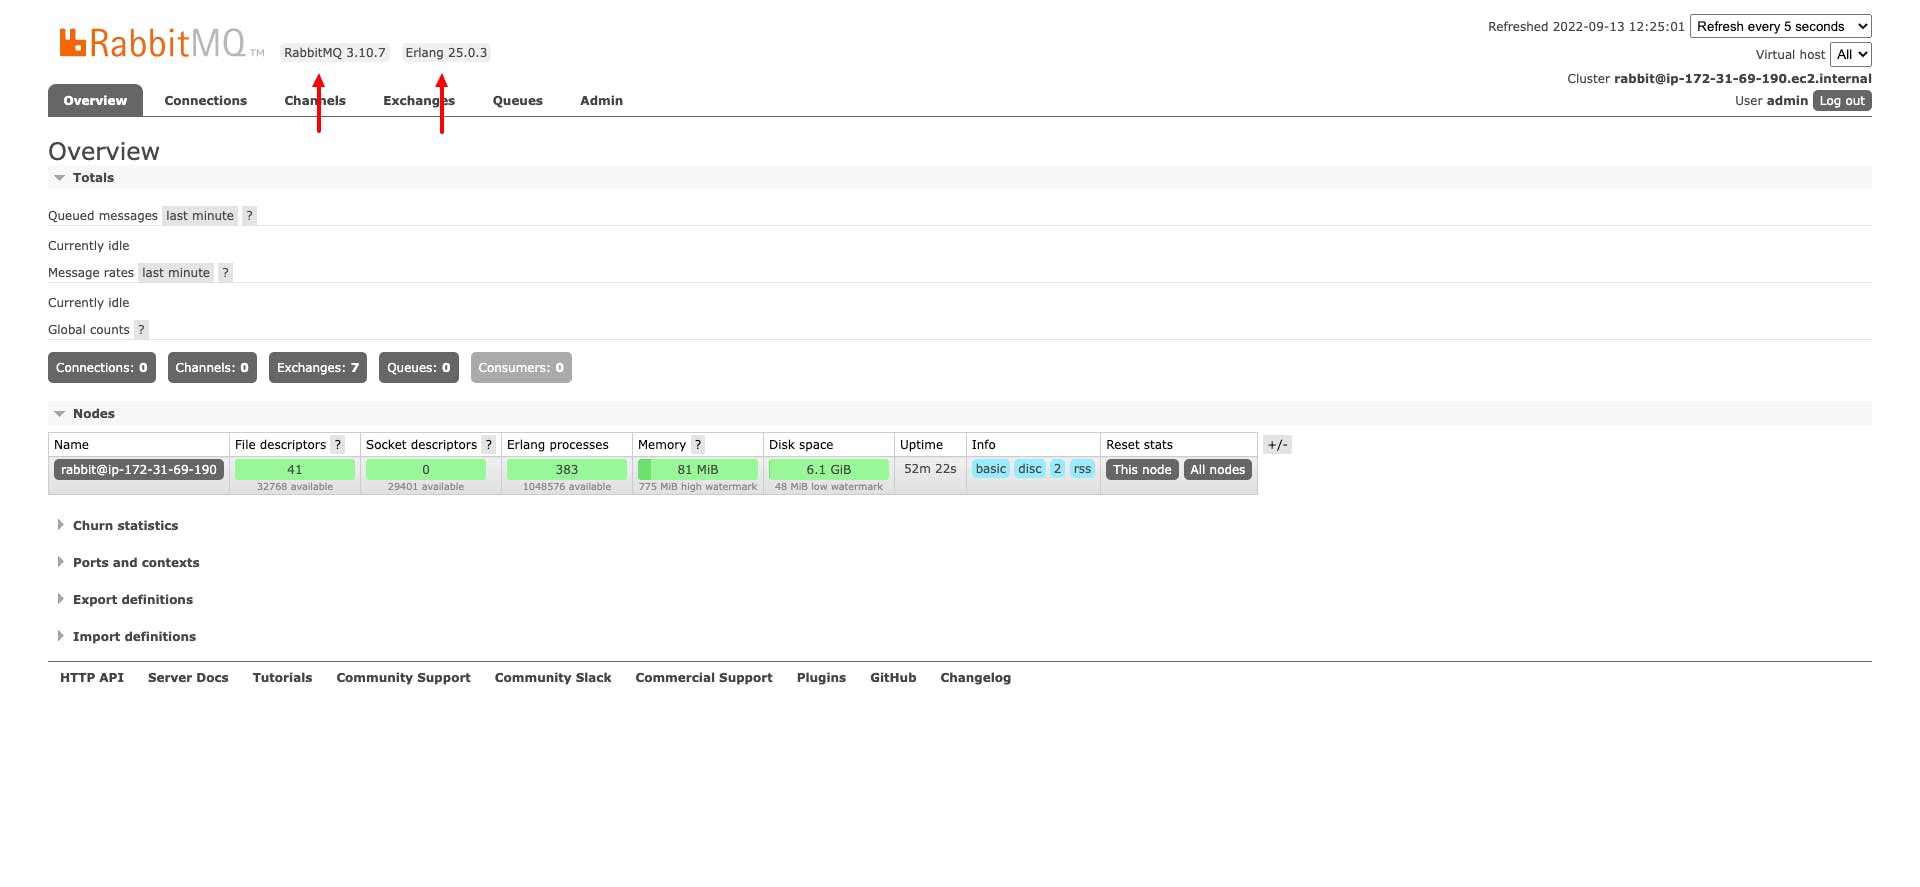 You can see from image above that we successfully installed:
- Erlang v25.0.3 and
- RabbitMQ v3.10.7
MQTT testing
Let's first create a queue with the name weather-data.
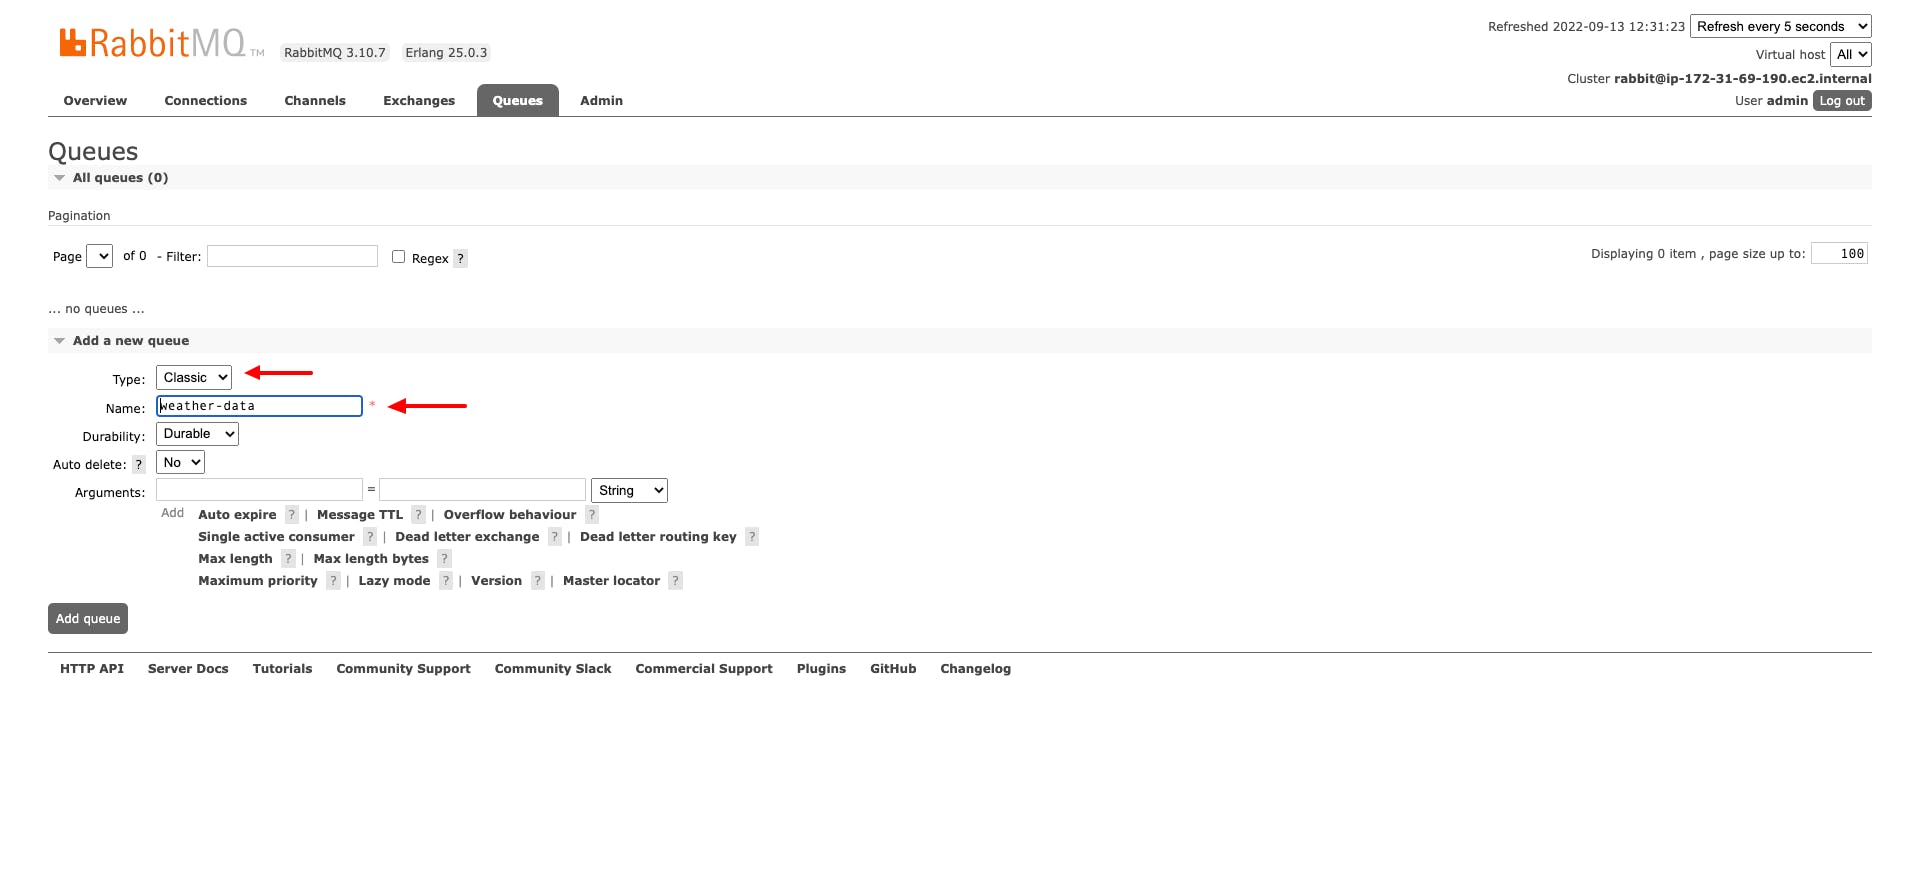
The RabbitMQ MQTT plugin builds on top of RabbitMQ core protocol's entities: exchanges and queues. Messages published to MQTT topics use a topic exchange (amq.topic by default) internally.
Now the only thing left to be done is to add binding between amq.topic and newly created queue. This will be done also by defining Routing key.
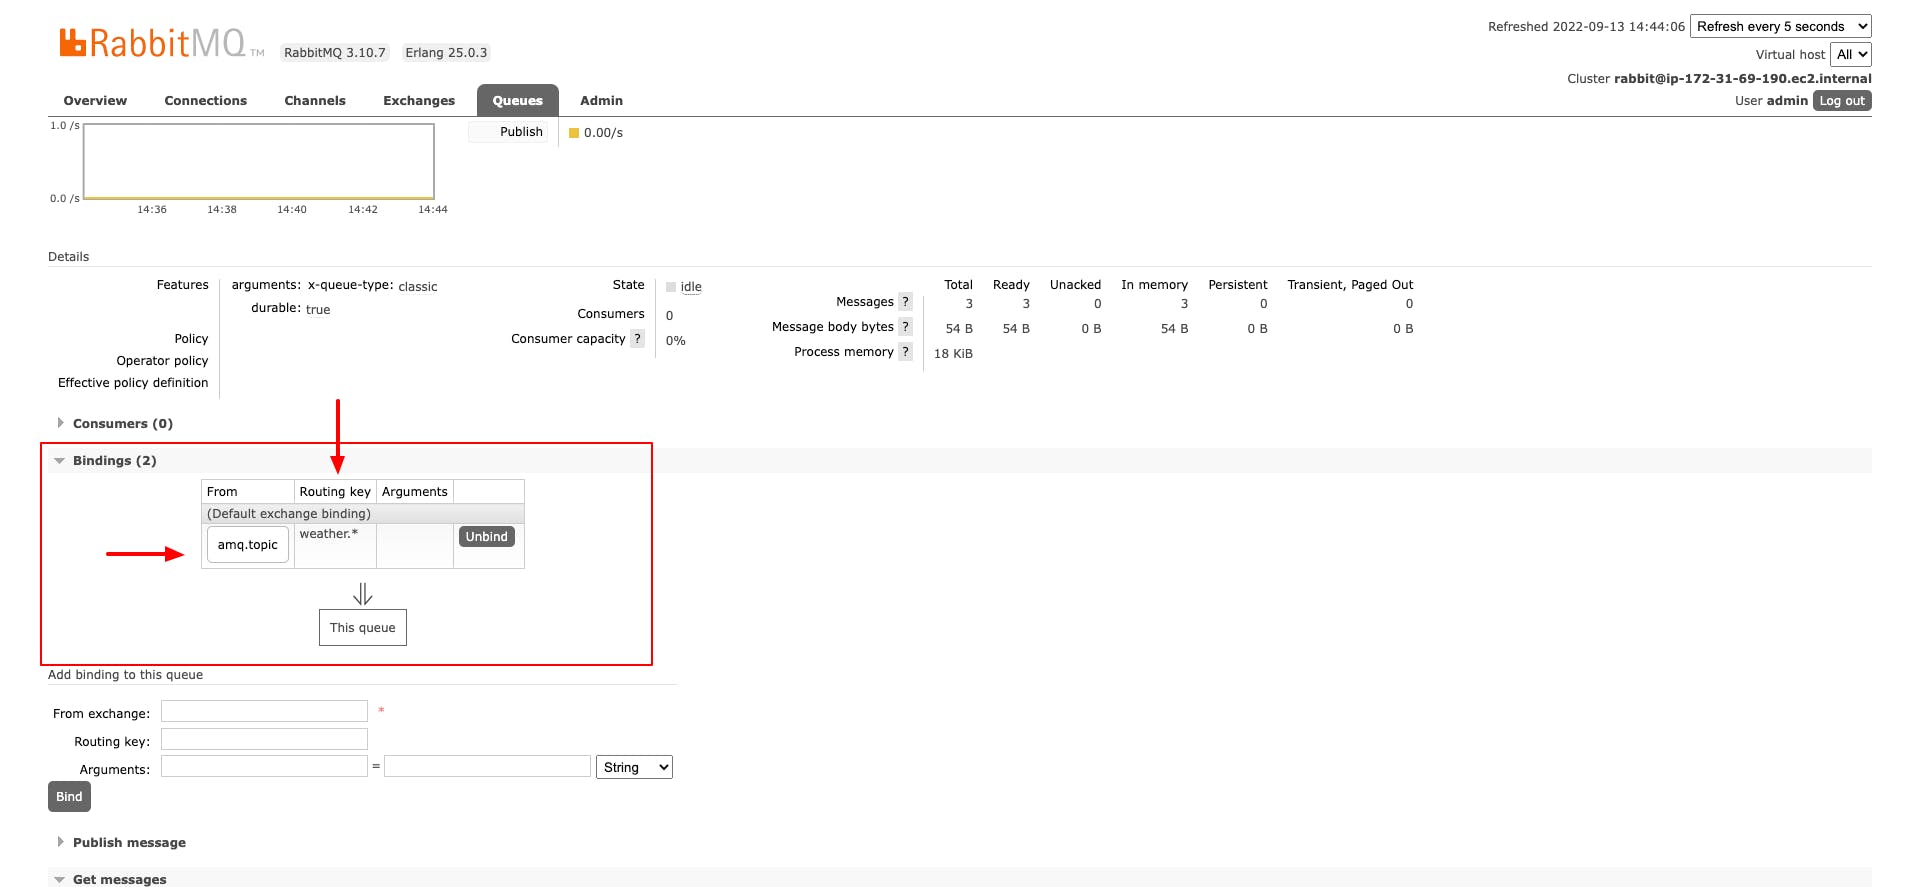 In my case routing key is
 weather.*. So anything that is published with weather. prefix will be routed to newly created queue - weather-data.
Now that we have everything setup, let's try to send one MQTT message. For this I'll be using moscuitto_pub CLI tool.
$ mosquitto_pub -h YOUR_IP_ADDRESS -t weather.office -m "{"temperature":"27.6"}" -u admin -P password -p 1883 -d
where:
-h host - YOUR_IP_ADDRESS - ip address of RabbitMQ server
-m message - message that will be published, here in this case JSON format simple temperature data
-u username
-P password
-p port - 1883
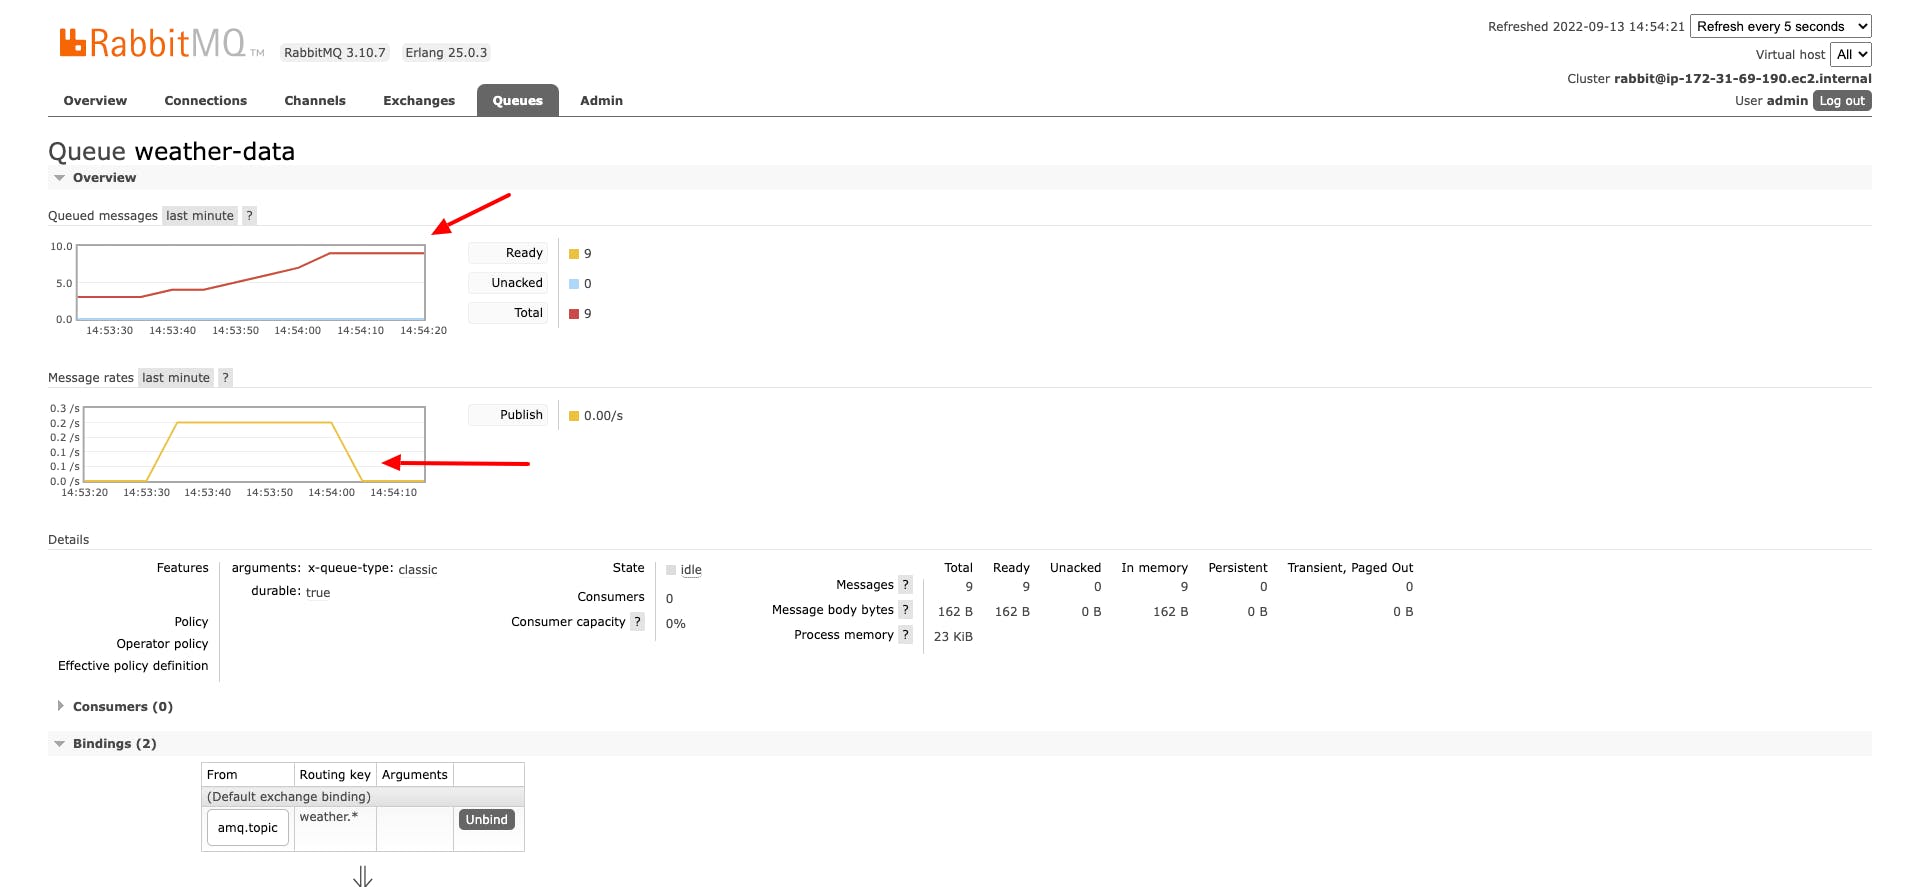
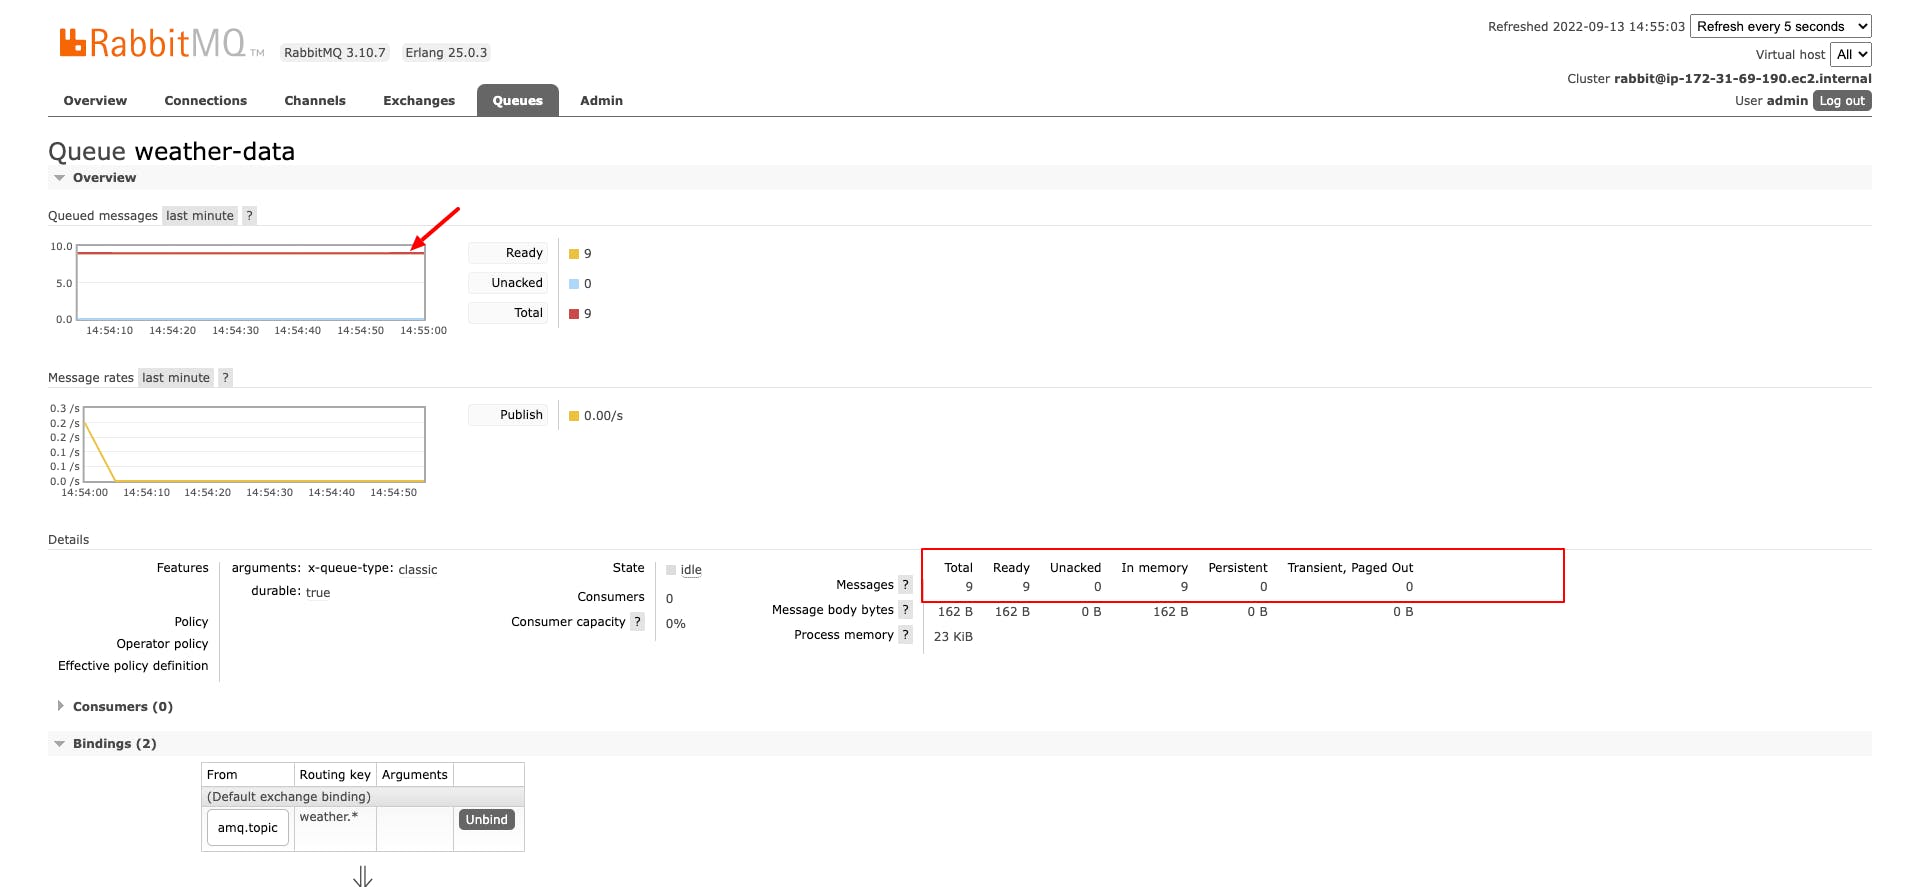
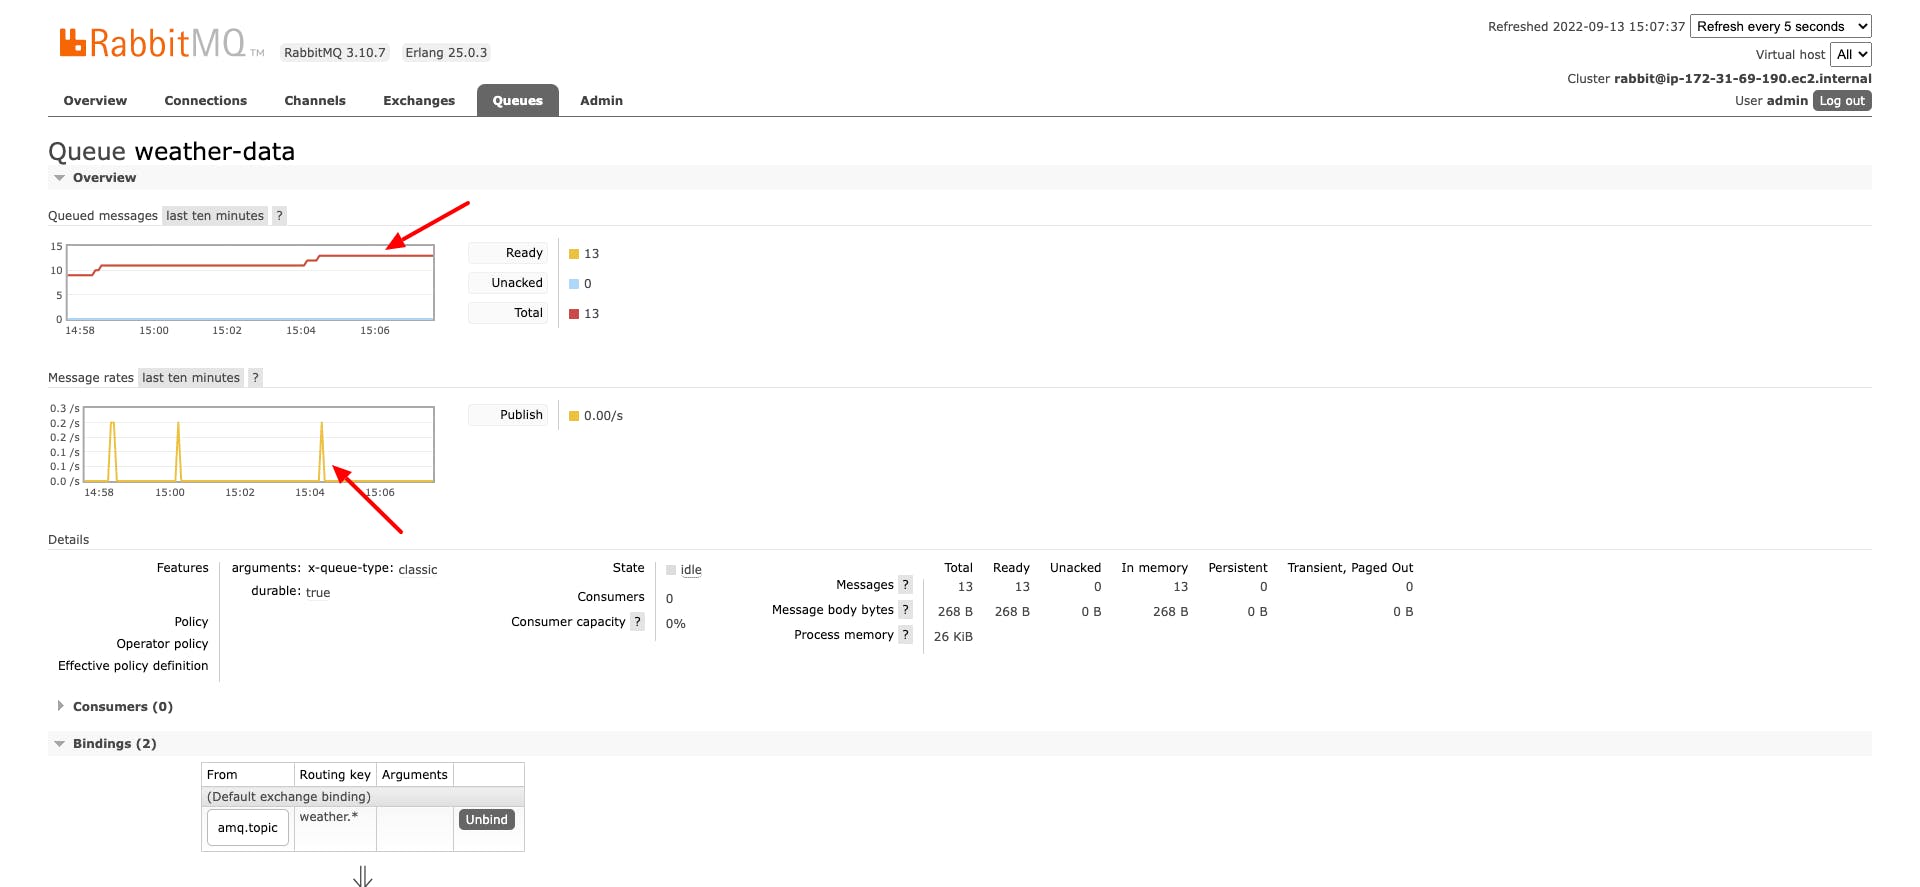
We can see that MQTT messages are incoming and that they are routed to weather-data queue.
MQTT X desktop application
If you are more to try some GUI MQTT client, there is a nice tool: MQTT X, and you can use this tool to establish MQTT connection and start sending MQTT messages.
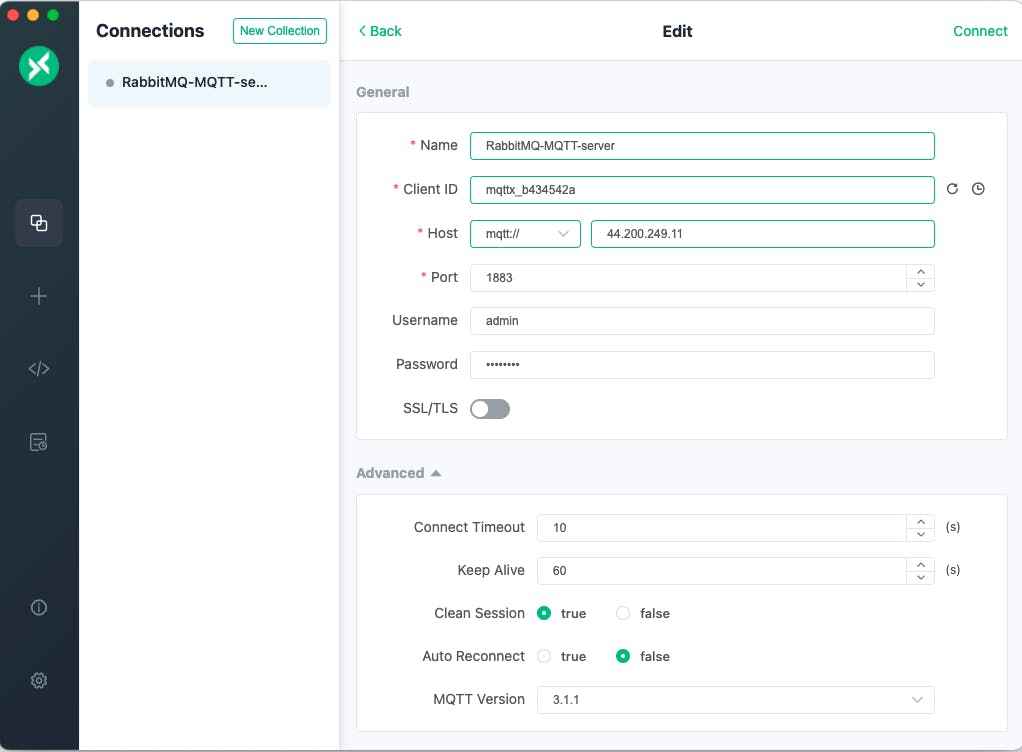
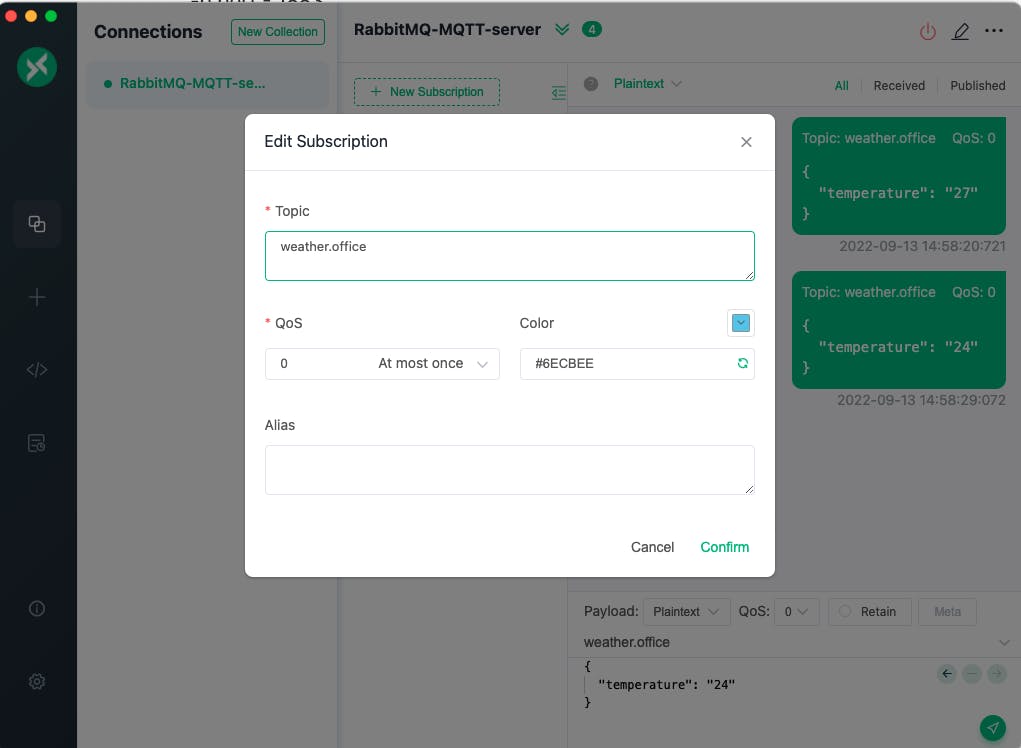
Once connection is established, you will have to define Subscription, which is actually Topic to which your MQTT messages will be sent.
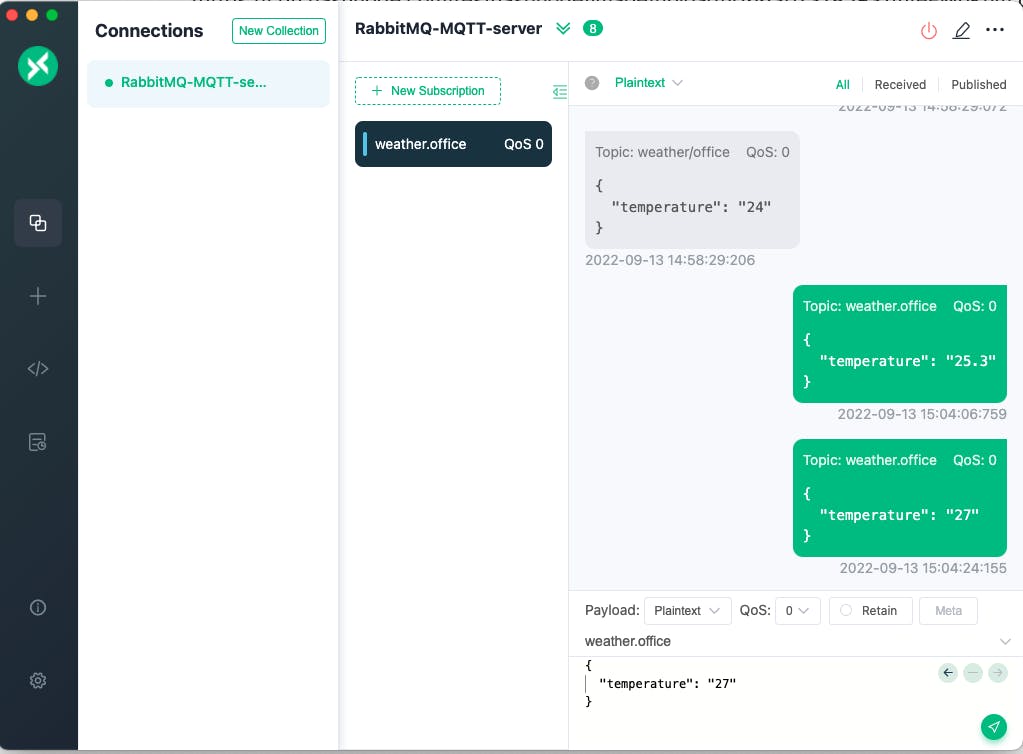
And finally you start sending messages:
Now if we check RabbitMQ server Web UI interface again, we will notice that same messages are incoming too.
Conclusion
That concludes first post about message broker, MQTT with RabbitMQ support.
Following second post will deal with providing cluster support with RabbitMQ.
